

 & SD Cards in Windows 11,10,8.1,8 & 7?")
Hi Guys, Today I am Going to tell you How to Remove Write Protection from USB & SD Cards in Windows 11,10,8.1,8 & 7?
If You Are Looking for “How to Remove Write Protection from Pendrives (USB) & SD Cards?” (or) “How to Remove Write Protection from USB in Windows 7,8,8.1,10 & 11?”.You are at the Right Place to Get Your Answers and solve the Issue/Error.
Write protection is a useful security feature used to protect your data from being copied, removed, or modified. A user is able to access the files, but can’t edit or modify the files when Write Protect Mode is Active. On Write Protection Mode – Adding, Creating, removing, copying, and editing files is not possible. Write protection features can be used on important files and data that are available on a computer, USB drive, memory card, or external hard drive. The Two Important Purposes of Write Protection are to Protect the Data on the Device & also Protect the Device from malware, Viruses, etc.. Write Protection can be done through both hardware and software ways.
Hardware write protection is nothing but a Physical Switch on the USB drives and SD cards. Physical write-protection switches are used to protect the data from unauthorized modification or deletion. Software Write Protection can be done by the operating system or third-party software. For example, in the Windows Operating System, you can set a file as read-only to prevent modification of the file. Sometimes, Write Protection Errors can also be caused due to damaged registry entry, malware & virus infection, or third-party encryption software that locks your USB Device. If You Try to Format the USB, you can’t format it. you’ll receive a “The disk is write-protected” error message. If your USB Device is Write-Protected and can’t remove or disable the feature and gets the error “The Disk is Write Protected” then you need to follow the below-given tutorials to fix the issues.
Check Out This: How to Install & Run Google Playstore in Windows 11 Without Using any Emulators?
Steps For How to Remove Write Protection from USB & SD Cards in Windows 11,10,8.1,8 & 7?
Solution 1: Use JetFlash Online Recovery Tool (Mainly For Transcend USB)
Step 1: First of all, Go to Google, Type JetFlash Online Recovery & Open the Official Transcend Website (or) You can directly go to the Website through the link Given Below.
Link 1 – https://www.transcend-info.com/support/software-3/
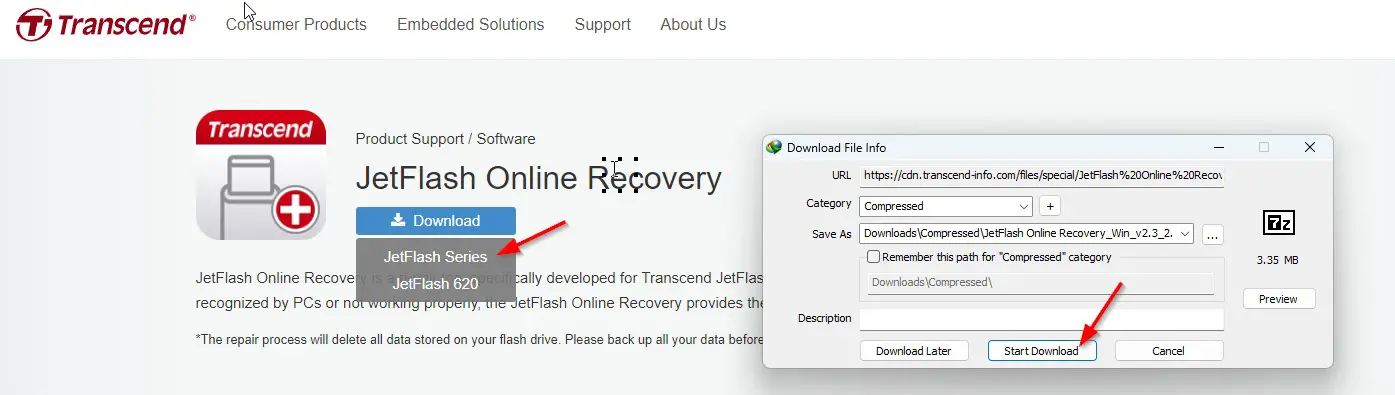
Step 2: Now You Need to Download the JetFlash Recovery Tool, Just Click on the Download Button. After Downloading the JetFlash Recovery Tool, Install and run it.
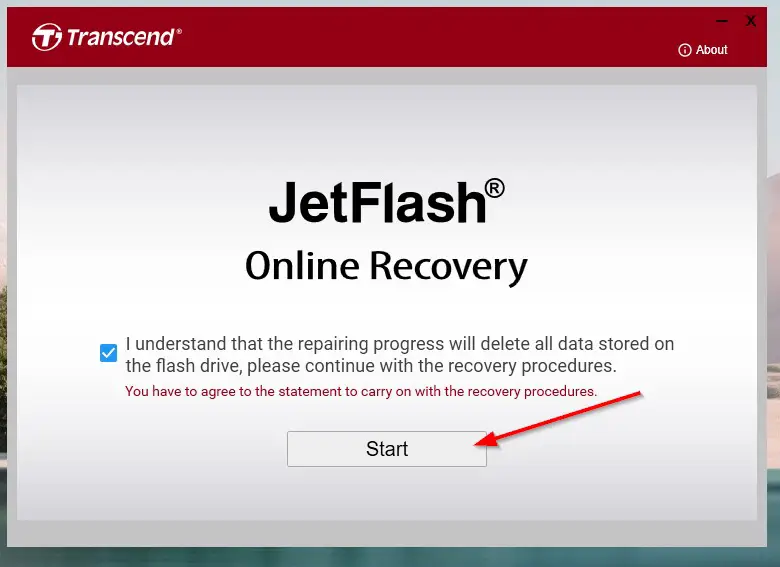
Step 3: Now Plug in Your USB Device and then Run the Transcend JetFlash Recovery Tool. Press the Start Button to Start Fixing the Issue.
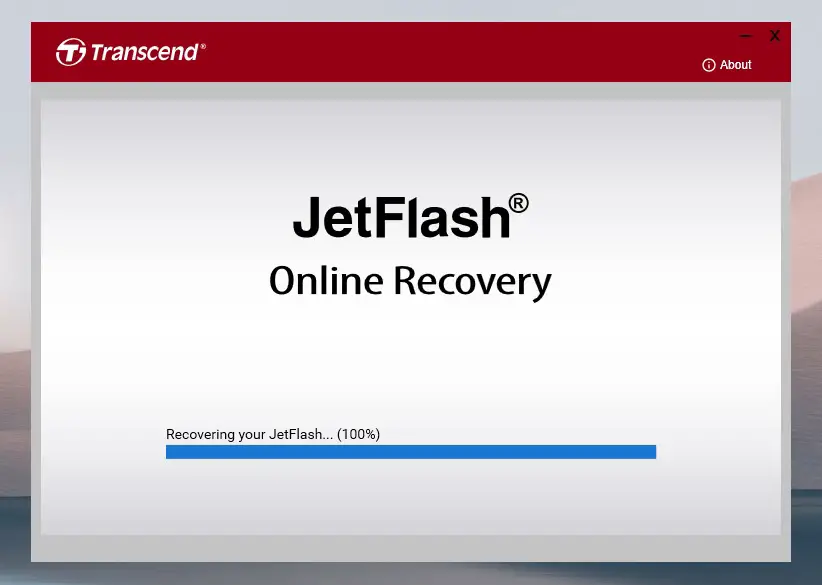
Step 4: After the Recovery Process is completed, You’ll see the message on the screen “Recovering Your JetFlash 100%” and Wait for the Process to Complete.
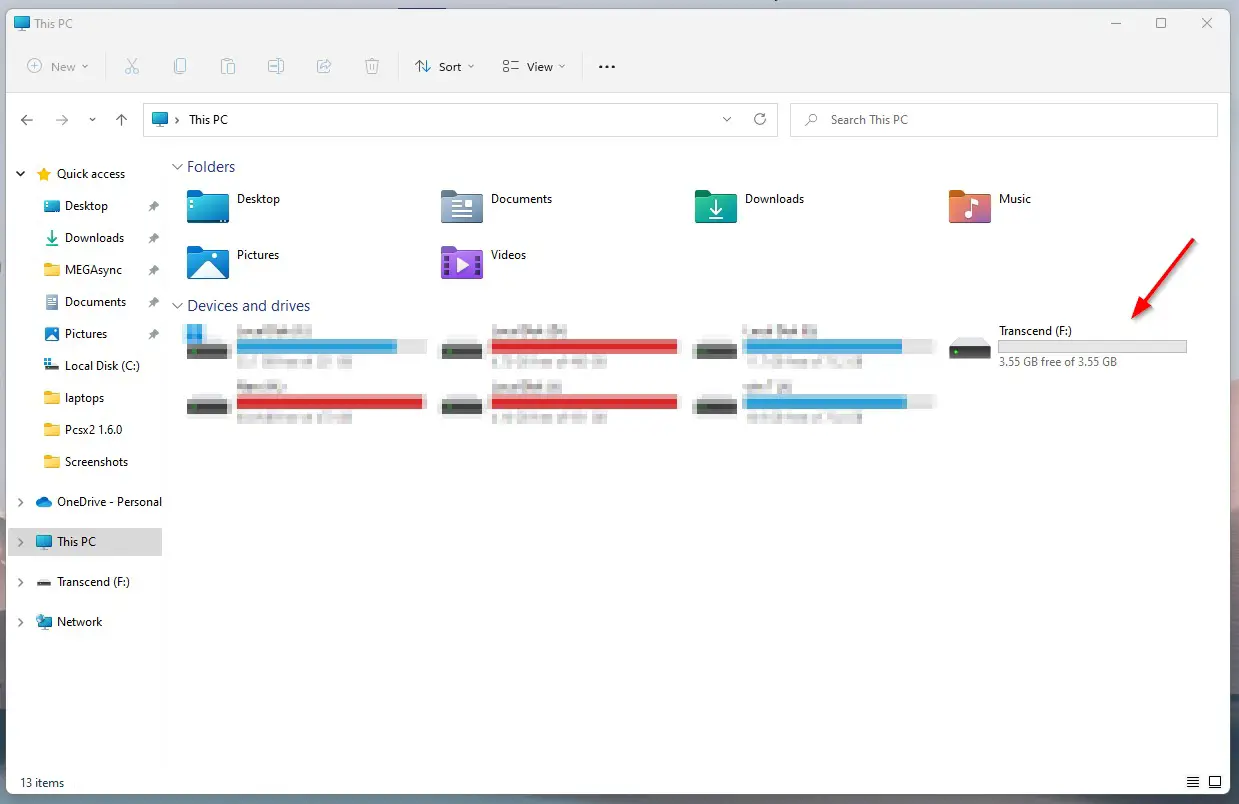
Step 5: After the Recovery Process is Finished, Just UnPlug the USB and Plug it again. Open the My PC / My Computer and right-click on the USB Drive & Click on the Format Option, Choose the FAT32 Option, and then Format the Pendrive.
If Still Errors Persists Follow the Other Solutions Given Below.
Solution 2: Using Command Prompt
Step 1: First of all, Go to Windows Search & Search for the Command Prompt and Run it as Administrator.
(or)
Press the Win + R on your keyboard to open the Run Program. When the RUN dialog box Appears, type “cmd” into the field and then press Ctrl + Shift + Enter.
Step 2: When the Command Prompt Window Appears, You need to enter the following commands One By One.
diskpart

list disk

select disk (as per your system)

attributes disk clear readonly
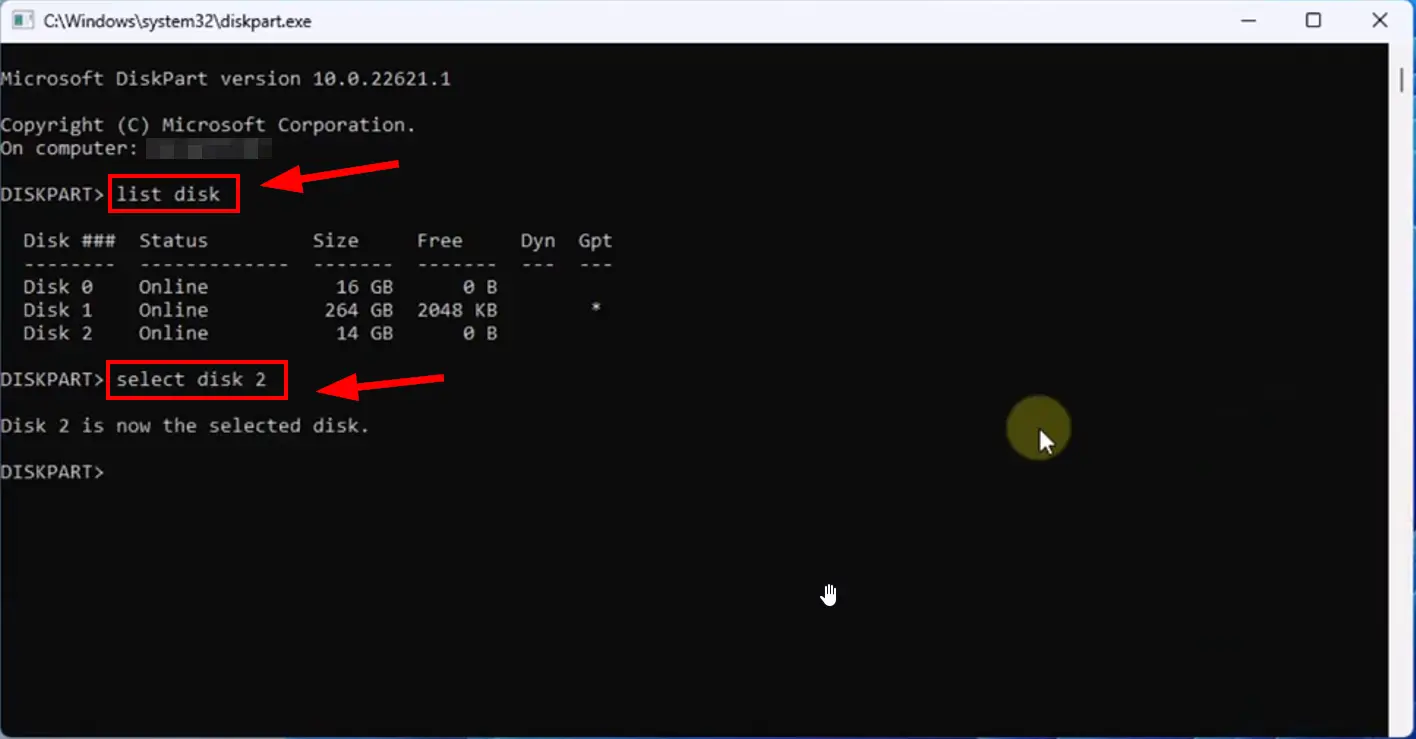
Step 3: Now, Type the First Command diskpart and Press Enter and Click Yes if User Account Control Window Prompts.
Step 4: Now Type the Second Command list disk and press Enter.
Step 5: You can see the List of the disks that are available. Just Type the Third Command select disk (Enter the Disk Number of your Pendrive as Per Your System) and Press Enter.
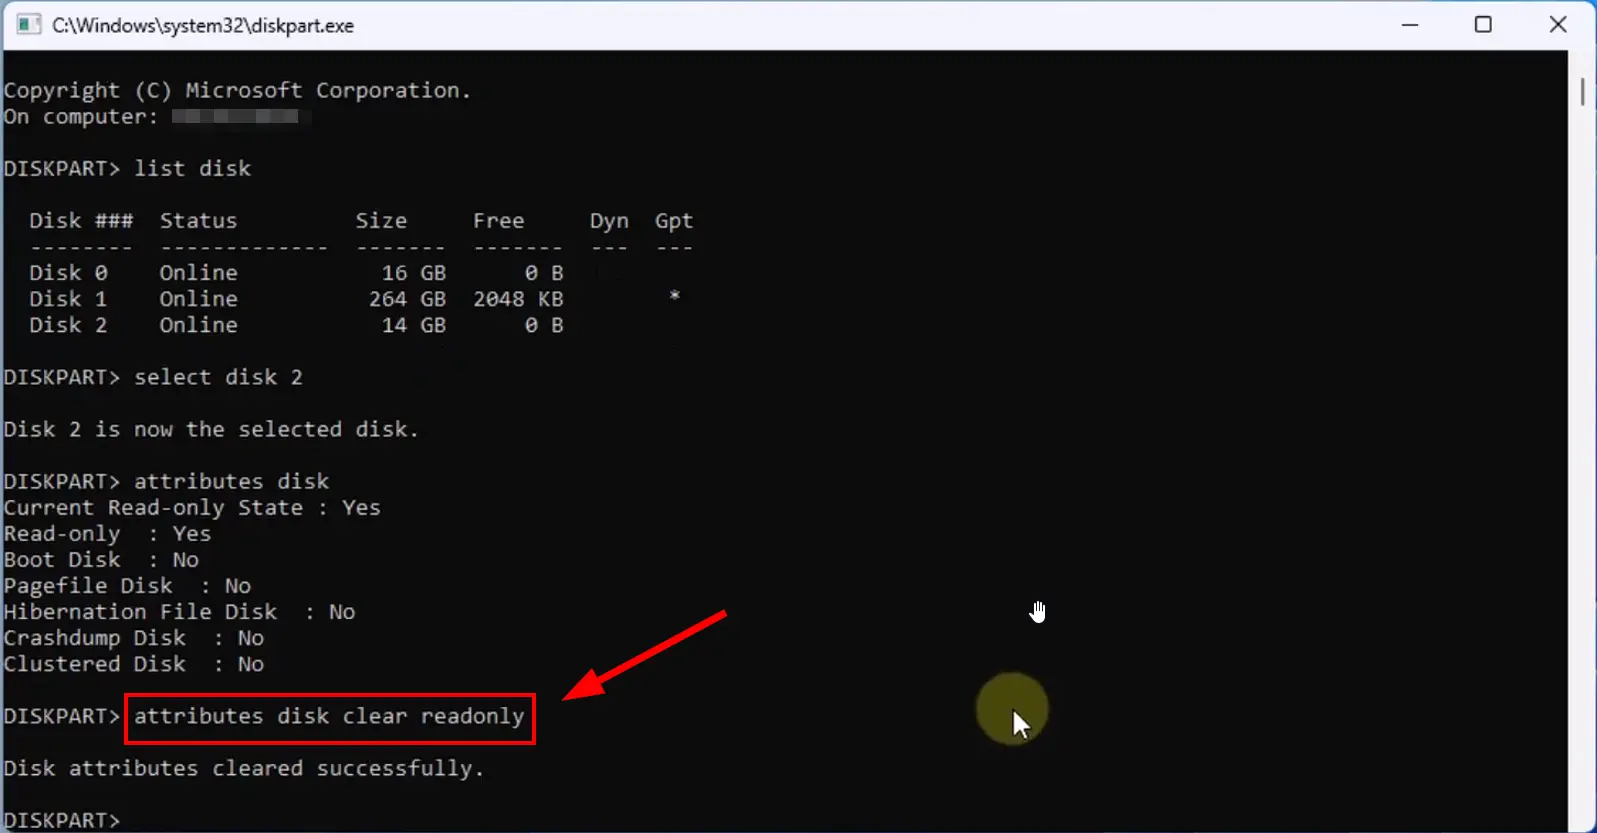
Step 6: Now You Need to Type the Final Command attributes disk clear readonly and press Enter.
Step 7: Once the Removal process completes, type exit to quit. Restart the PC.
Solution 3: Using Registry Editor
Step 1: First of all, Go to Windows Search and Type Registry Editor and Open the Registry Editor (or) Press the Windows + R keys to Open Run Program, type Regedit, and press Enter to Open the Registry Editor.
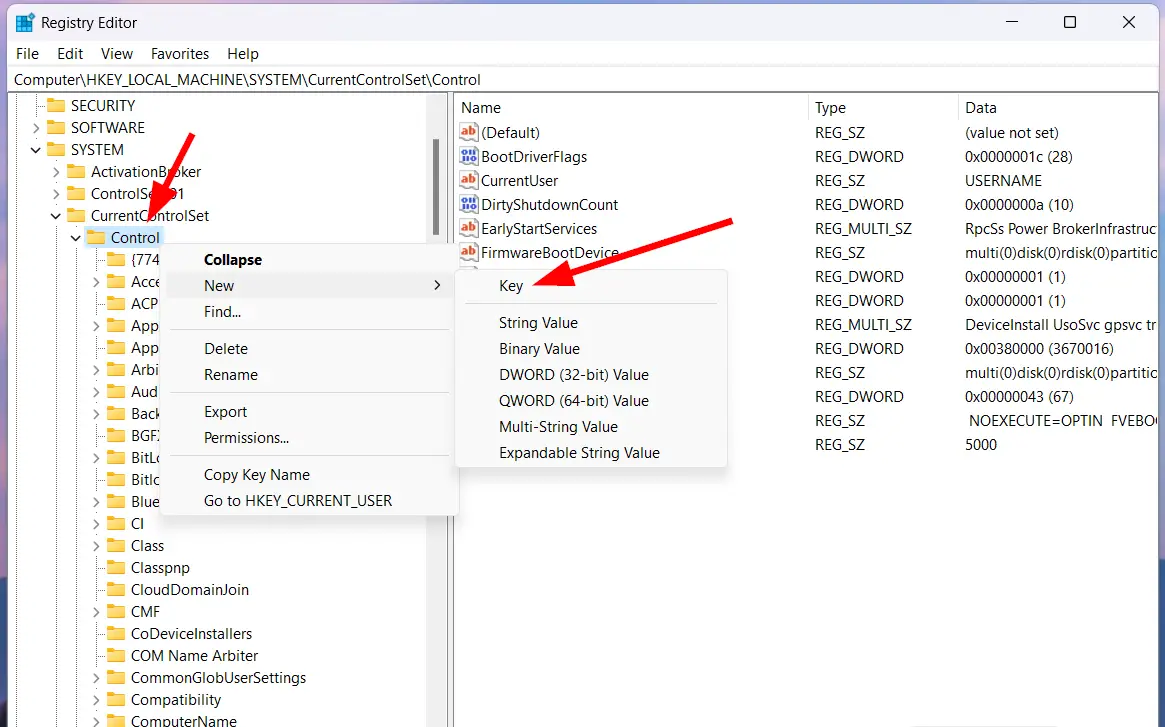
Step 2: After Launching the Registry Editor Program, Navigate to the following path which is given below (or) Copy-Paste the Below given location address in the registry editor address bar.
Computer\HKEY_LOCAL_MACHINE\SYSTEM\CurrentControlSet\Control
Step 3: Under Control Key, Look for the StorageDevicePolicies Registry Key. If it is not Present then you need to Create a New Key Under Control and Name it as StorageDevicePolicies.
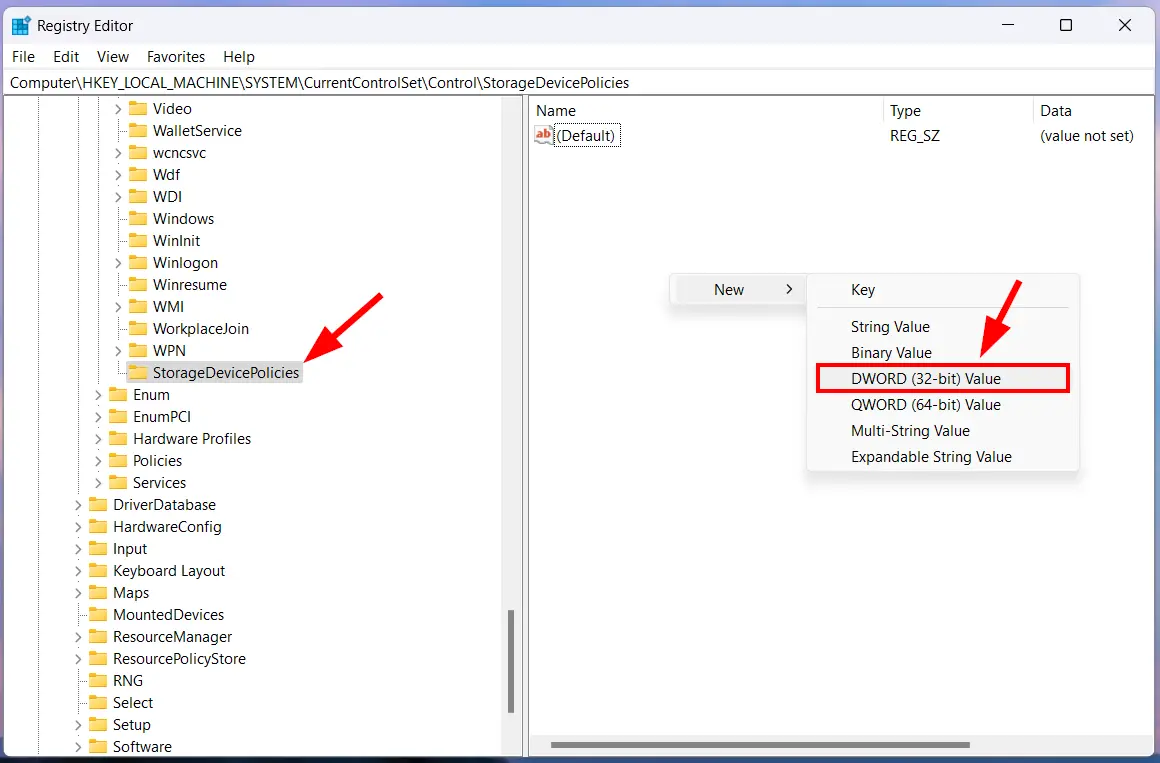
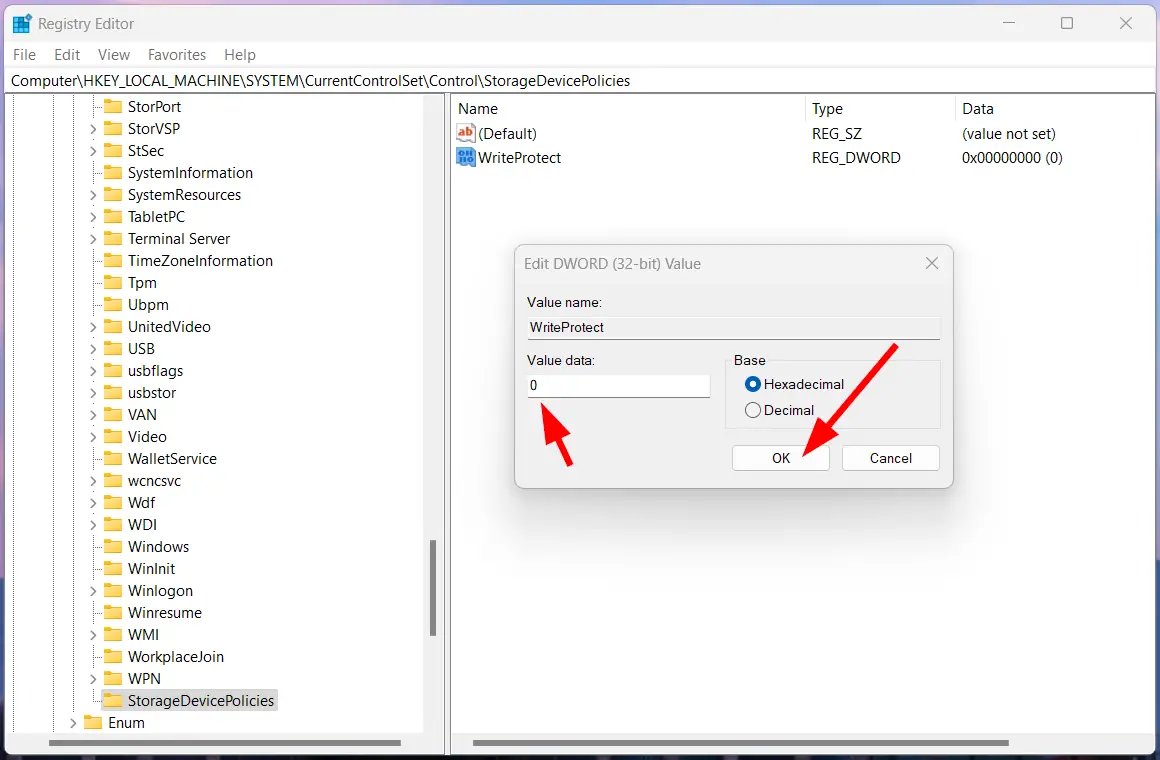
Step 4: After Creating the StorageDevicePolicies Key & You Need to Right Click on the StorageDevicePolicies and select New->DWORD (32-bit) Value and name it as WriteProtect.
Step 5: Now Right Click on the WriteProtect Value and Select the Modify Option (or) Double-click the WriteProtect DWORD (32-bit) Value & Type 0 as the Value Data in the dialog box and click OK.
Step 6: Now Close the Registry Editor & Restart Your PC and Check Your USB Whether the Problem is Solved or Not.
Solution 4: Use the Physical Lock Switch (If Present)
Some USB devices have a Physical Lock Switch (Write Protect) which prevents data from being written to a device. This Switch can be toggled on and off to enable or disable the read-only mode. For Example, If the Switch is On then it enables the device to “read-only” Mode and the files cannot be written into the USB Device. If the Switch is Turned Off, then it disables the “read-only” Mode and Now the Files can be written into the USB Devices. So, it is necessary to make sure the switch is in the correct position.
Leave Comments, Ask Your Doubts, We are here to Help You!