Hi Guys, Today I am Going to Show You How to Fix “Rankmath Causes Critical Error: Instant Index Status Error undefined – There has been a critical error on this website.”Quickly?
If You’re Looking for the Commonly Searched WordPress Error “How to Fix “Rankmath Causes Critical Error?” (or) ” How to Fix Instant Index Status Error undefined in Rankmath?”.You are at the Right Place to Get Your Answers & Solve the Issue/Error.
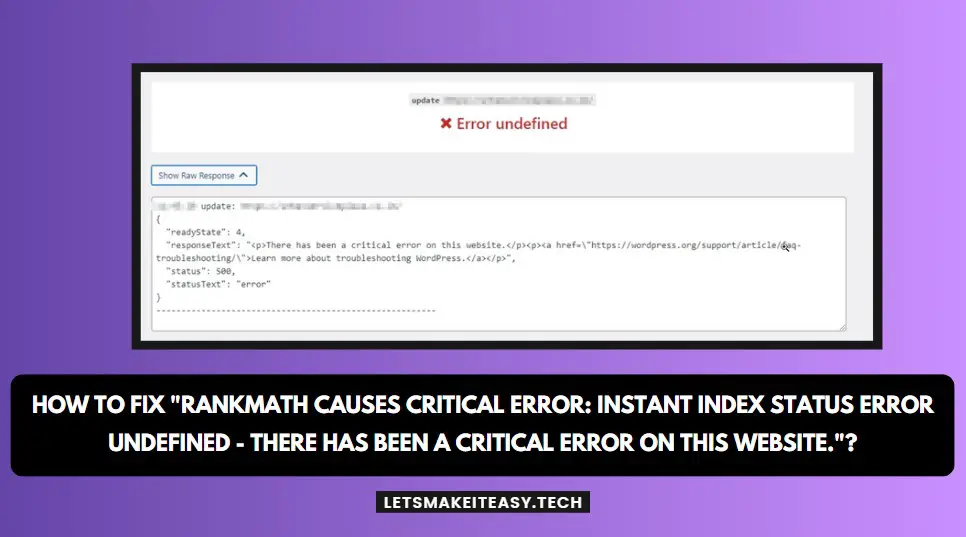
Rankmath is One of the Greatest SEO plugins which offers most of its cool features for free. Rankmath Pro Costs $59 Per Year. Rankmath Pro Gives you Some Great Features like Keyword Rank Tracker, Track Google Index Status, Track Top 5 Winning Keywords, Detect Orphan Pages, and Google Trends Integration. So it would be worth paying for Rankmath Plugin. If You’re Using Rankmath Plugin on your WordPress website, especially using Rankmath for instant indexing purposes, then you may see this error. “Error undefined – There has been a critical error on this website”. You Will See the Full Error Code When you click on the Raw Response Option. This is the Response code that you get when you’re trying to update the URL in Google instant indexing API.
” getstatus: {“readyState”: 4,“responseText”: “<p>There has been a critical error on this website.</p><p>Learn more about troubleshooting WordPress.</p>”,“status”: 500,“statusText”: “error”} “
This is Error Appears due to Mainy Reasons such as Using Older Versions of the Instant Indexing Plugin, Not Updating the Themes and Plugins, Poorly Optimised Themes or Plugins may conflict with the Instant Index Plugin, Using Older PHP Versions, JSON Key May not Uploaded Correctly, Not Giving Owner Permissions to Service Accounts and Much More. The Easiest Fix is to Update the JSON Key in Google Indexing API Settings. If You’re Want to Know More about this Solution, then Just Follow our Below Steps and Methods Properly.
Method 1: Update the Google JSON Key in Google Indexing API Settings
Step 1: First of all, Goto to your WordPress Admin Panel and Log in to your Account.
Step 2: From Your WordPress Dashboard, Navigate to the Rankmath Section and Click on the Instant Indexing Option.
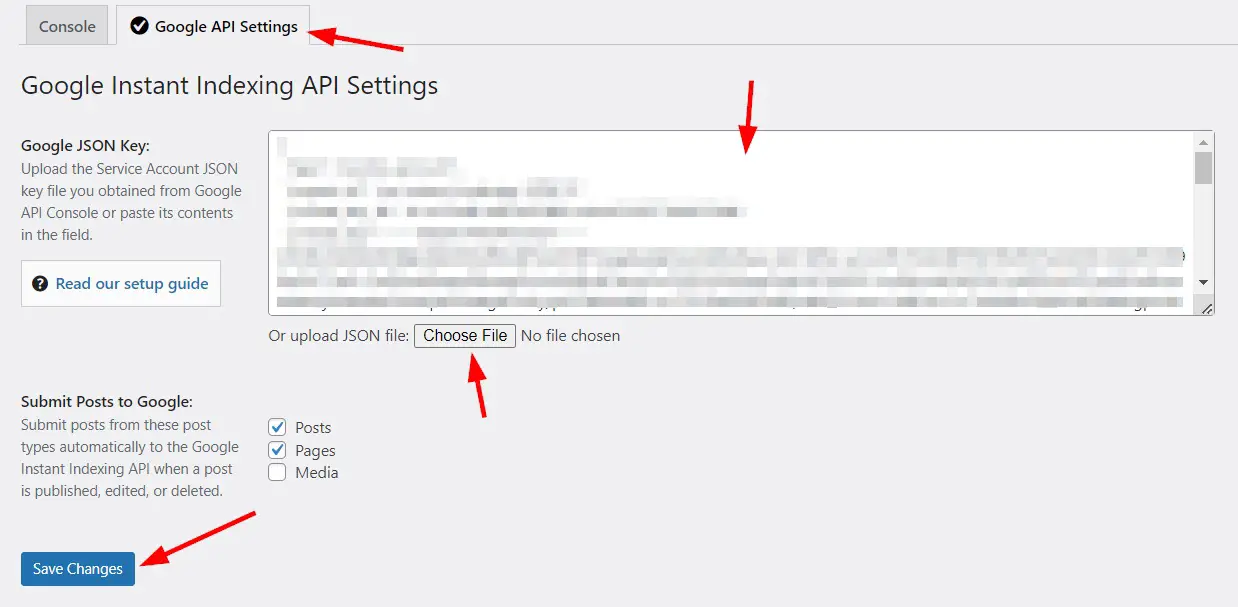
Step 3: Under Instant Indexing Settings, Click on the Google API Settings and Now You need to Upload / Copy and Paste the Service Account JSON key file you obtained from Google API Console.
*Note – If JSON Key is already Present, Clear that code and Copy Paste the Key Once Again, and Press the Save Changes Button.
Step 4: Now You need to use any Cache Plugins to Clear the Cache of your Website.
Step 5: Navigate to Rankmath Instant Indexing Option, Click on the Console Tab & Copy and Paste the URLs that you want to index.
*Note – Urls Must be in the Correct form (One URL per Line)
Step 6: Now Select the Google: Publish/update URL Option in Action Settings and Press Send to API button.
Step 7: After Sending to API, You’ll See the Success Message with Green Tick & also you can check further by clicking on Show the RAW Response and Now Look for the Term “type: URL Updated. This shows that the URL is Properly Updated.
Method 2: Check Whether the Service Account is given an Owner Level Permissions or not on your Google Search Console Property
Step 1: First of all, Goto to Google Search Console and Log in with your account.
Step 2: Navigate to Settings and Click on the User and Permissions option.
Step 3: Now click on the service account and change the permissions to Owner and Save it.
*Note – Just In Case, If You can’t find the service account then Press the Add Users Option on the Top & Enter the Email ID address of the Service Account & Select Owner in the Permissions and Click the Add button.
Method 3: Update the Theme and Plugins
If you’re using the Themes and Plugins for a Long period of Time without updating, then this may be the culprit behind this issue. Try to Update the Plugins and Themes to the Latest Version to Avoid the Conflict Error with Rankmath Instant Indexing API.
Method 4: Change the PHP Version to the Latest One.
Step 1: First of all, Goto to your Website Hosting Site and Log in to your Account.
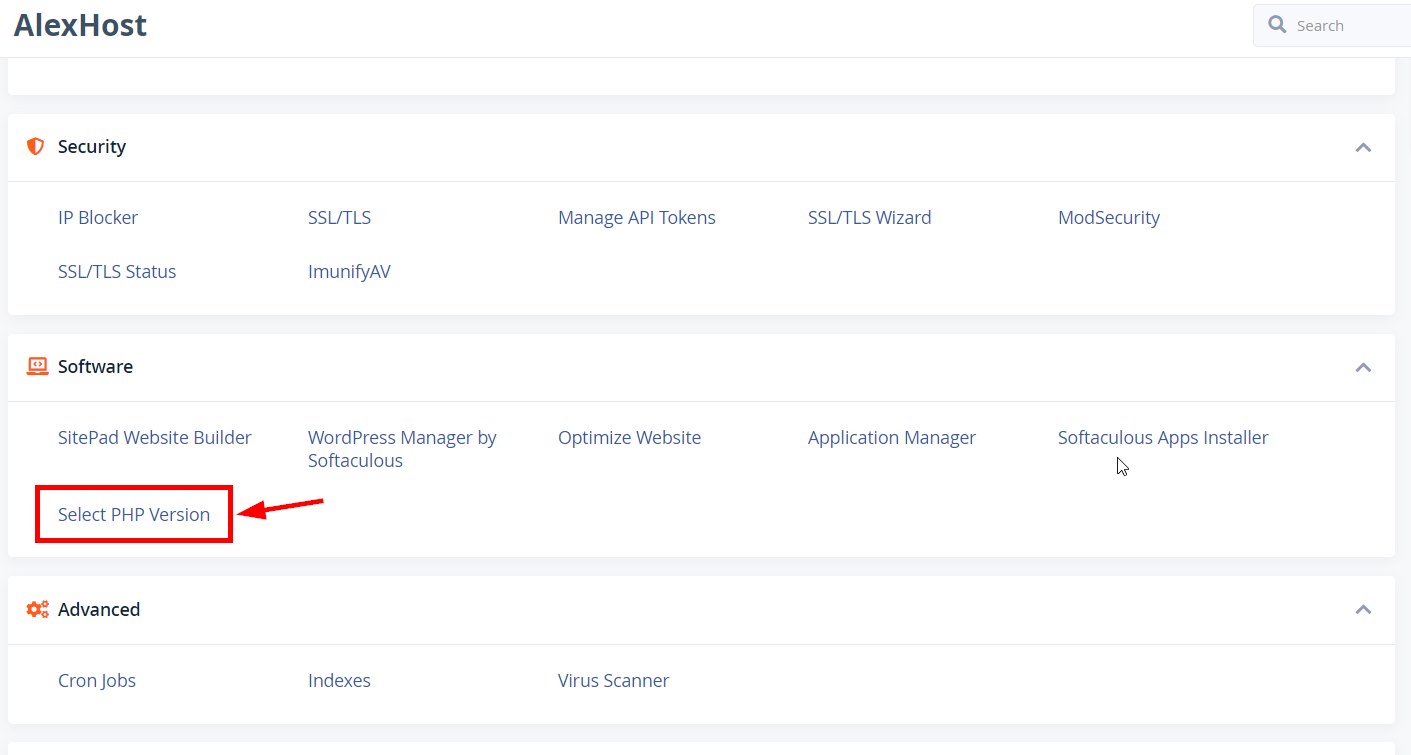
Step 2: Now Goto the C-Panel and Look for the Select PHP Version Option (PHP Selector) (or) Look for the PHP Configuration Option.
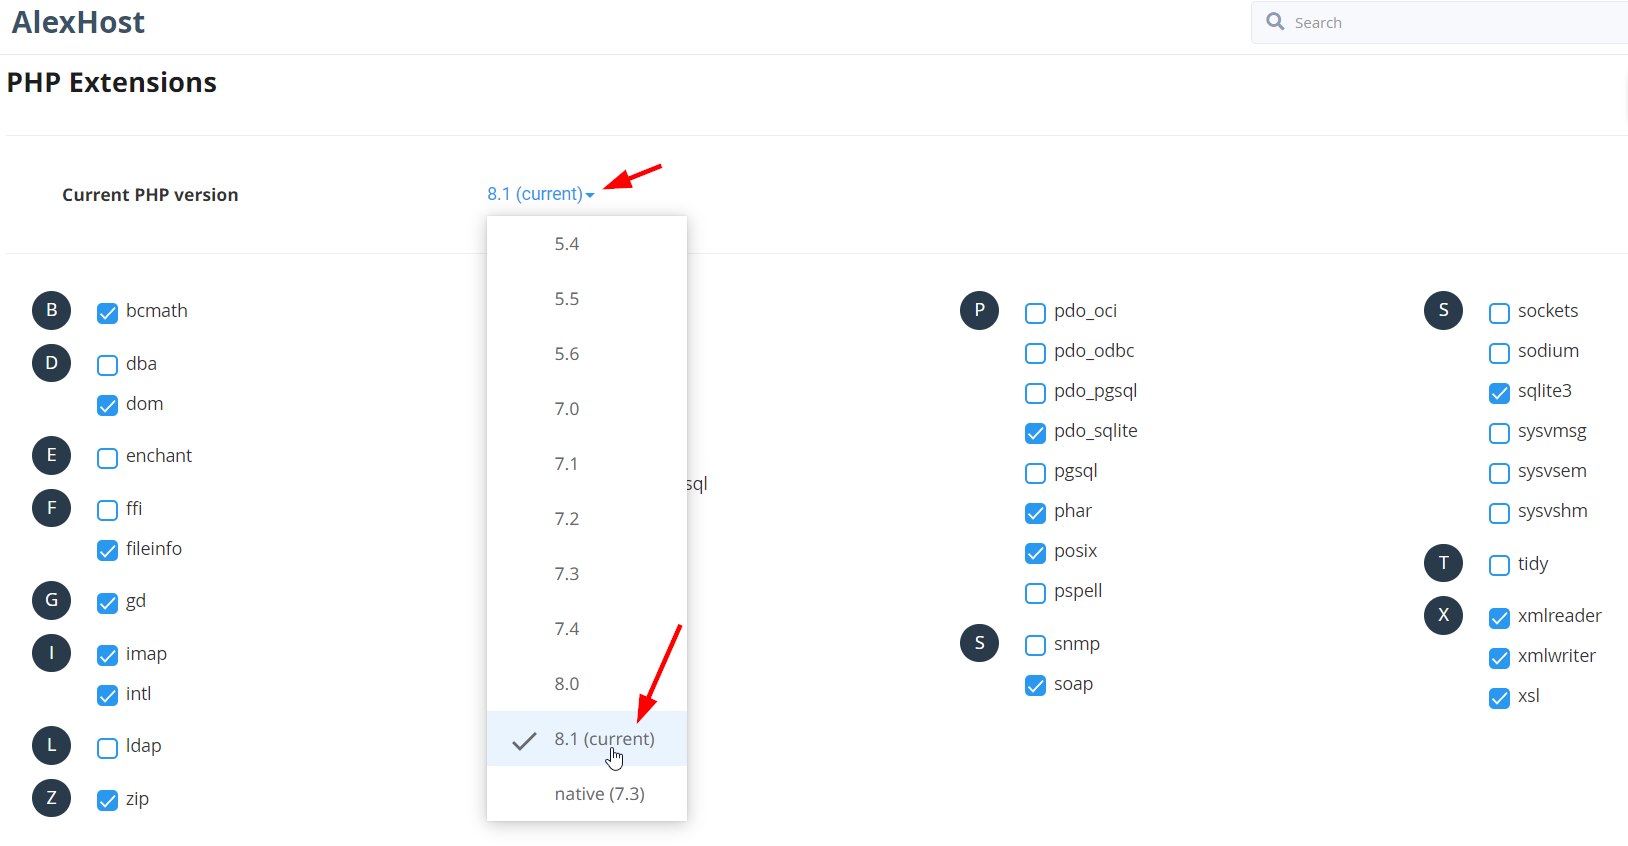
Step 3: Under PHP Configuration/Selector, You can Select the Latest PHP Version PHP 8.1, and Save it.
*Note – If Changing the PHP Version to the Latest One Still not Works, then try to switch PHP to an older Stable version like PHP 7.4.
Method 5: Deactivate ALL Plugins and Themes
Step 1: First, From your WordPress Dashboard, Navigate to the Plugins Section and Deactivate all Plugins. Now you need to enable the plugin one by one and check which causing the issues. If Plugins are not causing the issues then it may be related to themes or other factors.
Step 2: Secondly, Navigate to the Themes section & Deactivate your current theme and set any default theme. Now Check whether the theme is causing the issues or not.
*Note – If You are not able to access the website, then you can access your WordPress website through FTP.
Step 1: Use FTP Clients like FileZilla or Cyberduck to access the WordPress root directory. You Need FTP Hostname, username, Password, and Port Number in order to access.
Step 2: Navigate to public_html Folder and Double Click on the wp-content Folder.
Step 3: On the wp-content folder, Rename the Plugins folder to the Newer name in order to deactivate all plugins. Now Check whether the website working or not. If it is working then the problem is within the plugins. If not then it is related to themes or other factors.
Step 4: Now again Open the wp-content folder and Rename the currently using Theme folder & check whether the website is working or not. If it works then the issue is with your current theme.
Follow all the Methods Carefully to Fix the issues. If still Appears Leave a Comment below.
That’s All About this Post. Give Your Reviews / Reactions about this Post and Leave Comments, Ask Your Doubts, We are here to Help You!


