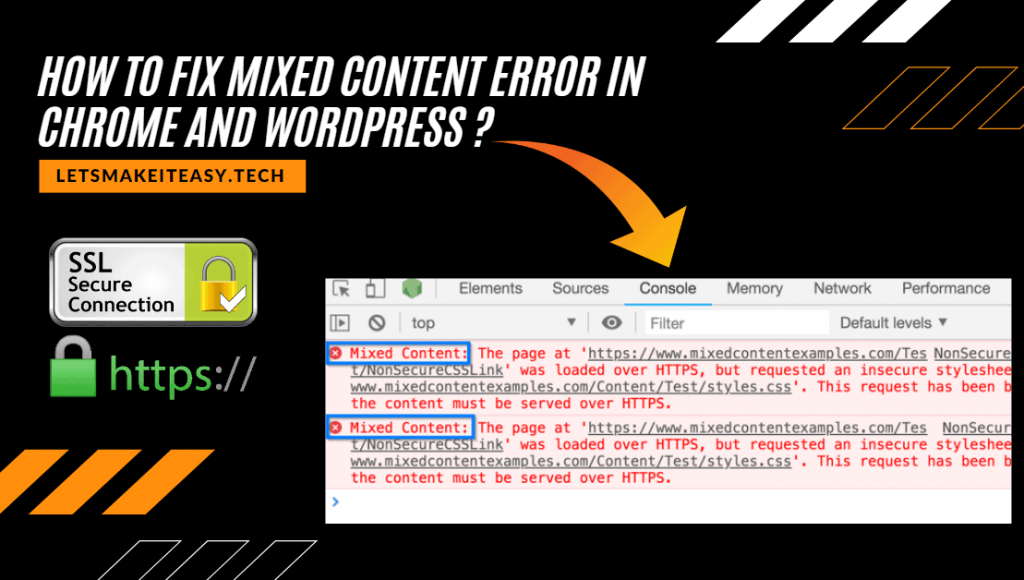
Hi Guys, Today I am Going to tell you How to Fix Mixed Content Errors (HTTPS/SSL) in WordPress Easily?
If You are Looking for the Commonly Searched WordPress Error “How to Fix Mixed Content Issues in WordPress?” (or) “How to Fix Mixed Content Warnings on WordPress?”.
You are at the Right Place to Get Your Answers & Solve the Issue/Error.
Let’s See about it.
Check Out This: How to Transfer a Domain Easily from One Registrar to Another (In 3 Steps)? | Step-By-Step Domain Transfer Tutorial
Steps For How to Fix the Mixed Content Errors (HTTPS/SSL) in WordPress Easily?
Method 1: Using .htaccess
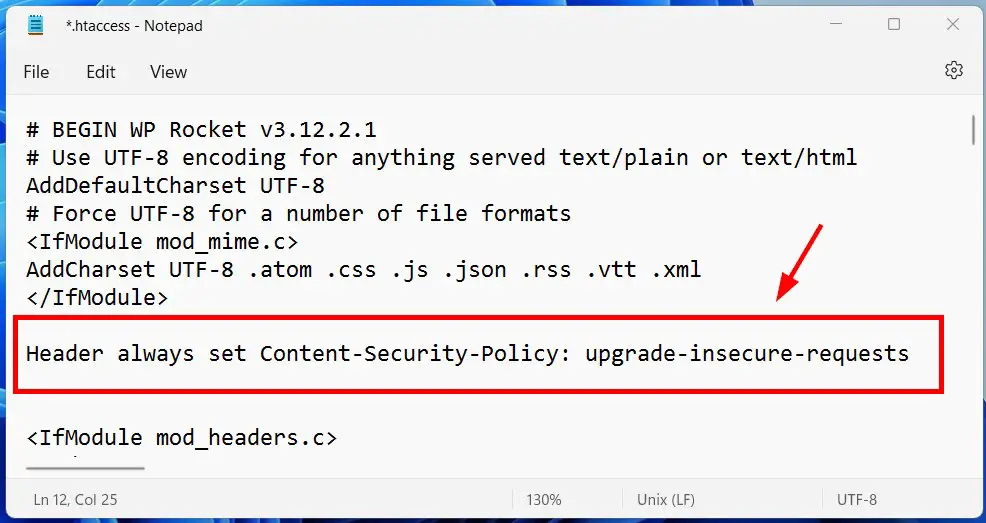
Step 1: Goto your Hosting Account & Navigate to Public_html and open the .htaccess file and Right Click on it and Edit it.
Step 2: Now Copy and Paste the Following Code into your .htaccess file.
Header always set Content-Security-Policy: upgrade-insecure-requests
Header always set Content-Security-Policy: upgrade-insecure-requests
Step 3: Now Save the file and Refresh the Website and Check for Mixed Content Errors.
Method 2: Using WordPress Settings
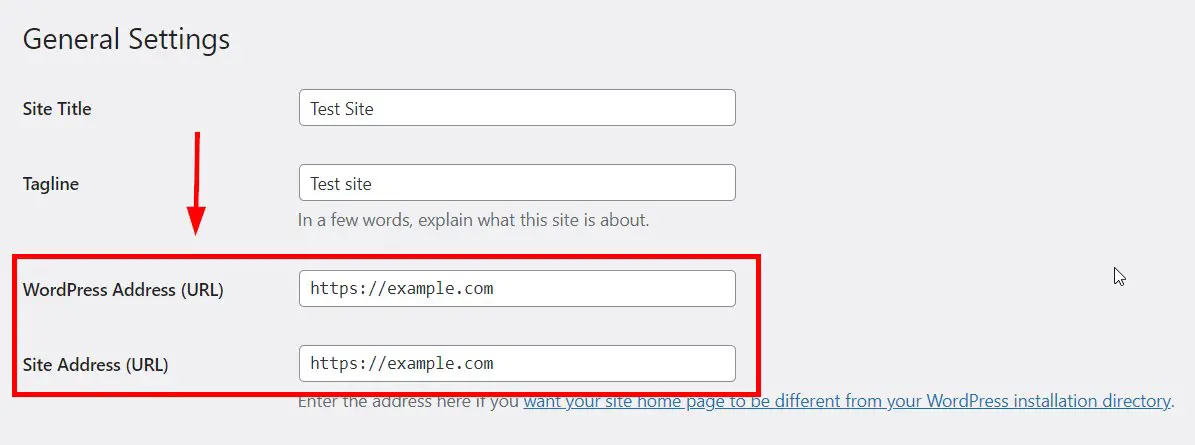
Step 1: Go to your WordPress Dashboard and Navigate to Settings and Click the General Options.
Step 2: Now Change both the WordPress Address (URL) and Site Address (URL) from HTTP to HTTPS.
For Example
If your Url is in HTTP (http://example.com) then Change it to HTTPS (https://example.com)
Method 3: Using Elementor Page Builder
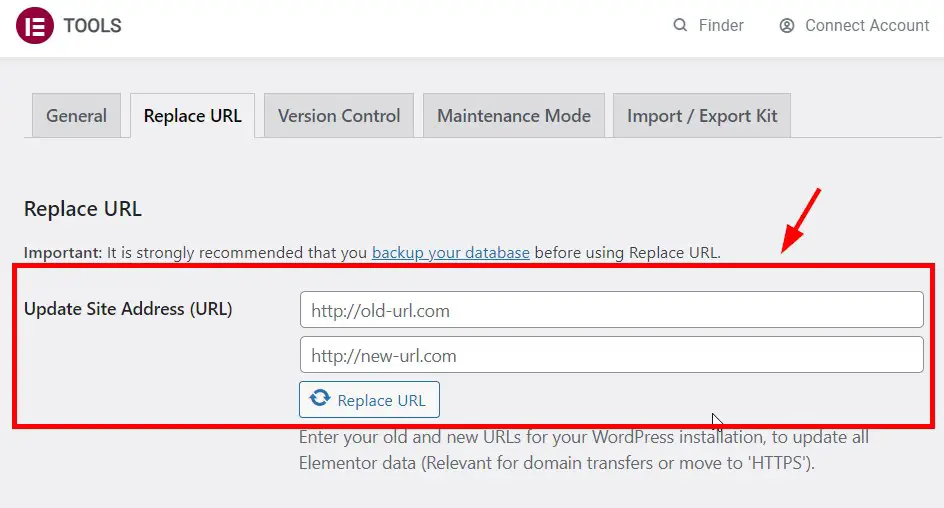
Step 1: Goto to your Plugins and Download and Install Elementor Page Builder Plugin. After Instaling Navigate to Elementor Page Builder and Select Tools Option.
Step 2: Now You need to Update the Url from HTTP to HTTPS and Press Replace URL Button.
For Example
If your Url is in HTTP (http://example.com) then Change it to HTTPS (https://example.com)
Method 4: Using SSL Insecure Content Fixer Plugin
Step 1: Right Click on your Site and Click Inspect Element and Switch to Console Tab and You’ll See the Mixed Content Errors.

Step 2: Now Go to WordPress Plugins Section and Download SSL Insecure Content Fixer plugin.
https://wordpress.org/plugins/ssl-insecure-content-fixer

Step 3: After Installing SSL Insecure Content Fixer Plugin, Go to Settings and select the SSL Insecure Content.
Step 4: Now Just Select Capture Option or Capture All Option and Save it.
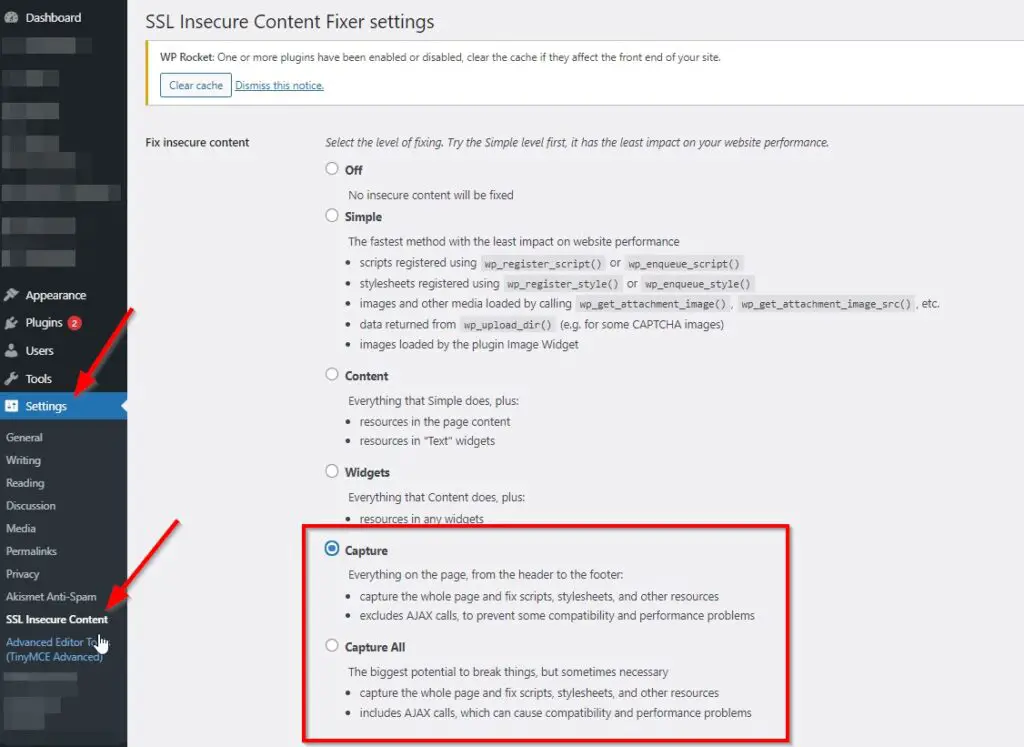
Step 4: Now Refresh the Website.
Method 5: Using Cloudflare SSL Options
Step 1: Now Right Click on your Site and Click Inspect Element and Switch to Console Tab and You’ll See the Mixed Content Errors.
Step 2: Now Open the Cloudflare Official Website and Navigate to SSL/TLS Option and Select Edge Certificates Tab.
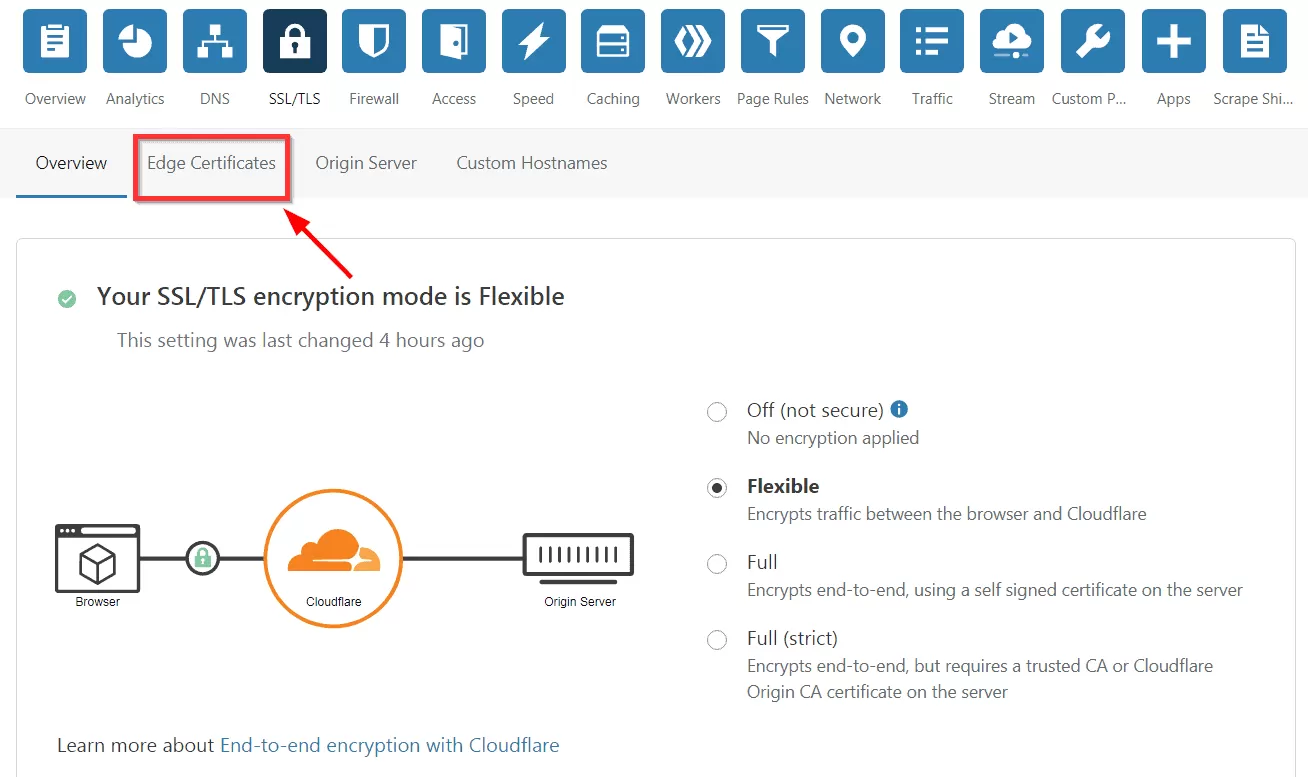
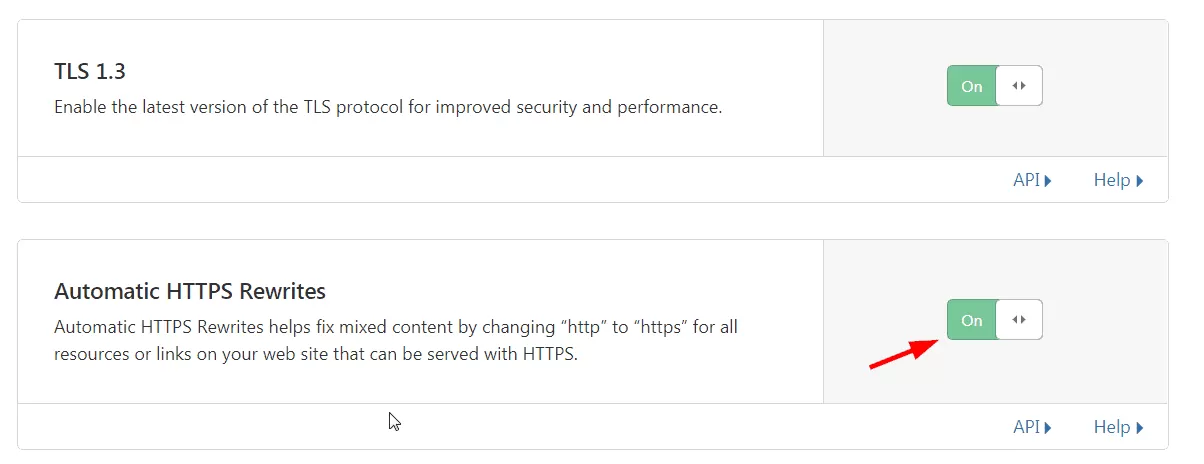
Step 3: Now Turn On The Automatic HTTPS Rewrite Option.
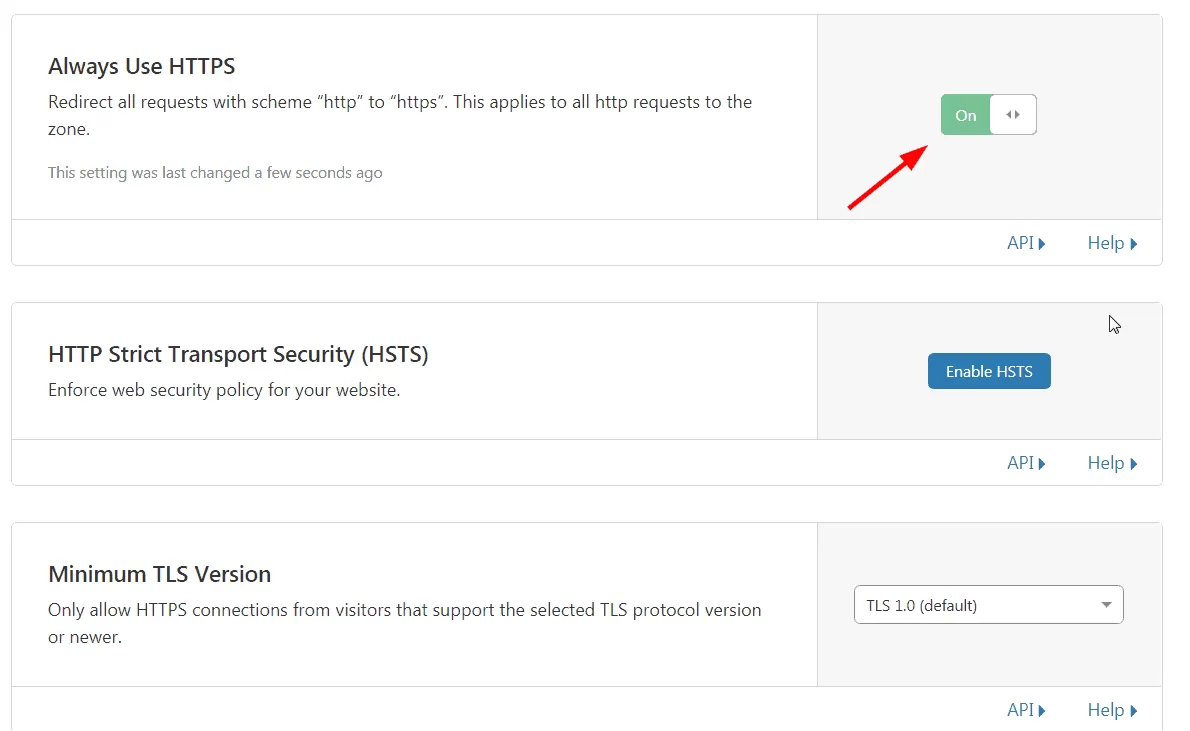
Step 4: Now Turn On The Always Use HTTPS Option.
Step 5: Now Refresh your Website And Wait For Changes.
Method 6: Using Really Simple SSL Plugin
Step 1: Goto to Your WordPress Plugin Section and Search For Really Simple SSL Plugin and Download it.
https://wordpress.org/plugins/really-simple-ssl/
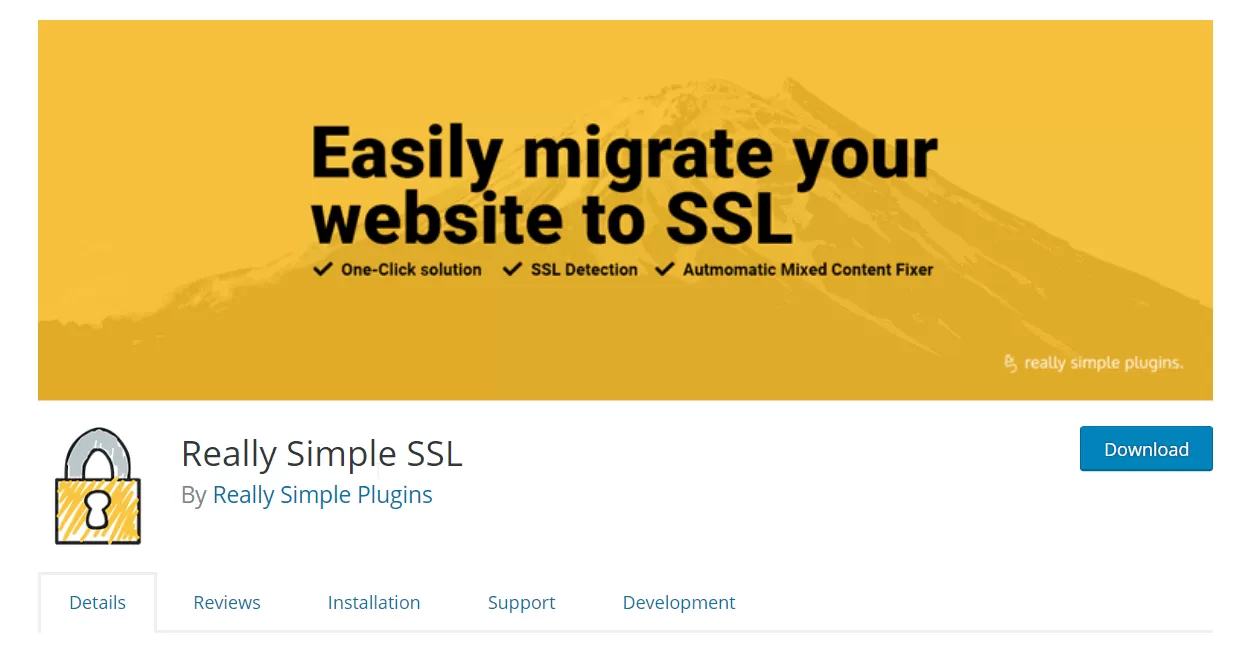
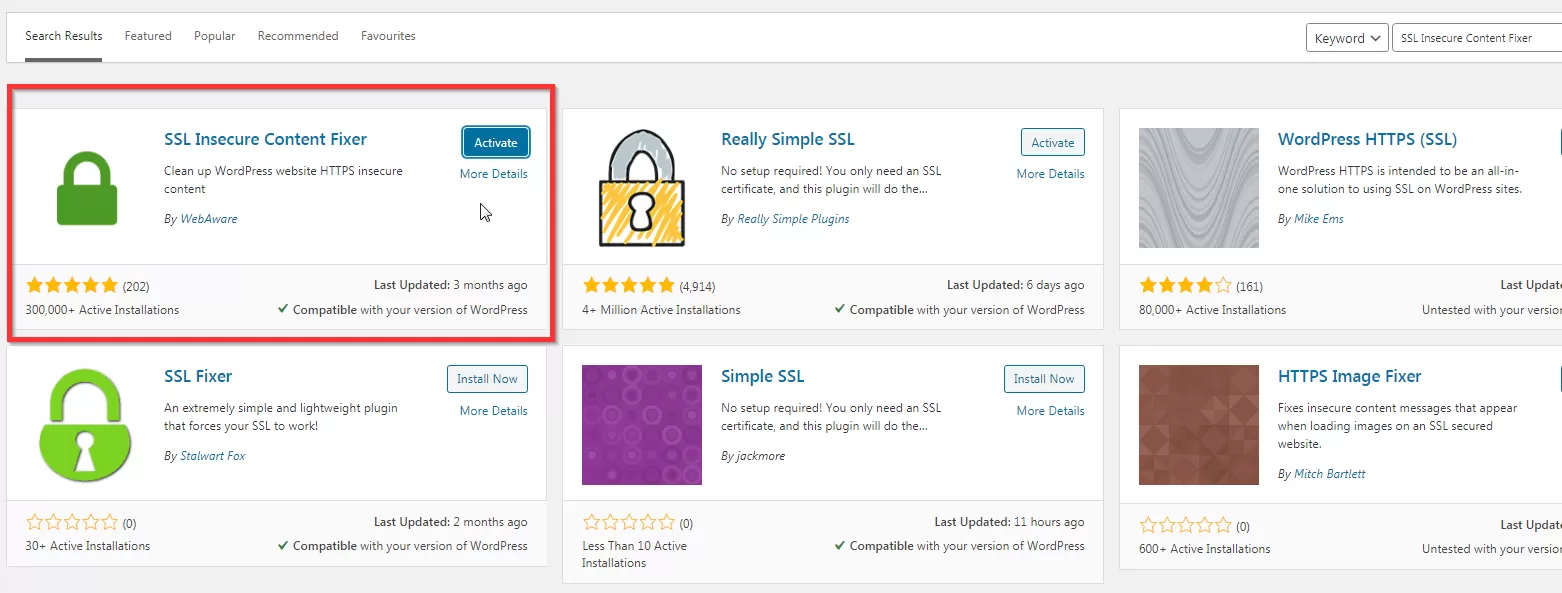
Step 7: Now After Downloading the Plugin Activate it.
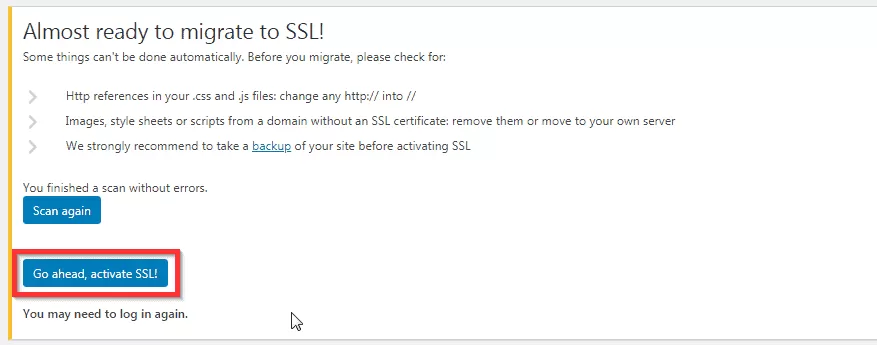
Step 8: Now Click the Go Ahead, Activate SSL Button.
Step 9: Goto Your Website and Check it. Mixed Content Errors Will Be Fixed.
Method 7: Using Better Search Replace Plugins
Step 1: Goto to Your WordPress Plugin Section and Search For Better Search Replace Plugin and Download it.
https://wordpress.org/plugins/better-search-replace
Step 2: Now Right Click on your Site and Click Inspect Element and Switch to Console Tab and You’ll See the Mixed Content Errors.

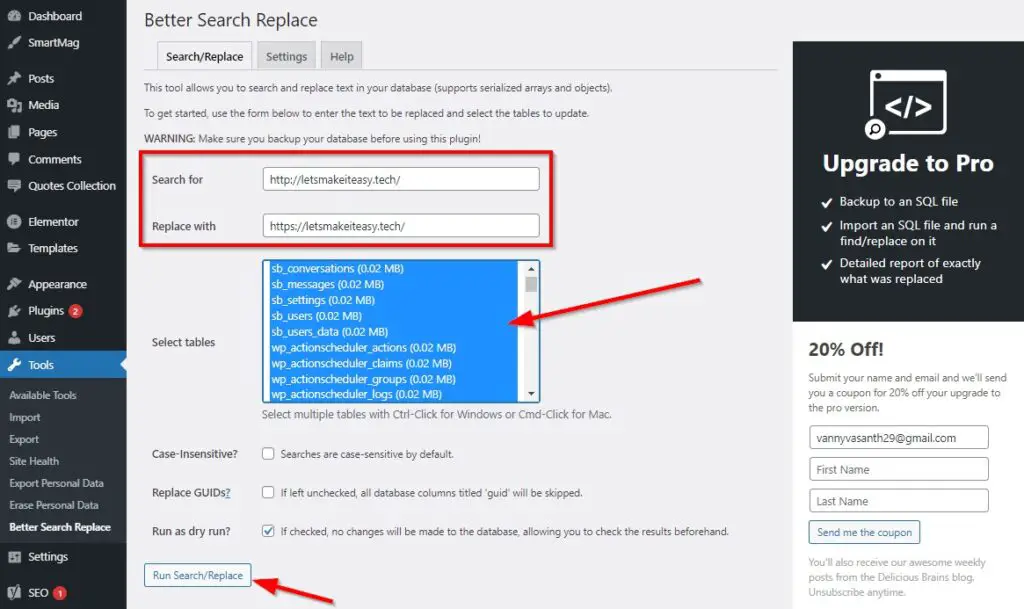
Step 3: Goto to Your WordPress Admin and Navigate to Tools Section and Select the Better Search Replace Plugin.
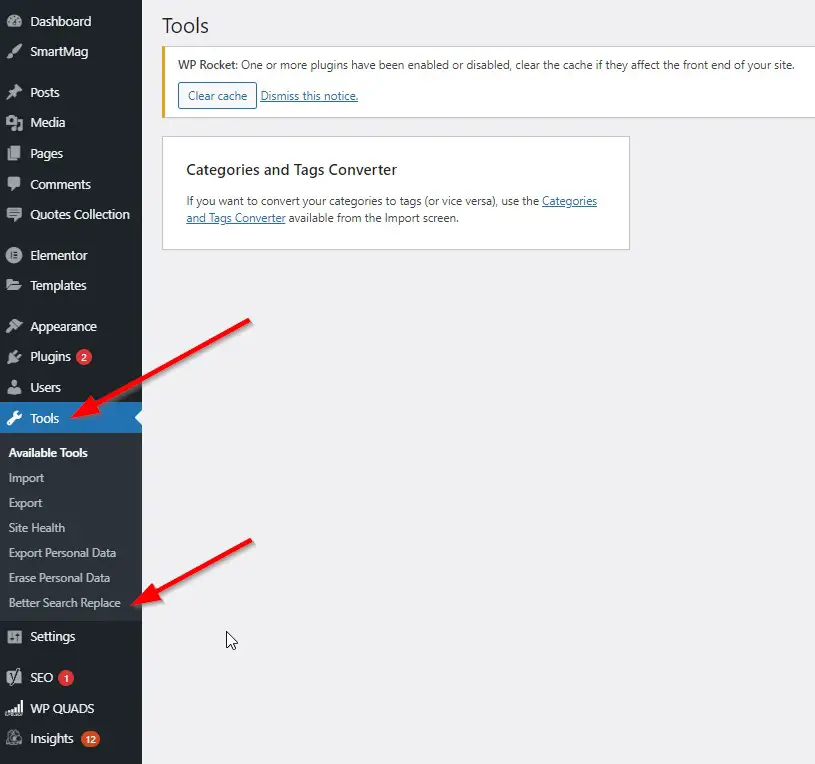
Step 4: Now Enter the HTTP Url Address in Search for and HTTPS URL Address in Replace with.
Step 5: Now select all the Tables and then click the Run Search/Replace button.
Step 5: Goto Your Website and Check it. Mixed Content Errors Will Be Fixed.
That’s It! You’re Done Man!
That’s All About this Post. Give Your Reviews / Reactions about this Post and Leave Comments, Ask Your Doubts, We are here to Help You!


