Hi Guys, Today I am Going to Show You How to Deactivate All WordPress Plugins & Themes when you are not able to access the WP-Admin?
If You’re Looking for the Commonly Searched WordPress Error “How to Deactivate All Plugins when you are not able to access the WP-Admin?” (or) “How to Deactivate WordPress plugins via phpMyAdmin?”.You are at the Right Place to Get Your Answers & Solve the Issue/Error.
WordPress is one of the Best and Most Used Content Management Systems (CMS) which is mainly used for building and managing websites easily.WordPress is Free for anyone so anyone can download, install and modify it for free. It is so Popular among individuals who have zero coding experience and also for those who are new to building websites and blogs. If you’re a WordPress User, then you may face an issue called “Sorry, You are not allowed to access this page” (or) “You are not able to access the WP-Admin Page” (or) A Error Related to Login Issues. This type of error and Issues Happens mainly when you’re using plugins to Hide Your WordPress Login Page & also When an active user account may get deleted, or removal of right from the admin users, and also due to Plugins which deletes the User Account accidentally (or) your site may have been hacked. This Issue needs to be fixed right away to avoid any further problems.
To Fix these Issues Easily, You need to Deactivate All the Installed Plugins and Themes. The Easiest Way to Deactivate all plugins is using the file manager option from your c-panel. But You can also easily Deactivate all the Plugins through the FTP. If you’re not able to connect using FTP, then you may try the phpMyAdmin Method to Deactivate WordPress plugins and themes. If You’re New to WordPress or a Beginner on WordPress, then you need to follow the steps carefully in order to fix this issue properly.
Method 1: Deactivate All Plugins and Themes through FTP
Step 1: For Accessing the WordPress Root Directory through FTP, First You Need a FTP Client like FileZilla or Cyberduck. Second, You Need FTP Hostname, username, Password, and Port Number in order to access.
Step 2: After Successfully connecting to the Root Directory via FTP, Look for the public_html Folder and Double Click on it.
Step 3: On the public_html Folder, You can See the wp-content Folder, Double Click on it.
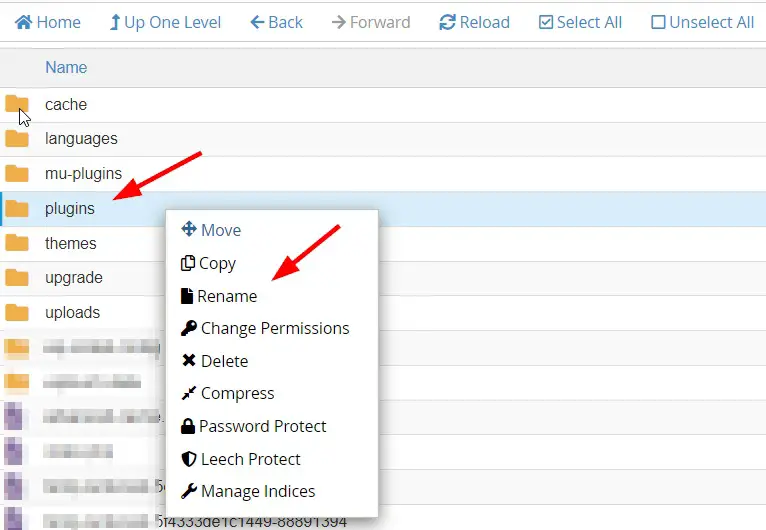
Step 4: On the wp-content folder, Look for the Plugins Folder and Right click on it and Select the Rename Option.
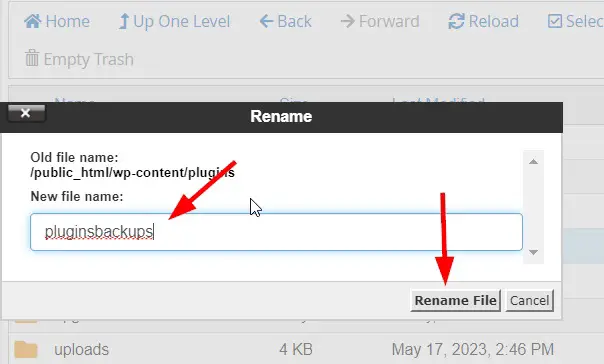
Step 5: Now Rename the Plugins folder to the Newer name (anything you wish) in order to deactivate all plugins.
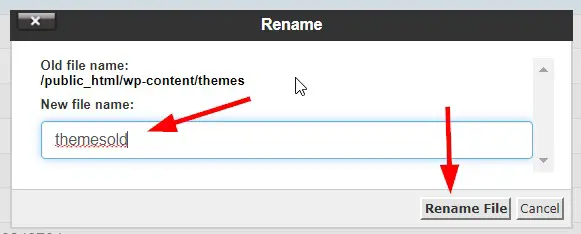
Step 6: Same for Themes Also, Goto the wp-content folder, Look for the Themes Folder and Right click on it and Select the Rename Option.
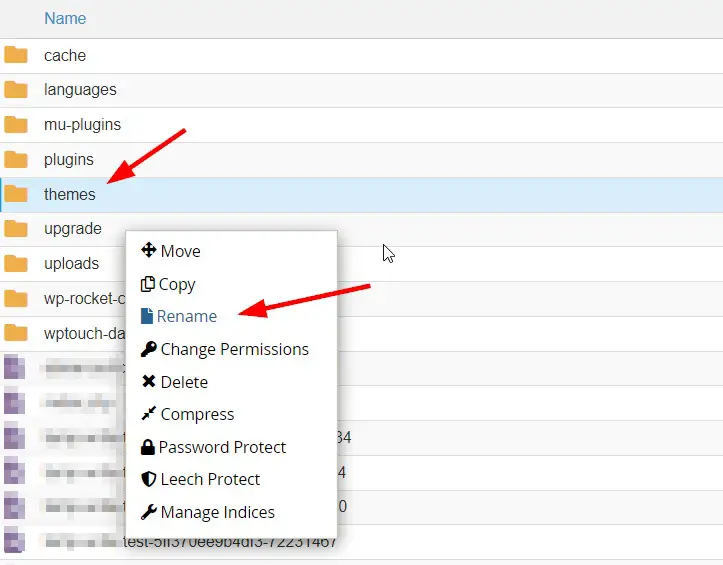
Step 7: Now You can Rename the current Theme folder to some other name to deactivate the theme.
Method 2: Deactivate All Plugins through phpMyAdmin
Step 1: First of all, Goto to your Website Hosting Site and Log in to your Account.
Step 2: Now Goto the C-Panel and Navigate to the Databases Section Look for the phpMyAdmin and Click on it to Open the phpMyadmin.

Step 4: On the phpMyAdmin Page, You need to select your WordPress database. Now it will show all the tables from your WordPress database.
Step 5: Now you need to look for “wp_option” and Click on it. If you find difficult to find then Press Ctrl + F to Open Find Box in your Browser & Search for “wp_options” and click on the wp_options to open it.
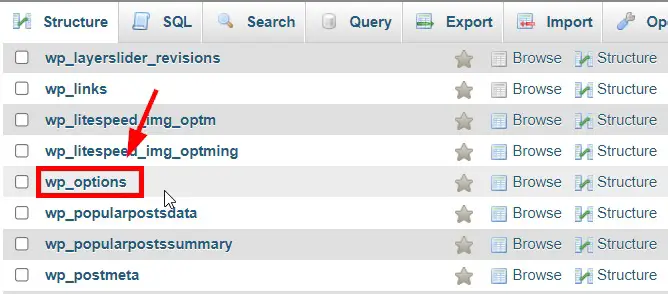
Step 6: On the wp_options Table, You need to find the active_plugins option and click on the Edit Button.

Step 7: On Active_Plugins Options, Navigate to option_value Box and Enter a:0:{} as the value in the box and Press the Go Button to Save the Changes.
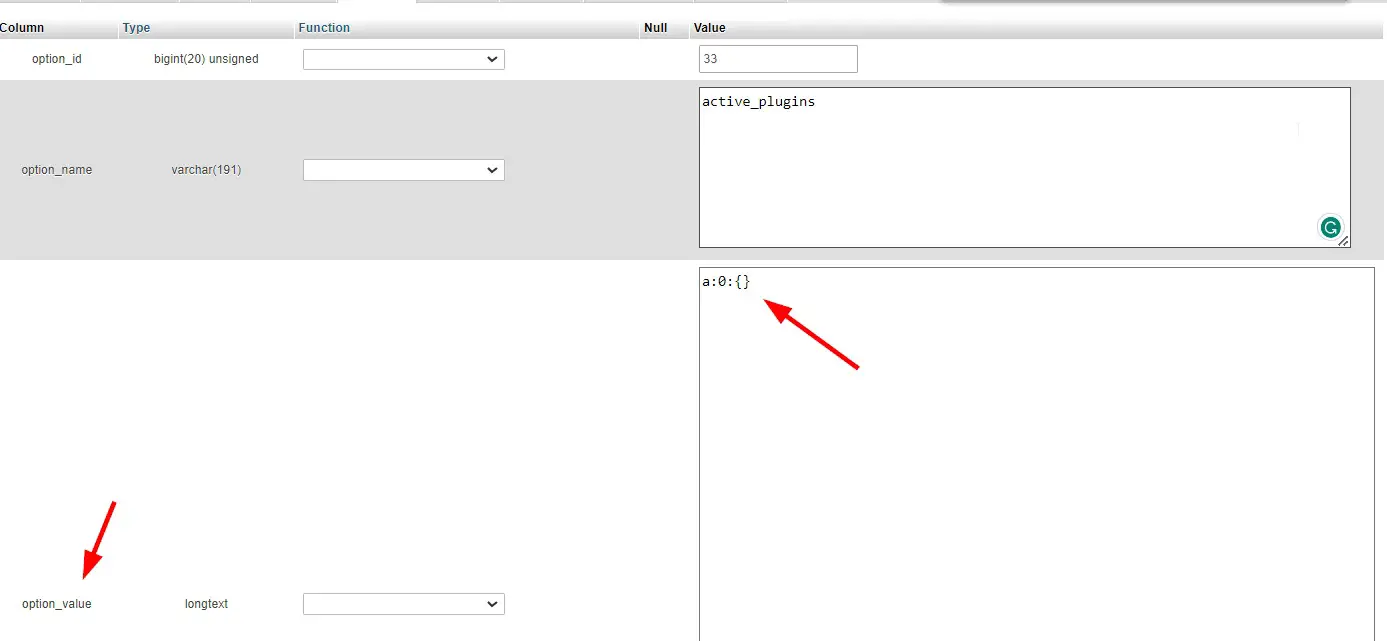
Step 8: Now You’ll be able to access the Worpdress Admin Page. Goto your WordPress Admin Panel and log in to your account. Now you will see that all the plugins and themes are successfully deactivated using phpMyAdmin.
That’s All About this Post. Give Your Reviews / Reactions about this Post and Leave Comments, Ask Your Doubts, We are here to Help You!


