Hi Guys, Today I am Going to Show You How to Configure TP Link 300Mbps Wireless n ADSL2+ Modem Router? | TP-Link 300Mbps Wireless N ADSL2+ Modem Router Bsnl Configuration
Check Out This: How To Block AdBlocker on Your Blogger 2020 ? | Block Adblock Blockers 2020
Steps For How To Fix ” How to Configure TP Link 300Mbps Wireless n ADSL2+ Modem Router? | TP-Link 300Mbps Wireless N ADSL2+ Modem Router Bsnl Configuration?
Step 1: First of all Open your Web Browser and Type the Device IP Address ( Default is 192.168.1.1 ) and Press Enter to Access it.
Step 2: Now Enter Admin as Username and Password as it is Default One and Click Login.
 Step 3: Now If Your Frst time Installing the Device , It Starts with Configuration Setup Wizard Automatically.
For Already Installed Users Click Quick Start and Click Run Wizard Option.
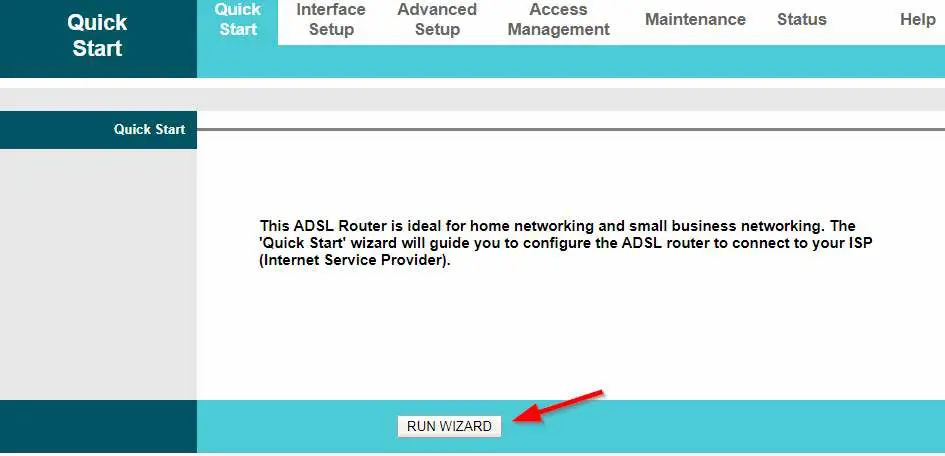
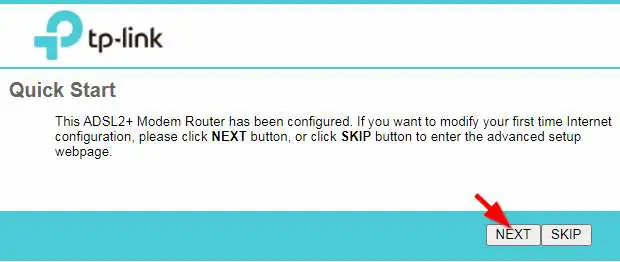
Step 4: After Running the Quick Start Wizard , Click Next and Move to Next Page.
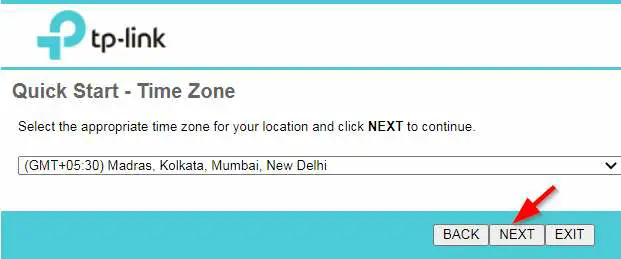
Step 5 : Now Select your Timezone according to your place where you are living.
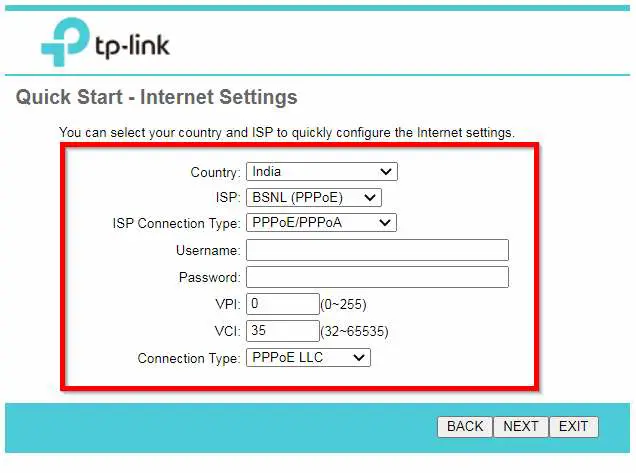
Step 6 : Select Your Country and Choose Your ISP and Its Connection Type.
For India Especially for BSNL Users
1.Enter VPI as 0 and VCI as 35
2.Select PPPoE LLC as Connection Type.
3. Enter your Username And Password which was given by your Internet Service Provider.
Now After Completing Click Next and Finish The Process.
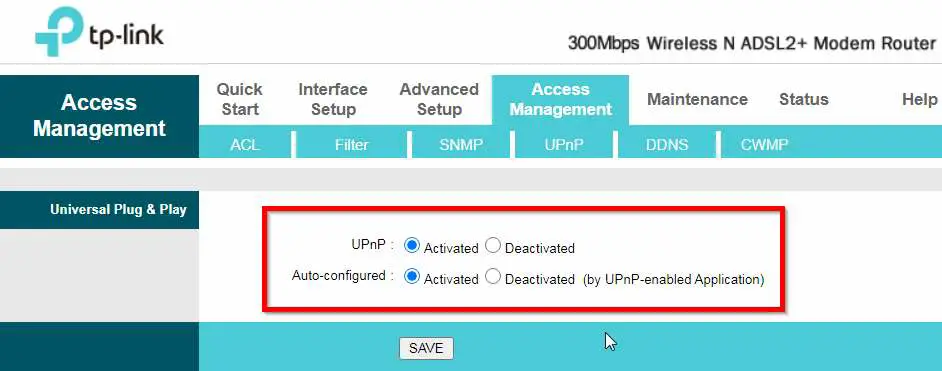
 Step 7 : Now Navigate to Access Management and Select Activated Option for Both UPnP and Auto-Configured.
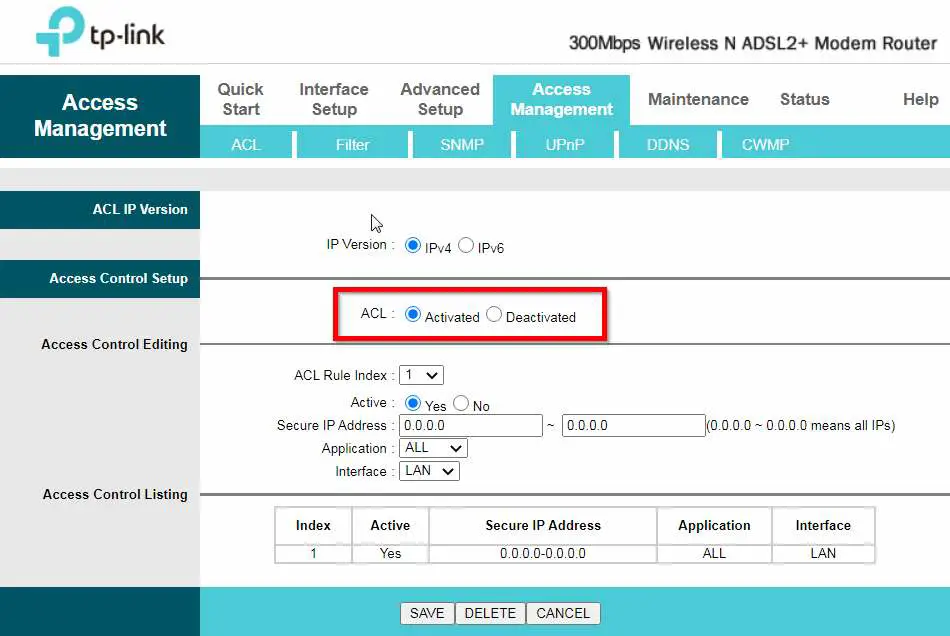
Step 8: Now Navigate to ACL Tab and Select Activated Option For ACL and Enter 0.0.0.0 in Secure IP Address { Both Boxes } and Click Save .
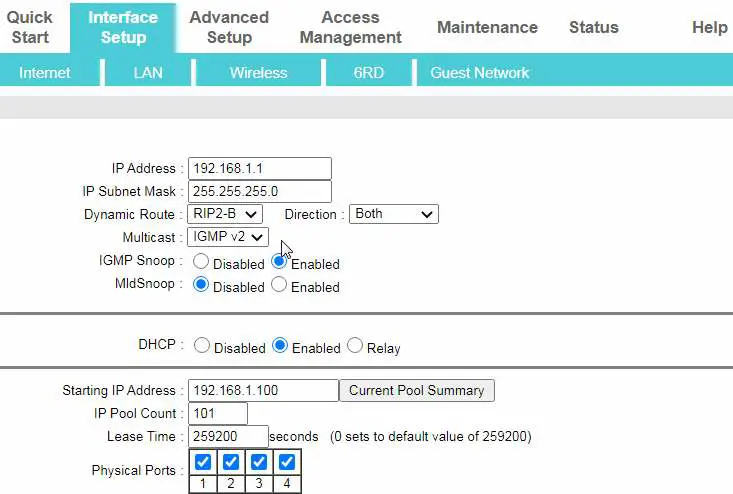
Step 9: Now Goto Interface Setup and Choose LAN Enter the Details in Field As Shown in the Below Pic and Click Save.
Step 10: Now Goto DNS Relay and Choose Use User Discovered DNS Server Only Option.
Enter Primary DNS Server as 8.8.8.8 And Secondary DNS Server as 8.8.4.4 and Click Save.
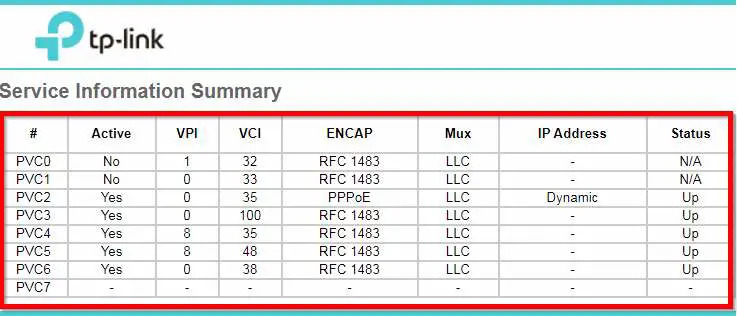
 Step 11 : Now Navigate to Internet Tab in Interface Setup and Click PVCs Summary Option.
Here You can Check the Status of Virtual Circuits Whether it is UP or Down or Idle or N/A.
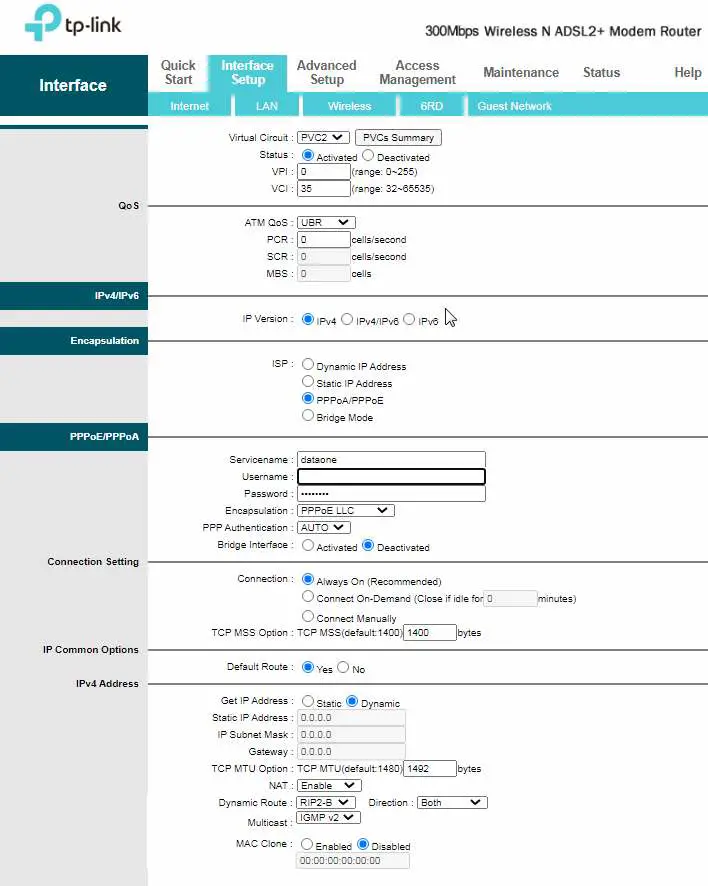
Step 12: Now Enter the Values and Choose the Options as Shown in the Below Screenshot.
* Important Note *
You Must Enter your Username And Password which was given by your Internet Service Provider.
Use PVC2 as Primary Virtual Circuit by Click Activated Button and Select PPPoA and Select Get Ip Address as Dynamic and Activate for the Upcoming Pvc’s also but Select ISP as Bridge Mode.
But You have to Deactivate the PVC0 and PVC1.
That’s It ! You’re Done Man !
@@@ Leave Comments !!! @@@
***


