Hi Guys, Today I am Going to tell you How to Fix Wifi Icon Greyed Out in Windows 7,8,8.1,10 & 11?
Check Out This: How to Install & Run Google Playstore in Windows 11 Without Using any Emulators?
Are you Looking for the Commonly Searched Term “How to Fix Wi-Fi Icon Greyed Out issue in Windows 11 ,10” (or) “How to Fix Network Icon Greyed Out in Windows 10,11?
You are at the Right Place to Get Your Answers & Solve the Issue/Error.
Let’s See About it.
Steps For How to Fix Wifi Icon Greyed Out in Windows 7,8,8.1,10 & 11?
Solution 1: Make Sure If any Wifi Button is Available
Just Look for any Wifi On/Off Keys (or) Buttons with Network Icon (or) Wifi Icon Available on Your Keyboards (or) on the Side of the Laptop.
This Network/Wifi Key is Used to Enable or Disable the Network on your Computer.
You can enable the Wi-Fi by pressing the function key and the F8 key at the same time (Fn+F8 key).
Some of the Commonly Used Wifi Keys are
Function Key (Fn) + F8 Key
Function Key (Fn) + F3 Key
Function Key (Fn) + F2 Key
*Note – If The Above Keys do not Work, Press the Function Key and the Key That has the Wifi Symbol or Network Symbol.
Solution 2: Make Sure Aeroplane Mode is Turned Off
Just Make Sure that Aeroplane Mode is Turned On or Not. If Turned On, Just Turn it Off and Check Whether Wifi is Connecting Or Not.
Solution 3: Uninstall & Reinstall Wifi Adapter Drivers
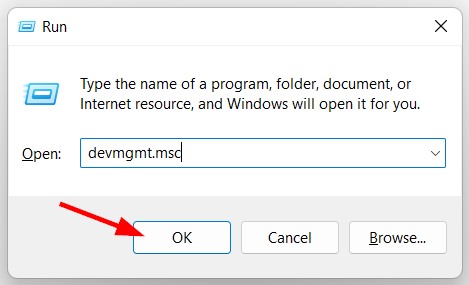
Step 1: Press Windows Key + R to Open Run Program and Type devmgmt.msc to Open Device Manager.
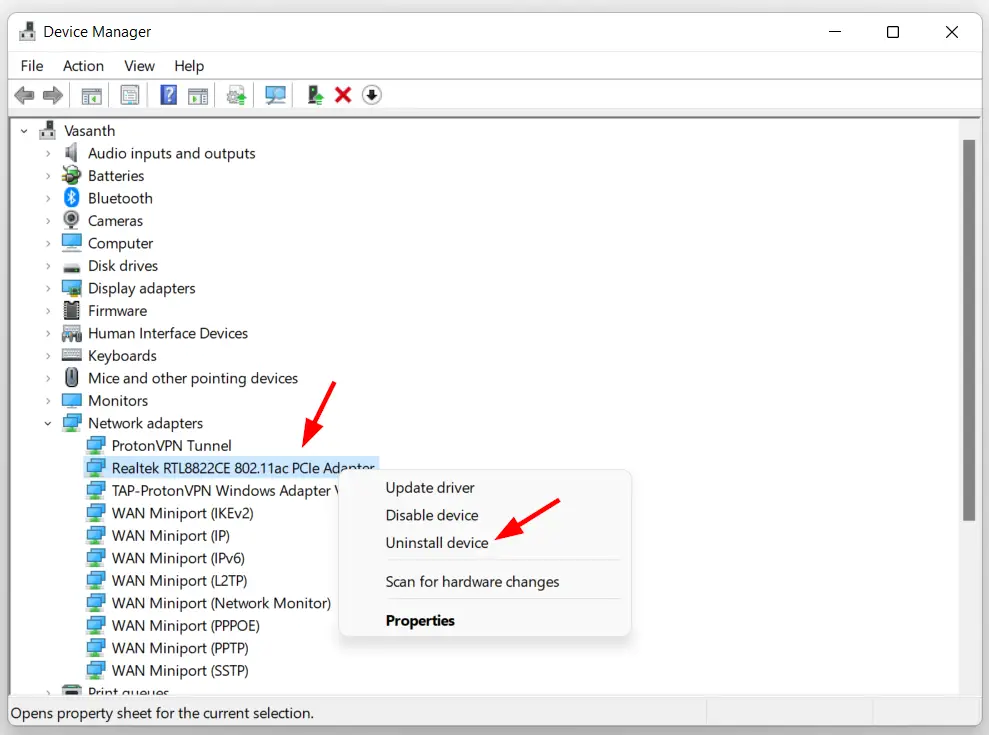
Step 2: Navigate to Network Adapters and Look for your Wifi Adapter and Right Click on it and Select Uninstall Device.
Step 3: Now Right Click on the Network Adapters and click the Scan for Hardware Changes Option. Now The Driver Will be Reinstalled Automatically.
Solution 4: Update your Wifi Adapter Driver
Step 1: Press Windows Key + R to Open Run Program and Type devmgmt.msc to Open Device Manager.
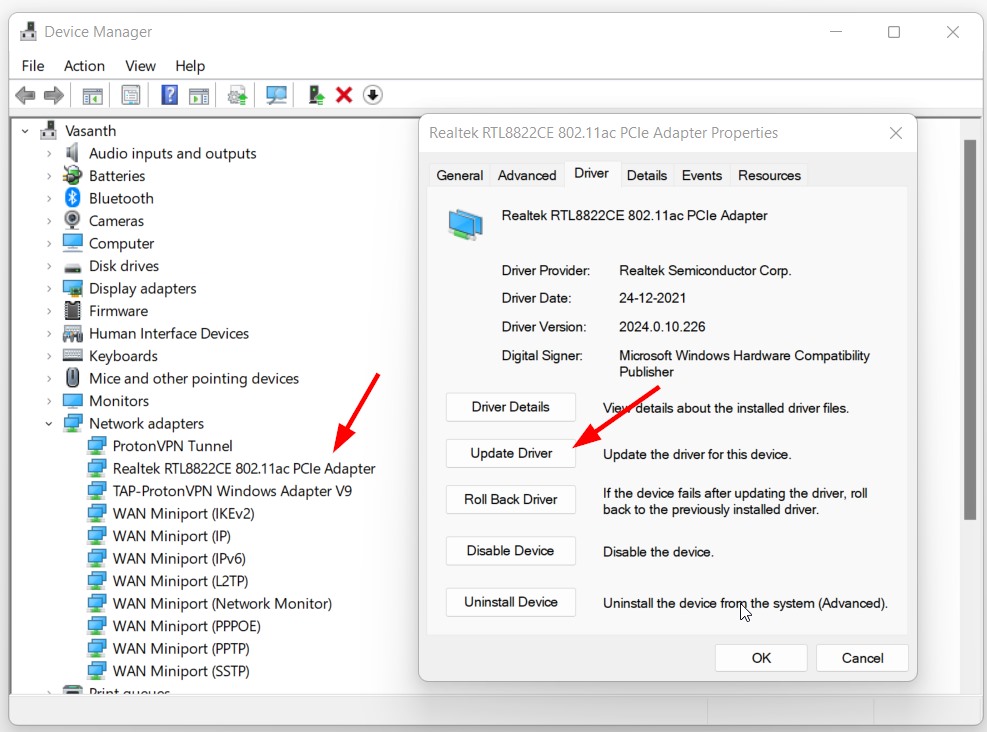
Step 2: Navigate to Network Adapters and Look for your Wifi Adapter and Right Click on it and Select Properties.
Step 3: Navigate to Driver Tab and Select the Update Driver to Update the Drivers Either Automatically or Manually.
Restart Your PC.
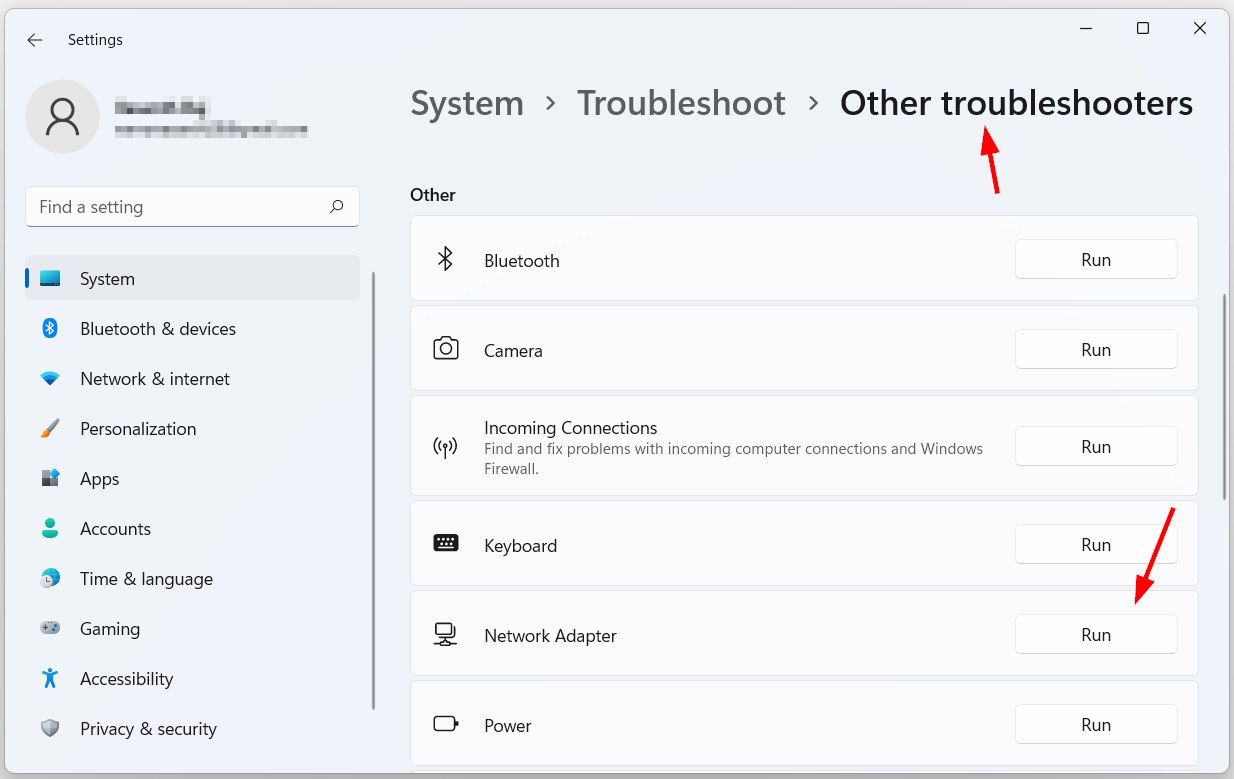
Solution 5: Run the Network Adapter Troubleshooters
Step 1: First of all, Goto Search and Search for Troubleshooters Settings (or) Goto Settings and Click on the Troubleshoot Settings.
Step 2: Just Select the Other Troubleshooters and Scroll Down to Network Adapter and Press the Run Button to Troubleshooter.
Solution 6: Using Command Prompt
Step 1: Open Command Prompt and Run it as Administrator.
Step 2: Now Just Type the Following Commands One by One.
Type ipconfig /flushdns and press Enter.
Type netsh winsock reset and press Enter.
ipconfig /flushdns

netsh winsock reset
Restart Your PC.
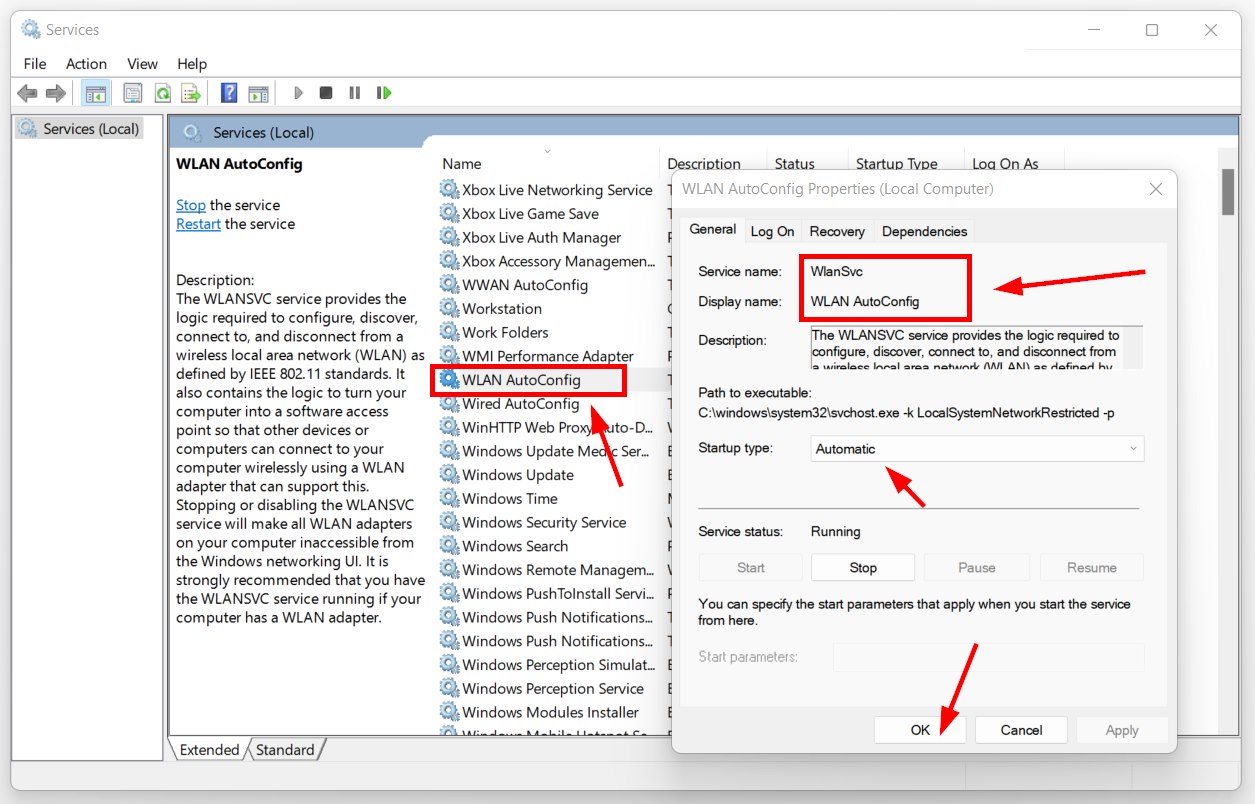
Solution 7: Using Services
Step 1: Press Windows Key + R to Open Run Program and Type services.msc to Open Device Manager.
Step 2: Look for WLAN Autoconfig & Right click on it and select Properties and Choose Automatic in Startup Type and Press Apply and then Press Ok to Save the Changes.
Restart Your PC.
That’s It. You’re Done. Have a Nice Day.
@@@ Leave Comments @@@
##Stay Safe Guys And Live Happily ##


