

If you are Looking for “How to Change the Time to 24 Hour format / 12 Hour Format?” (or) “How to Change Time Format in Windows 11?”. Don’t Worry, You are at the Right Place to Solve/ Fix the Issues Quite Easily and Quickly.
Personal Computers have an internal system clock that shows the current time and date. The System Clock allows users to quickly reference the time while doing the works in PC without needing to access the watches or real-time clock. A User Can Customize the time format, time zone, and date display of the clock. Usually, the 24-hour format is used in many regions. It is also called international time. The 24-hour time format is widely used in Europe and military contexts. The 24-hour time format is the default format used in many operating systems like Windows.

Since Windows uses the 24-hour time format as a default option, Users can change the time format to the 12-hour format at any time. There are a lot of ways to Change the time format on your PC. If you want to change the time format but don’t know how to do it properly then You Need to follow this article carefully. This article offers Various solutions to help you resolve the problem.
How to Change the Time Format from 24 Hours to 12 Hours / 12 Hours to 24 Hours in Windows 11,10,8,7?
For Windows 11 Users
Step 1: First of All, Click on the Start Button & Click on the All Apps Option, and Open Settings (or) Type “Settings” on the Search Box and Open the Settings (or) Press the Windows Key + I Shortcut Key to Open the Settings.
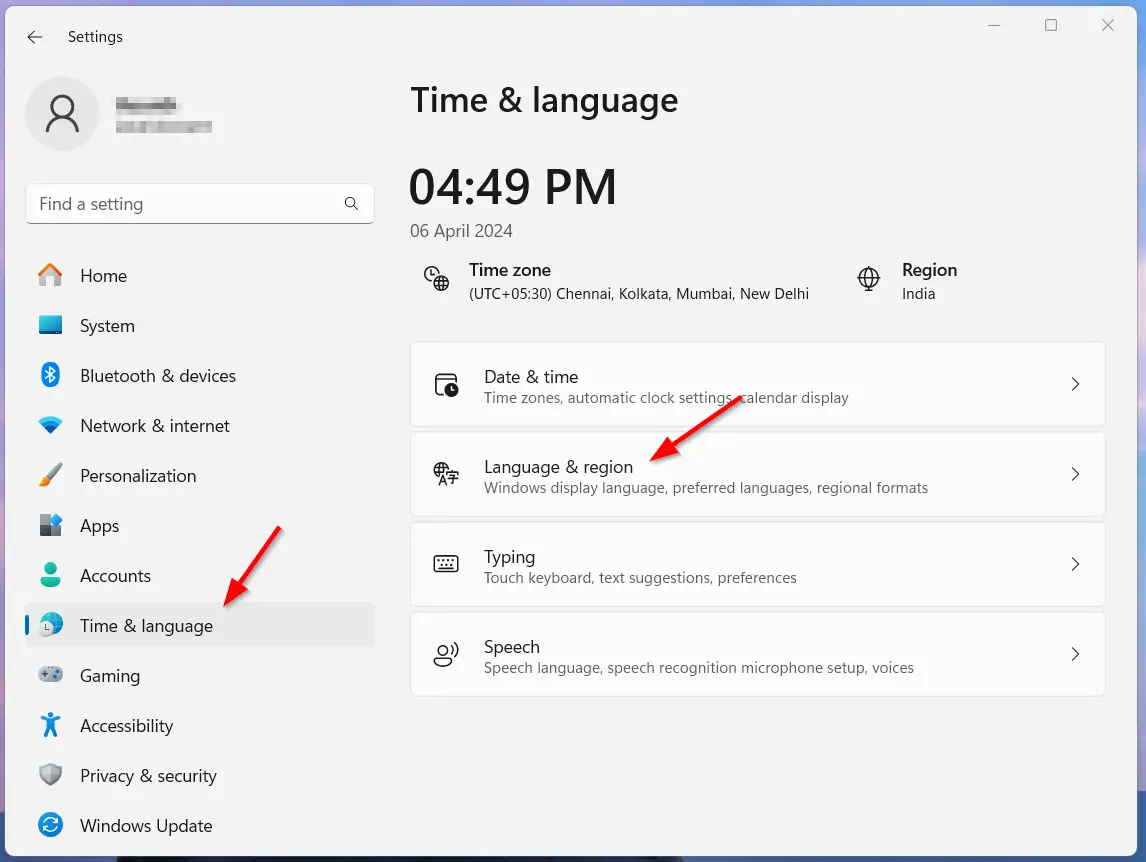
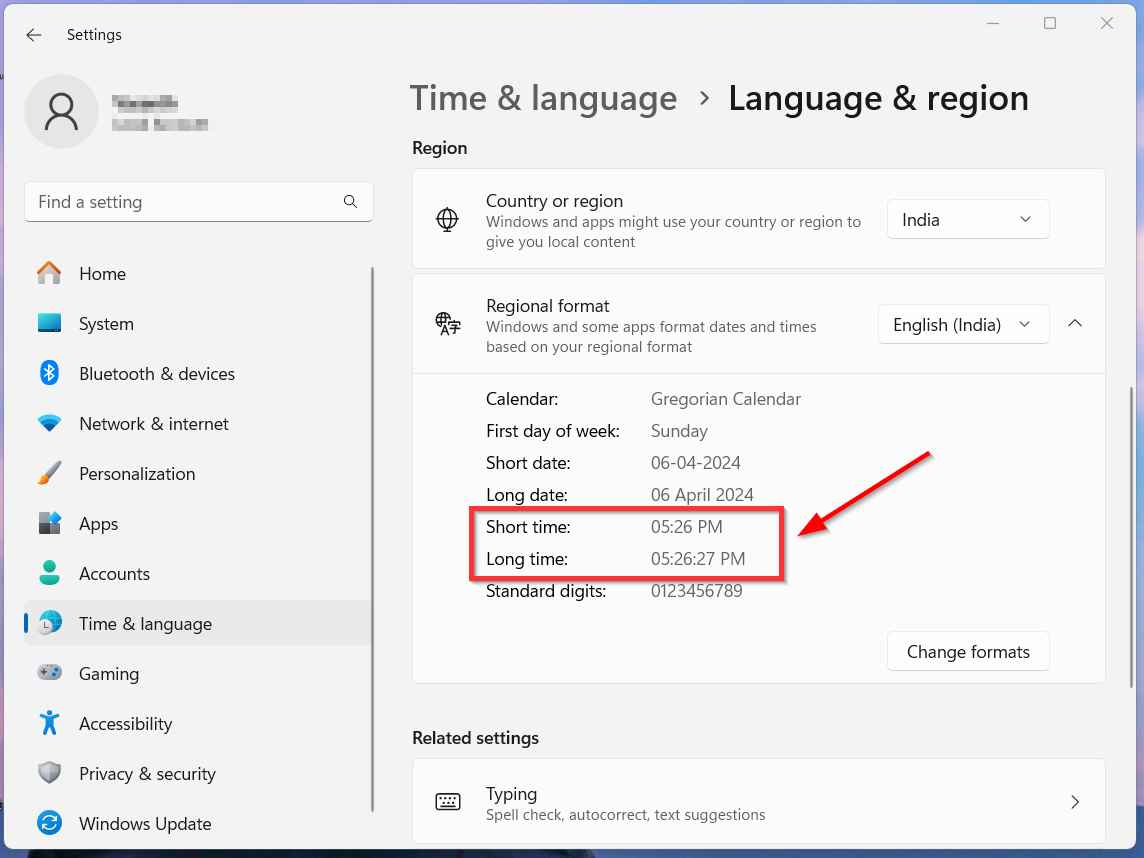
Step 2: On Settings, Navigate to Time & Language Options, and click on the Language & Region Option.
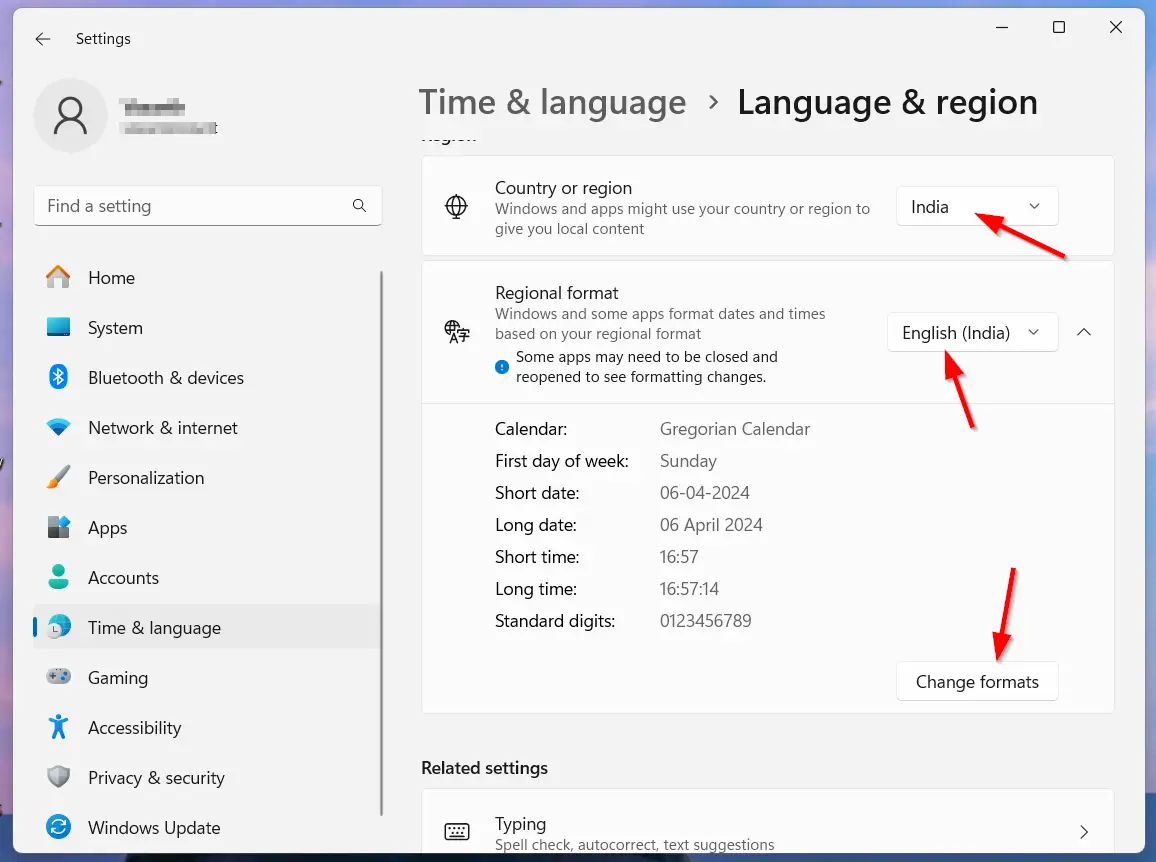
Step 3: On the Language & Region Window, Scroll Down to the Region Section and Set the Region Format as per your Living Region.
For Example, If You’re an Indian then Choose English(India).
Step 4: After Setting the Region Format, Click the Drop Down Icon and Press the Change Formats Button.
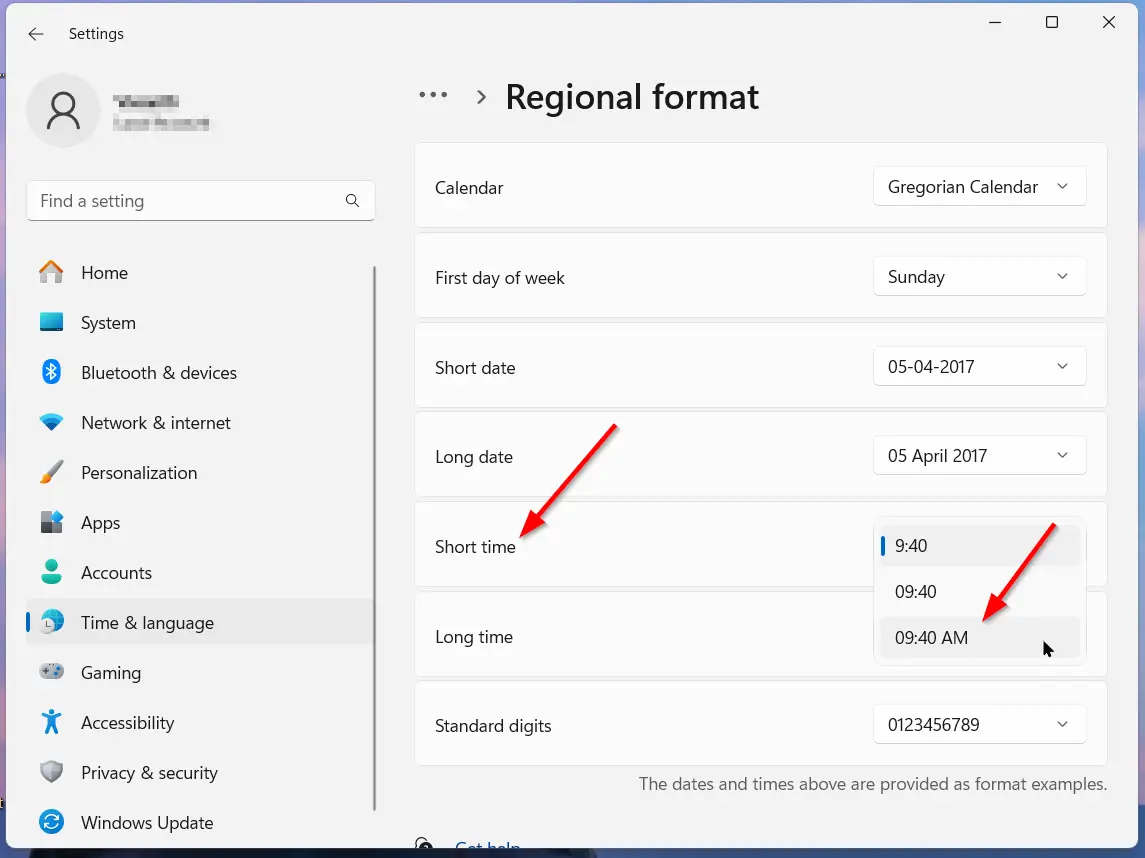
Step 5: On the Regional Format Window, Scroll Down to Short Time Option & Click on the Short Time Drop Down, and Choose the Option As Per Your Need.
*Note: If you Want to Change the hour format to 12 hours, You Need to select the option that carries “AM” at the end, for example, 9:40 AM.
If You Want the 12-hour clock, Choose the 09:40 AM (or) 9:40 AM Option.
If You Want the 24-hour clock, Choose the 09:40 (or) 9:40 Option.
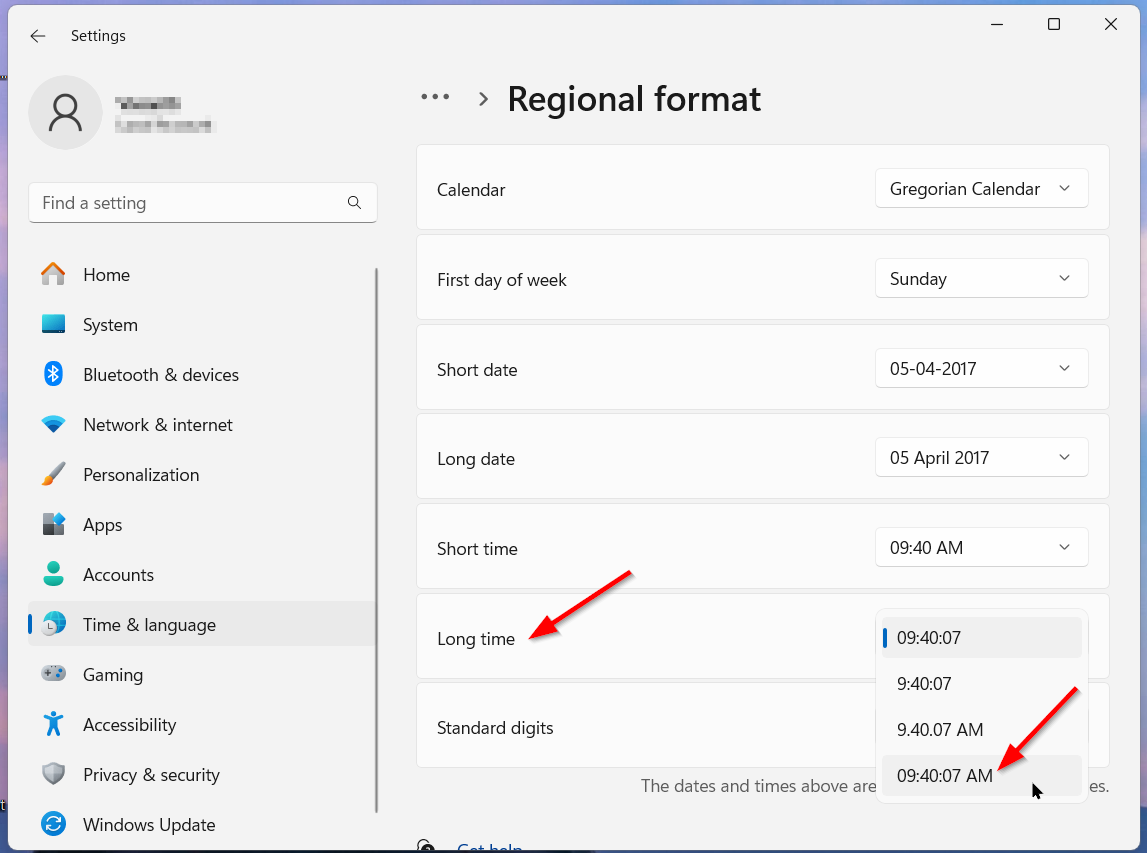
Step 6: Follow the Same Step for a long time also. Now You Need to Change the Long-Time Option & Click on the Short Time Drop Down, and Choose the Option As Per Your Need.
If You Want the 12-hour clock, Choose the 09:40:07 AM (or) 9:40:07 AM Option.
If You Want the 24-hour clock, Choose the 09:40:07(or) 9:40:07 Option.
*Note: The Short Time Shows the Hour and Minutes. The Long time is also the same as the short time but also shows seconds along with the hour and minute.
Step 7: After Changing the Short time & Long Time, You Can See the Time Format Changes as per the option you’ve chosen.
Most Popular: How to Remove/Delete Your Site from Ezoic Network?
For Windows 10,8,7 Users
Method 1: Change the Time format Using the Clock and Region Options in the Control Panel
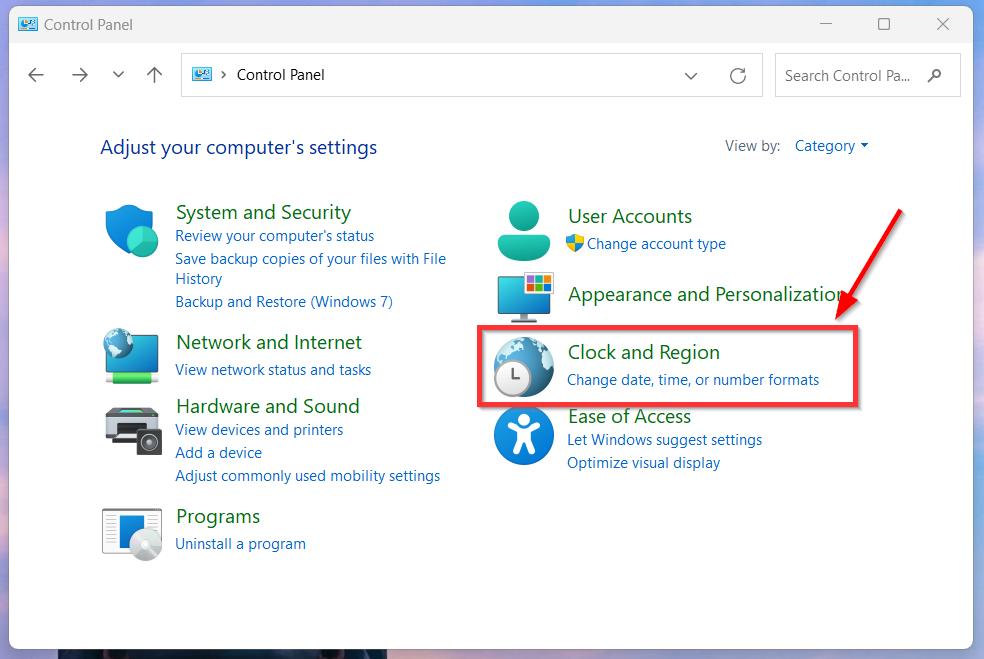
Step 1: First of All, Open the Control Panel & Look for Clock and Region, and Click on it.
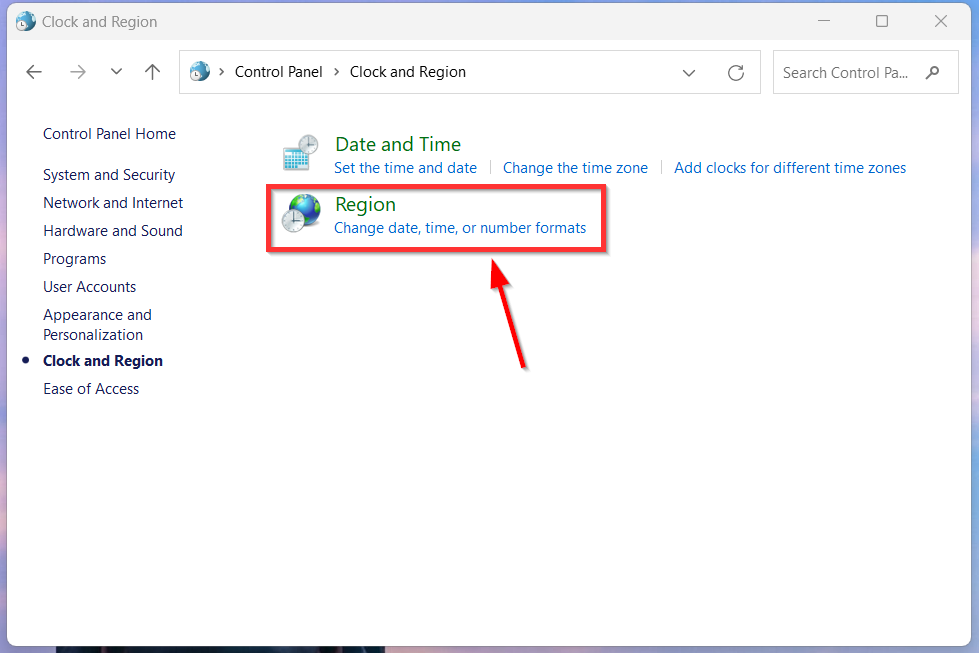
Step 2: On the Clock & Region Window, You Can See Two options. You Need to Click on the Region option (or) Click on the Change Date, Time, or Number Formats. A New Region Window Will Open.
Step 3: Under Region, You Can See the Format Option. Set the Format as per your Living Region.
For Example, If You’re an Indian, then Choose English(India).
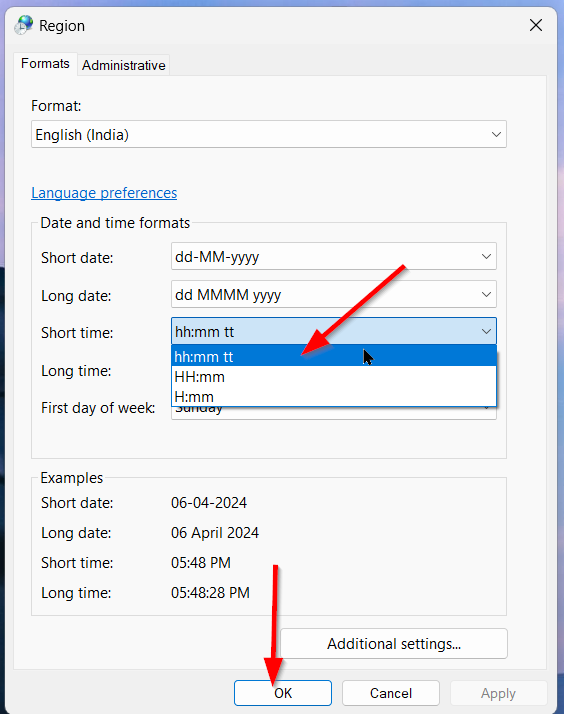
Step 4: Under the Date and Time Formats Section, You Can See the Short Time Option. Just Click on it and Choose the Option As Per Your Need.
If You Want the 12-hour clock, Choose hh:mm tt Option.
If You Want the 24-hour clock, Choose H:mm (or) HH:mm Option.
Notation Meaning
h – hour, m- minute, s – second (long time only) , tt – A.M or P.M
h/H – 12/24 hour
hh, mm, ss – Display Leading Zero
h, m, s – Do Not Display Leading Zero
Step 5: After You Change the Short time,Press the Apply Button and You Can See the Time Format Changes as per the option you’ve chosen.
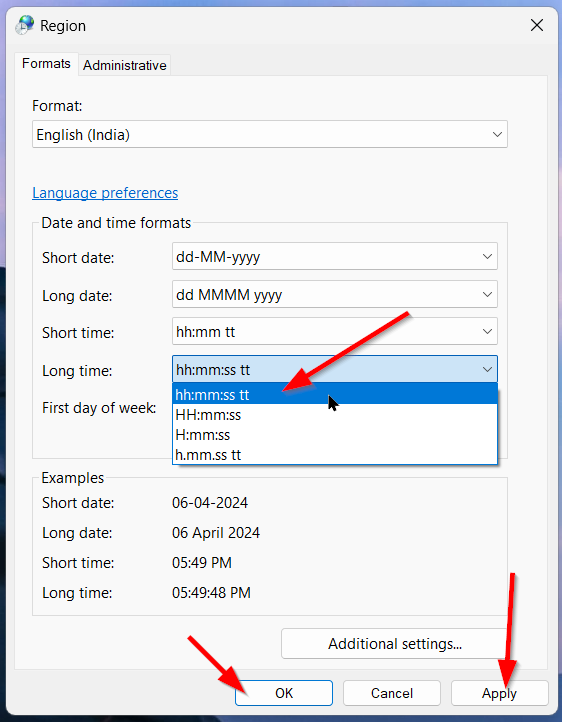
Step 6: Follow the Same Step for a long time also. Now You Need to Change the Long-Time Option & Click on the Long-Time Drop Down, and Choose the Option As Per Your Need.
If You Want the 12-hour clock, Choose the hh:mm:ss tt (or) h:mm:ss tt Option.
If You Want the 24-hour clock, Choose the HH:mm:ss (or) H:mm:ss Option.
Step 7: After Changing the Short & Long time, Press the Apply Button and You Can See the Time Format Changes as per the option you’ve chosen.
Method 2: Change the Time format Using the Date and Time Options in the Control Panel
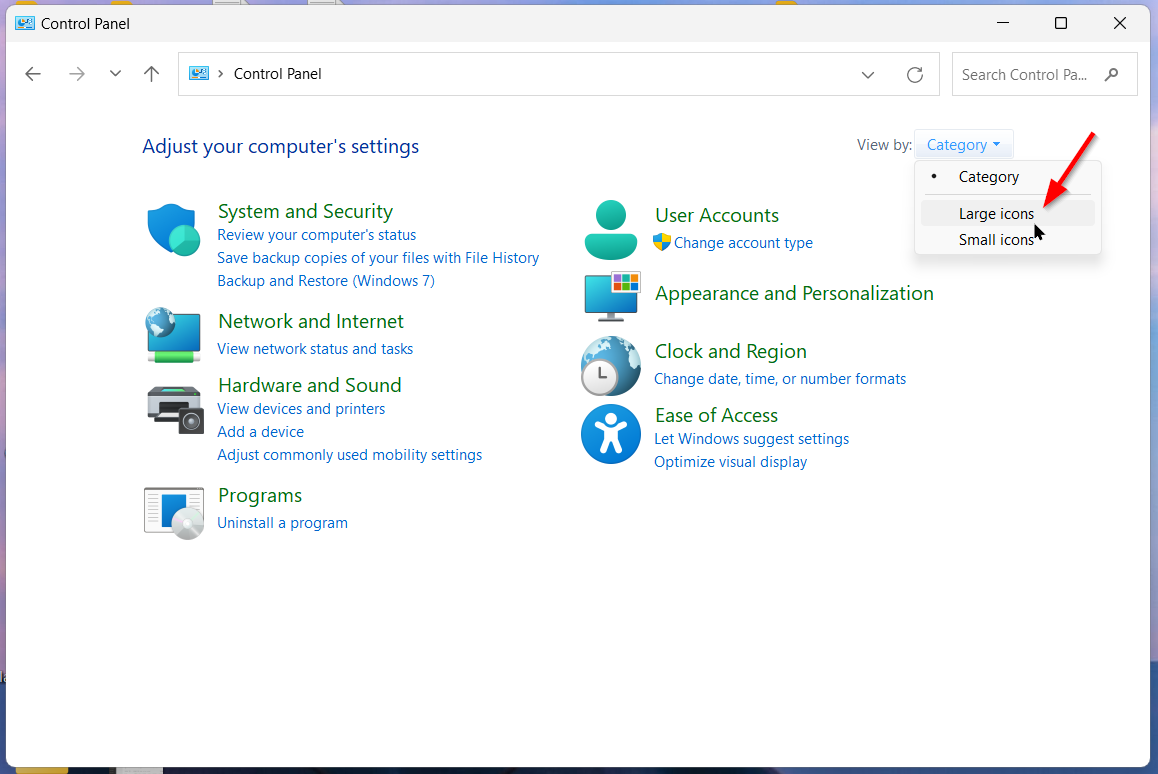
Step 1: Open the Control Panel & Click on the View By Option and Select Large Icons in the Dropdown Menu.
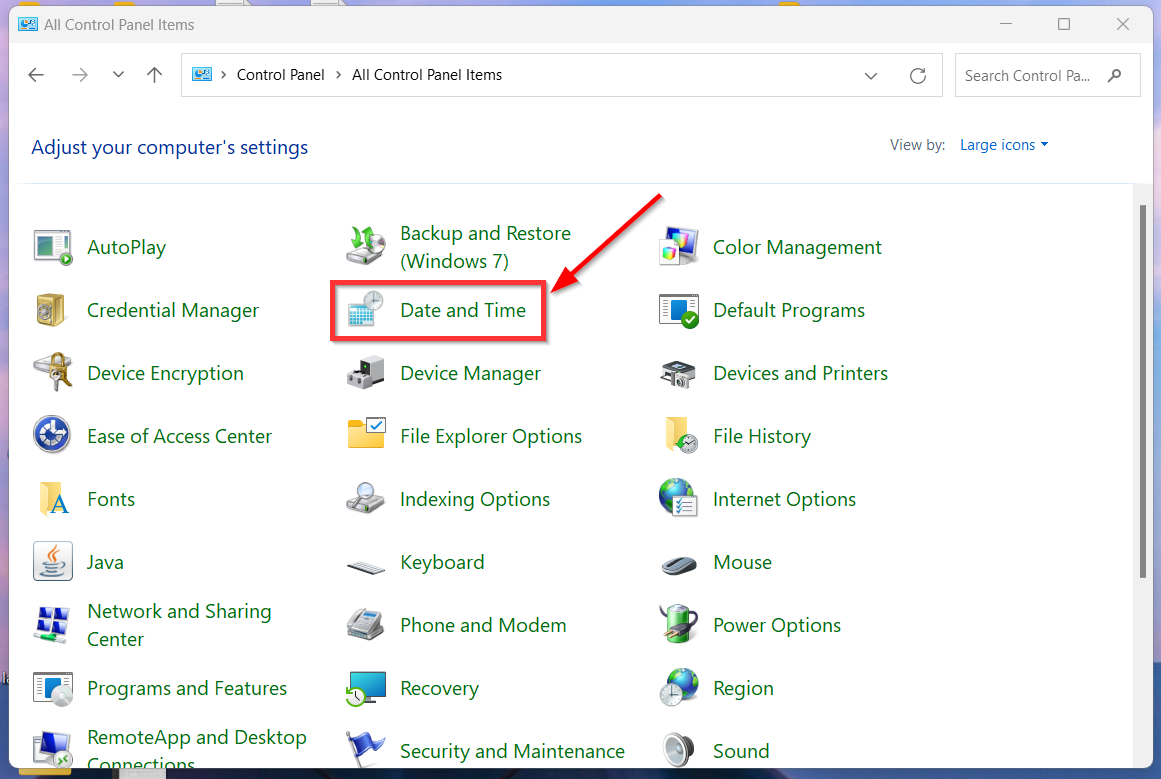
Step 2: You Will See the List of Options. Now You Need to Click on the Date and Time option.
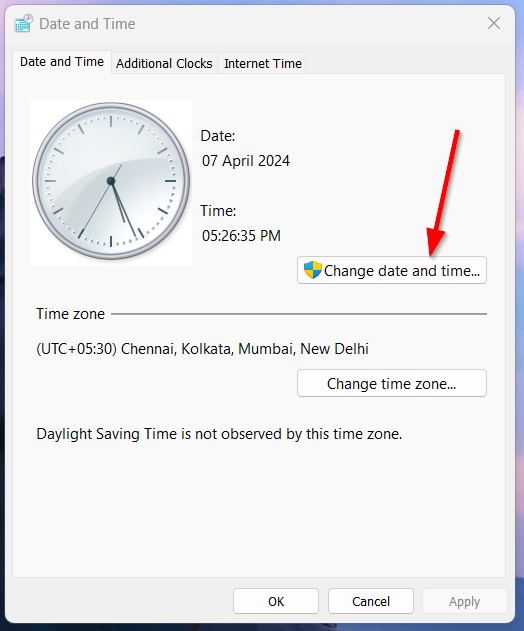
Step 3: A New Date and Time Window Will Appear, Just Click the Change Date and Time Option.
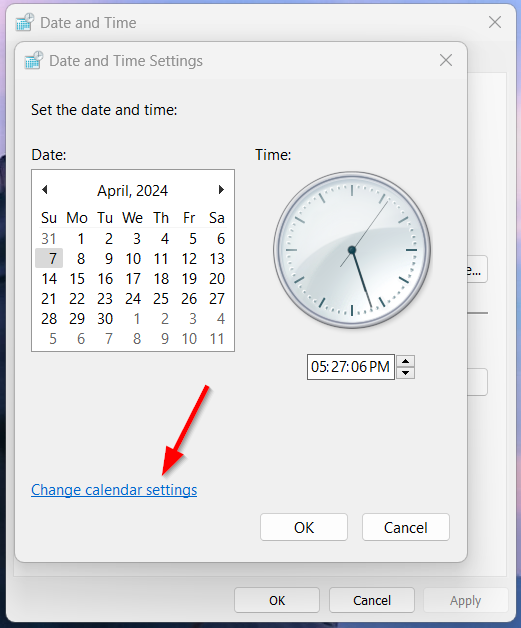
Step 4: Under the Date and Time Settings, Click the Change Calendar Settings Option.
Step 5: Now Follow the Same Steps (Step 4- Step 7) Mentioned in the Method 1.
Short Time
For a 12-hour clock, Choose hh:mm tt Option.
For a 24-hour clock, Choose H:mm (or) HH:mm Option.
Long Time
For a 12-hour clock, Choose the hh:mm:ss tt (or) h:mm:ss tt Option.
For a 24-hour clock, Choose the HH:mm:ss (or) H:mm:ss Option.
Step 6: After Changing the Short Time and Long Time, Press the Apply Button and then Click OK.
Method 3: Change the Time format Using the Command Prompt
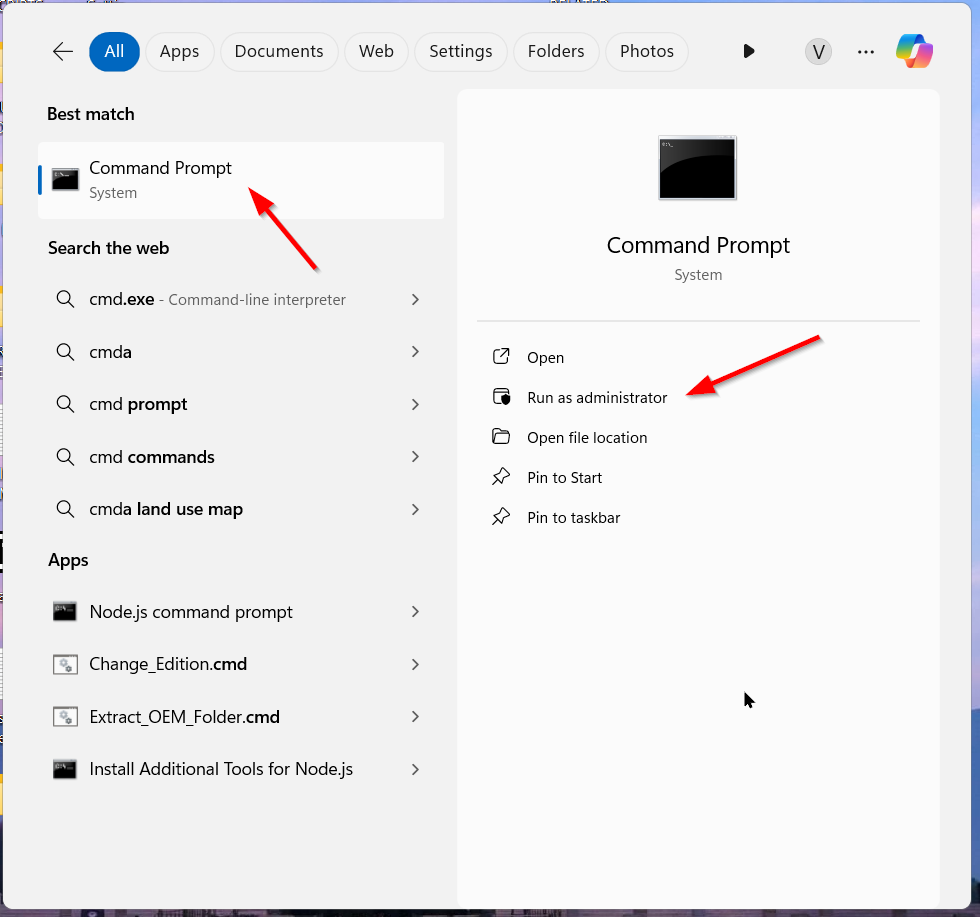
Step 1: Open the Command Prompt. To Open the Command Prompt, Click on the Start button, type cmd, & Right Click on it & Run it as administrator.
Step 2: To Change the Time Format using the Command Prompt, You need the following Basic command.
time HH:MM:SS AM/PM
time HH:MM:SS AM/PM – The Basic / Default Command for Changing the Time Format
IMPORTANT NOTE
This is the basic Command. So, You Need to Edit the HH and MM As Per Your Need.
Here HH is the hour, MM is the minute, and SS is the second.
AM/PM – For 12 Hour Format, You Need to Mention AM/PM in the Command. For 24 Hour Format, You Don’t Need to Mention AM/PM.
Step 3: In the Command Prompt window, You need to Type the following command if you want 12-hour time format.
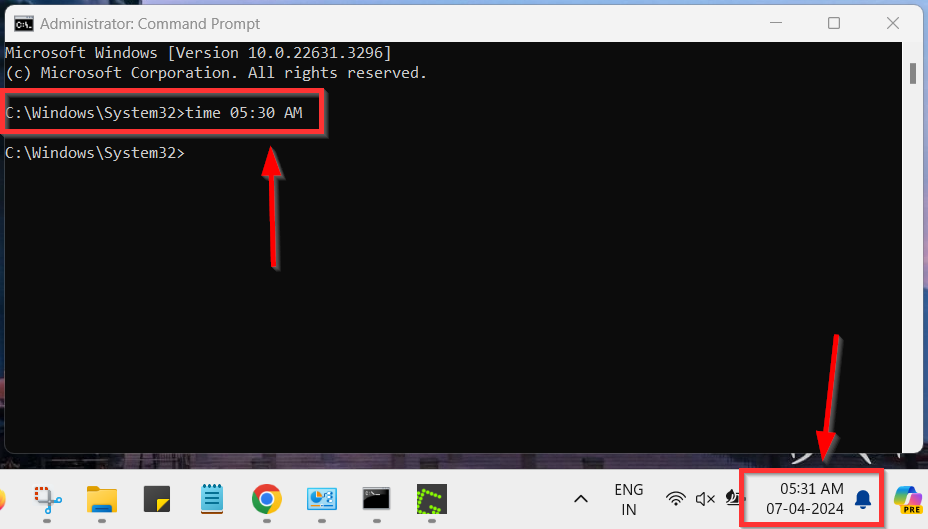
For example, to change the time to 05:30 AM, Just Type the following command in the command prompt and Press Enter.
time 05:30 AM
For example, to change the time to 05:30 PM, Just Type the following command in the command prompt and Press Enter.
time 05:30 PM

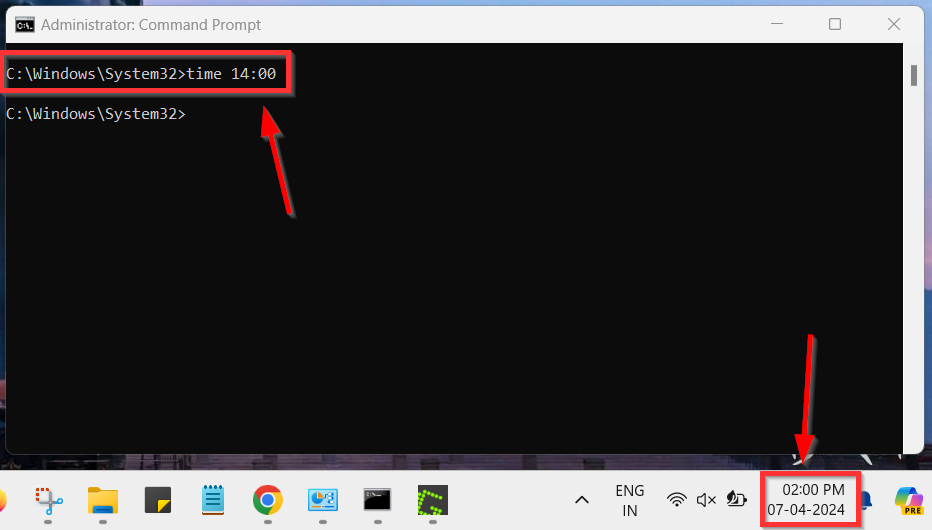
Step 4: For 24 Hour Time Format, You need to Type the following command.
time 14:00
Give Your Reviews / Reactions about this Post and Leave Comments, Ask Your Doubts, We are here to Help You!