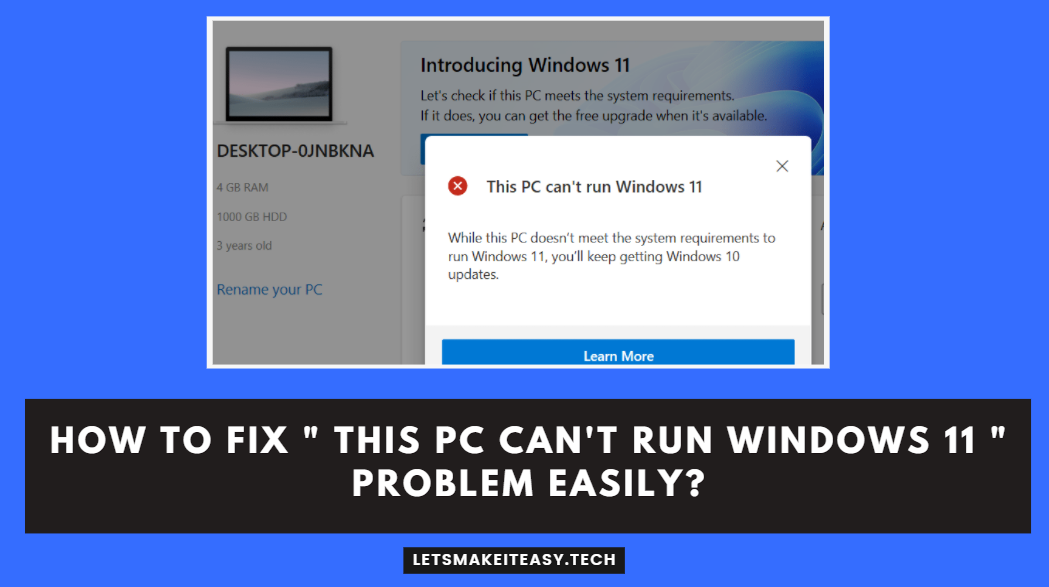
Hi Guys, Today I am Going to Show You How to Fix the “This PC Can’t Run Windows 11” Problem Easily?
If You’re Looking for a solution for “How to Fix This PC Can’t Run Windows 11?” (or) “How to Bypass This PC Can’t Run in Windows 11?”. Don’t Worry, You are at the Right Place to Get Your Answers & Solve the Issue/Error.
Windows 11 is the latest Windows Operating System from Microsoft. It was officially Got Released on 5 October 2021. Microsoft provides Windows 11 as a free upgrade to Eligible Windows 10 users. Minimum System Requirements for installing Windows 11 are Trusted Platform Module (TPM) version 2.0 and 1 gigahertz (GHz) or faster with 2 or more cores on a compatible 64-bit processor, 4GB of RAM, and 64GB of storage. It also requires a DirectX 12 compatible graphics card and a display with a resolution of 720p or higher. Windows 11 Offers a modern and user-friendly experience and Provides Improved performances in gaming, and productivity. If You want to Install Windows 11, then you can download it from the official website. (or) You can Download & Install it through the free upgrade option too. To Check if your PC is available for the free upgrade, You can use the PC Health Check App which is available on the official Windows site. If You are Using a PC that is not supported then you may face the error “This PC Can’t Run Windows 11. This PC doesn’t meet the Minimum System Requirements”.

This Error “This PC Can’t Run Windows 11” usually occurs when your system doesn’t meet the minimum requirements. This Error May also Happen when the Trusted Platform Module (TPM) & Secure Boot Options are Turned Off/Disabled by Default. So, Enabling these Options would fix the issues easily. For a PC that doesn’t have the tpm features and also not meets the system requirements, then you may need to bypass the System Requirements (TPM, Secure boot Options, RAM) to Install Windows 11. There are Several Methods that are available to bypass the Windows 11 Requirements. Also, Note that Microsoft Mentioned that Installing Windows 11 on an Unsupported PC May Result in compatibility issues. And also, your PC won’t receive any official updates & Damages that happen to your PC will not come under the manufacturer’s warranty. So, If you want to install the windows 11 on an unsupported PC then You need to follow our tutorial carefully.
Check Out This: How to Fix “Premiere Pro Crashes when clicking Export Media” Problem in Adobe Premiere Pro?
Hi Guys, I am Going to tell you How to Fix “This PC can’t run Windows 11” Problem Easily?
Step 1: Download the Microsoft Official PC Health Check app to Check if your PC meets the Basic Requirements to run Windows 11.
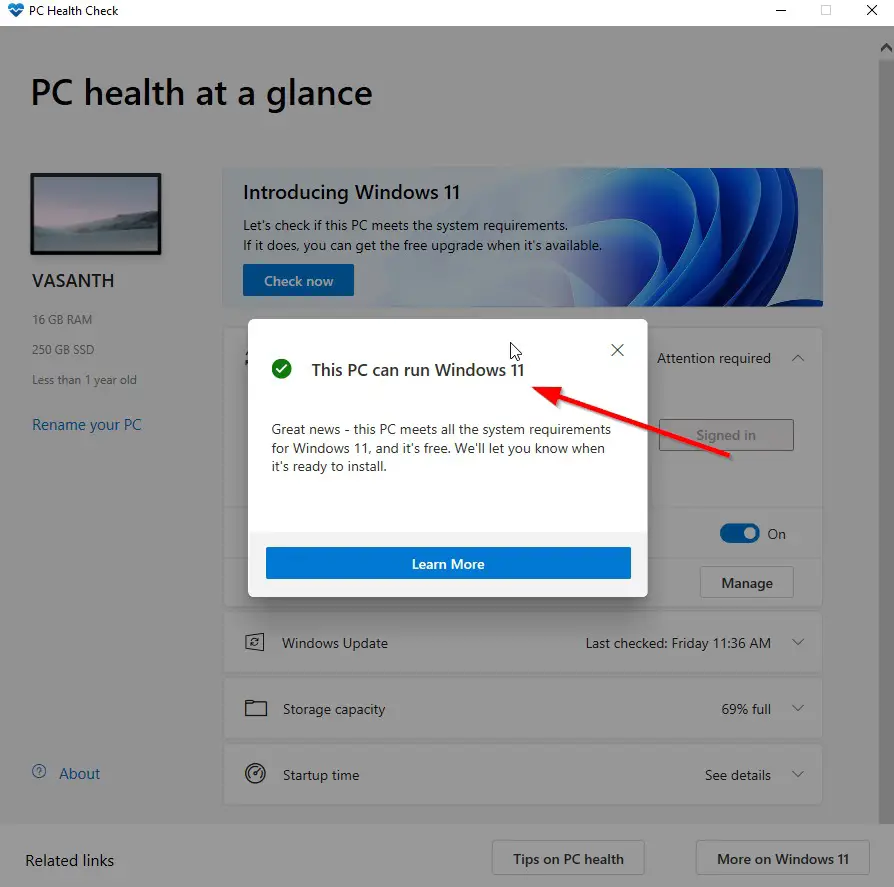
Step 2: Run the Microsoft Official PC Health Check app and Press the Check Now Button.
If You Get the “This PC Can Run Windows 11” Message, You’re Ready to Upgrade When Windows 11 Free Update is Available.
Most of the Users Who Get this error “This PC can’t run Windows 11” Should Follow the Following Tutorials.
How to Check TPM status in Windows 10,11?
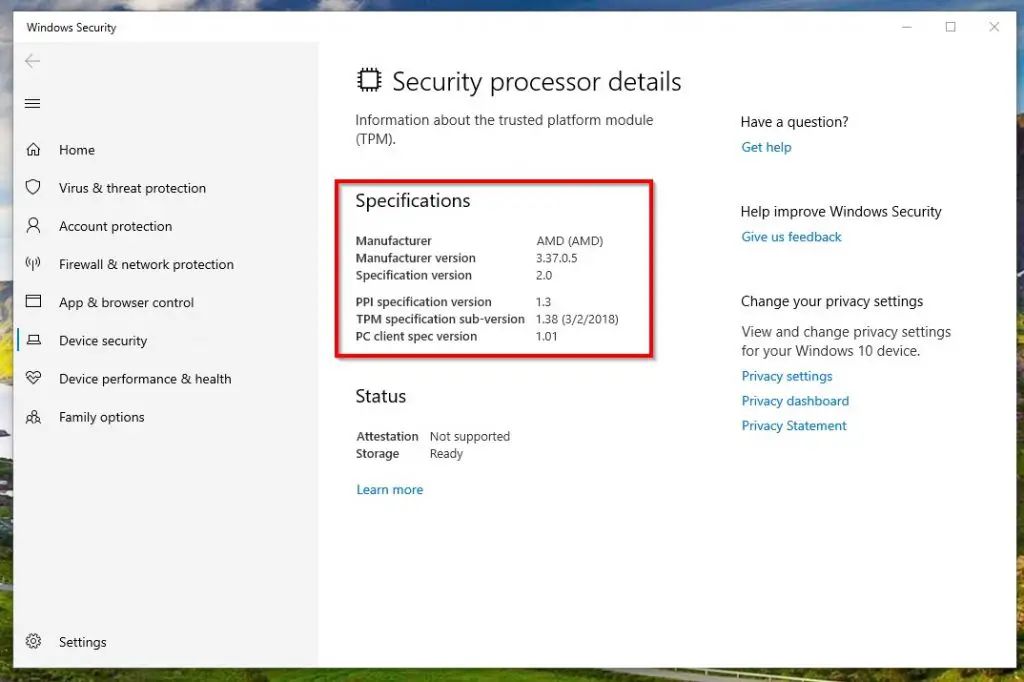
Step 1: First of all, Just Type tpm in Windows Search Bar (or) Open the Run Program and Type tpm.msc and Hit Enter. You can also Use the Check your Security Processor Details which Comes Under Device Security.
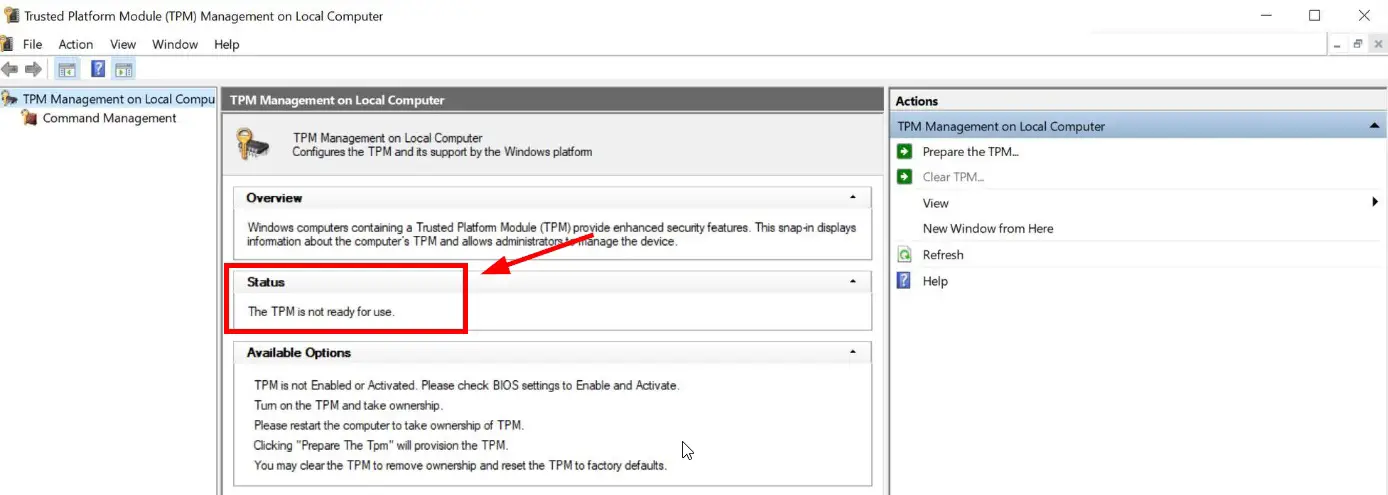
Step 2: A Trusted Platform Module (TPM) Windows Will Appear. Now look for the Status of the TPM Whether it is Says “Ready To Use or Not.”
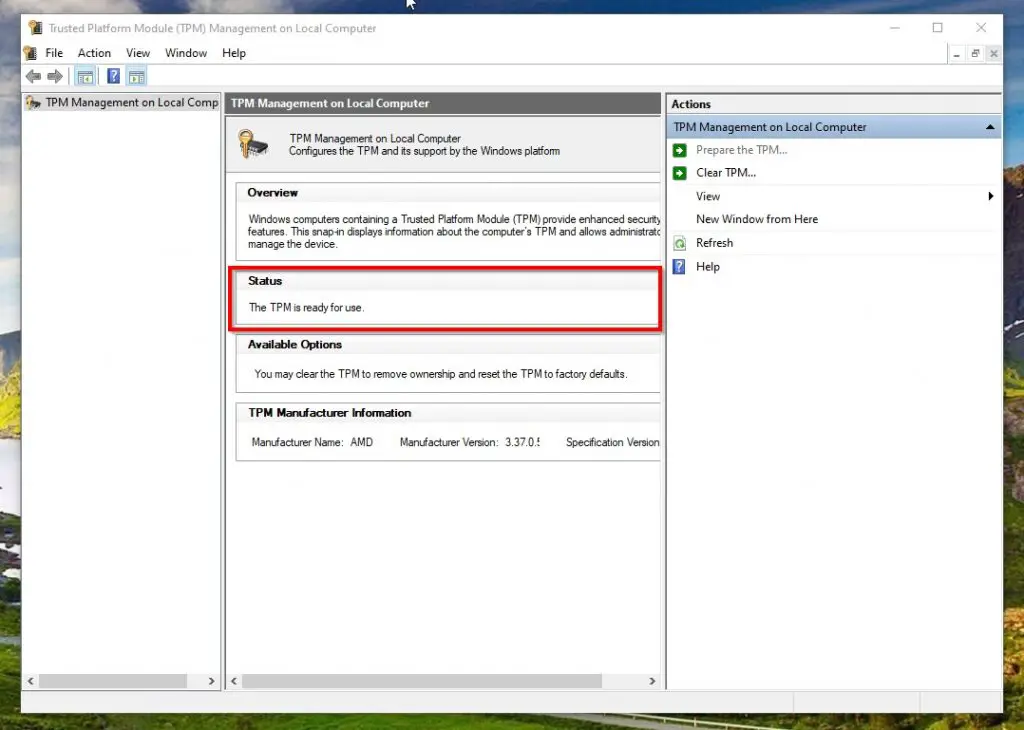
If it Says Ready to Use – It is Enabled Already (By Default)
If it says TPM can not be found or is Not Ready – Then You have to Enable it Manually.
Method 1: Enabling the Trusted Platform Module (TPM) v2.0 & Secure Boot If it is Disabled
Step 1: First of all You Need to Restart the PC and Enter the Boot Menu By Pressing the Boot Key.
* Some of the Boot Keys are Esc, Del, F9, F10, and F12.
Step 2: On BIOS Settings Window, Now You need to look for security settings and Navigate to the Security Tab in BIOS Settings.
Step 3: Now You See the option to change the TPM status, So, Just Change TPM Device Status From Hidden To Available.
Step 4: By Default, the TPM State Will be Disabled, So you may need to Enable the TPM State.
Step 5: Just Save the Changes on BIOS Settings and Exit the Boot Menu.
*Important Note – You Cannot Find the Exact TPM Word in BIOS. Since AMD and Intel Use Different Terms for TPM.
For AMD Users – AMD fTPM
For Intel Users – Intel Platform Trust Technology (PTT)
How to Enable TPM v2.0 in Bios For Different Motherboards?
Some of the Motherboards were listed Below,
1. Gigabyte A320M HD2- You Can Find TPM Option (Intel Platform Trust Technology (IPTT) or AMD CPU fTPM) Under the Peripherals Option In BIOS.
Just Enable the TPM.
2. Gigabyte B550 Aorus PRO – Choose Advanced Mode and Navigate to Settings Under Settings You’ll See the Miscellaneous Option. You Can Find
TPM Option (Intel Platform Trust Technology (IPTT) or AMD CPU fTPM).
Just Enable the TPM.
3. Gigabyte Z590 AORUS Pro – Choose Advanced Mode and Navigate to Settings Under Settings You’ll See the Miscellaneous Option. You Can Find
TPM Option (Intel Platform Trust Technology (IPTT) or AMD CPU fTPM.
Just Enable the TPM.
4. Asus B550 Motherboards – You Can Find TPM Option (Intel Platform Trust Technology (IPTT) or AMD CPU fTPM Under Advanced Tab In BIOS.
Just Enable the TPM.
5.MSI MPG Z490 GAMING PLUS – Navigate to Settings and Select Trusted Computing Just Enable the Security Device Support.
6. Asrock B450 Steel Legend – Navigate to Advanced and Select the CPU Configuration, Click the AMD fTPM Switch and Select the AMD CPU fTPM.
How to Enable Secure Boot Option in Windows 10,11?
*Note- You Also Need to Enable the Secure Boot also for Installing Windows 11.
Step 1: First of all You Need to Restart the PC and Enter the Boot Menu By Pressing the Boot Key.
* Some of the Boot Keys are Esc, Del, F9, F10, and F12.
Step 2: Look for the Boot Option on BIOS Settings & Now You need to Navigate to the Boot Options in BIOS Settings.
Step 2: On the Boot Settings Window, You can See the Secure boot Option.
Step 3: Usually, Most of the time the Secure boot is Disabled, So You Need to Enable the Secure boot Option Manually.
Step 4: Now You Need to Ensure whether the TPM & Secure Boot is Enabled or Not. For that, You Need to Log in to Your PC and Check if it is Enabled or not.
Step 5: In Order to check the TPM Feature, You Need to Type TPM in Windows Search Bar (or) Open the Run Program and Type tpm.msc and Hit Enter.
On TPM Management Program, You See the TPM Status, It Says “The TPM is ready to Use.”
You Can Also Use the Security Processor Details from Device Security Settings to Check the TPM Status.
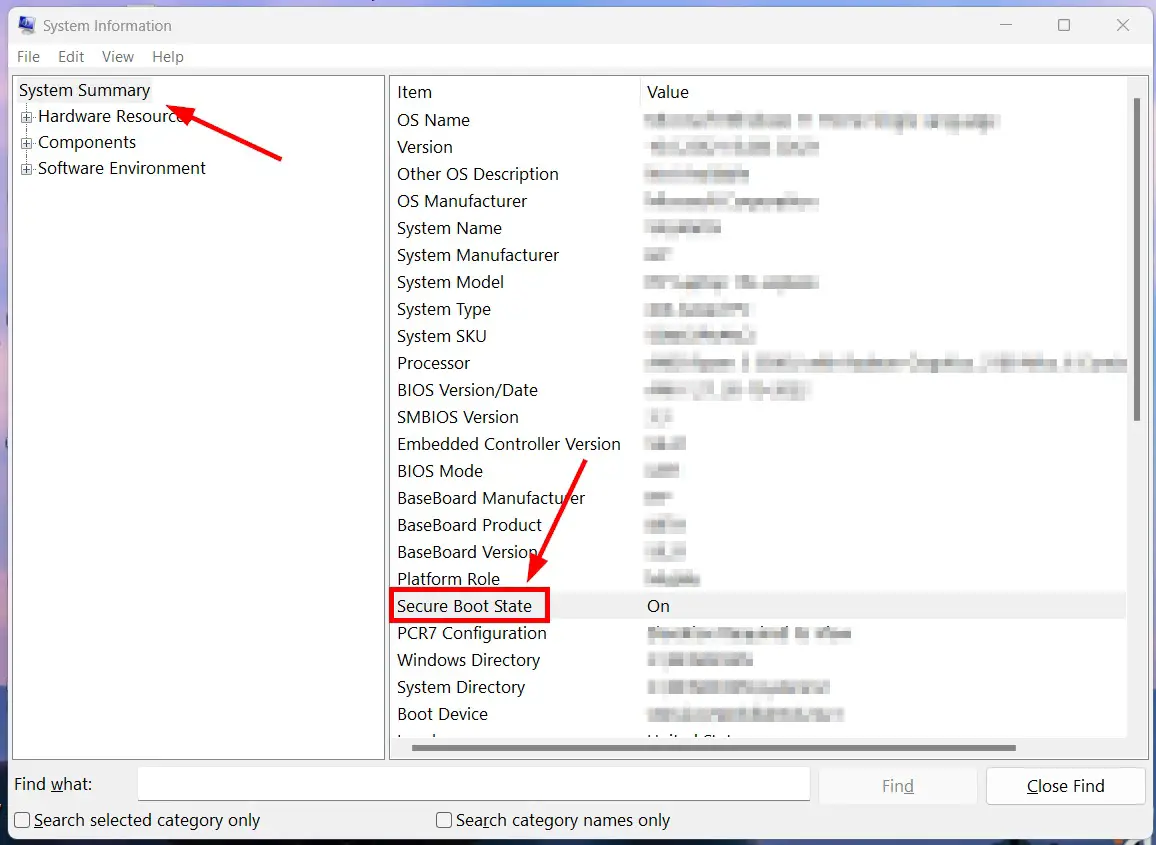
Step 6: To Check the Secure Boot Feature, You Need to Type System Information (or) msinfo32 in Windows Search Bar (or) Open the Run Program & Type msinfo32 & Hit Enter.
Step 7: On System Information Program, Click on the System Summary and Look for the Secure Boot State. If it is On then Secure Boot is Enabled Successfully on your System.
After Enabling TPM and Secure boot, Try Installing the Windows 11 OS.
If Still you cant install then your System Didn’t Meet the Minimum Requirements.For those Who Wants to Install the Windows 11 on their Unsupported PC. You Can Follow the Method 2 – Bypassing Windows 11 System Requirements.
Method 2: Bypassing the Windows 11 Basic System Requirements
How to Install Windows 11 on an Unsupported PC without TPM 2.0?
Solution 1: Bypass Windows 11 TPM requirements Using Official Microsoft Way
Step 1: First of all, Goto Search and Type Registry Editor and Open the Registry Editor (or) Press Windows Key + R to Open the Run Program and Type Regedit & Press Enter.
Step 2: Navigate to the following location given below by Copy-Pasting the address into Registry Location Bar.
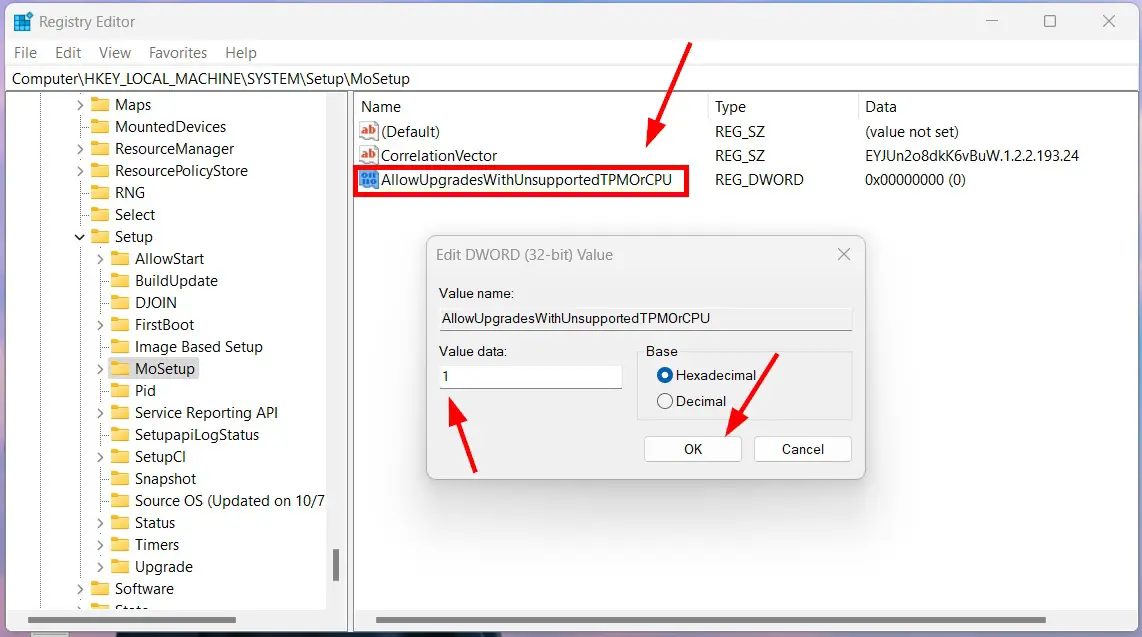
HKEY_LOCAL_MACHINE\SYSTEM\Setup\MoSetup
Step 3: Now You Need to Create a DWORD (32-bit) Value and Name the Value as AllowUpgradesWithUnsupportedTPMOrCPU

Step 3: Now Double Click on the Newly Created Value AllowUpgradesWithUnsupportedTPMOrCPU to Modify or Right Click on the Value Select the Modify Option. and
Step 3: Now Enter “1″ in the Value Data Field and Press OK to Save the Changes. Now Close the Registry Editor and Restart Your PC.
Solution 2: Bypass Windows 11 System Requirements Using Registry Editor
Step 1: First of all, Goto Search and Type Registry Editor and Open the Registry Editor (or) Press Windows Key + R to Open the Run Program and Type Regedit & Press Enter.
Step 2: Navigate to the following location given below by Copy-Pasting the address into Registry Location Bar.
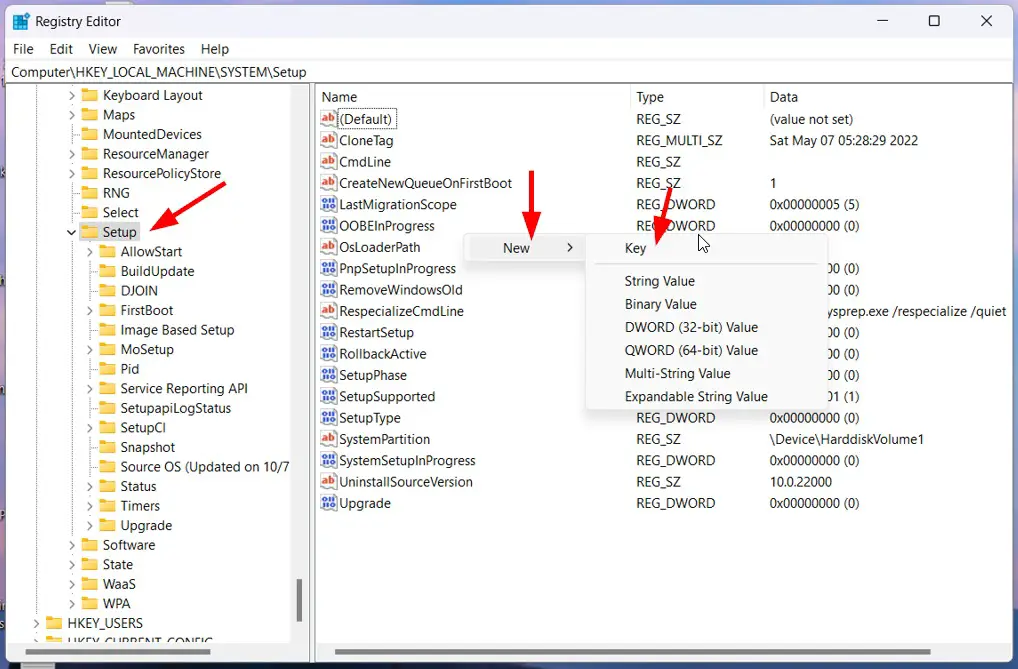
HKEY_LOCAL_MACHINE\SYSTEM\Setup
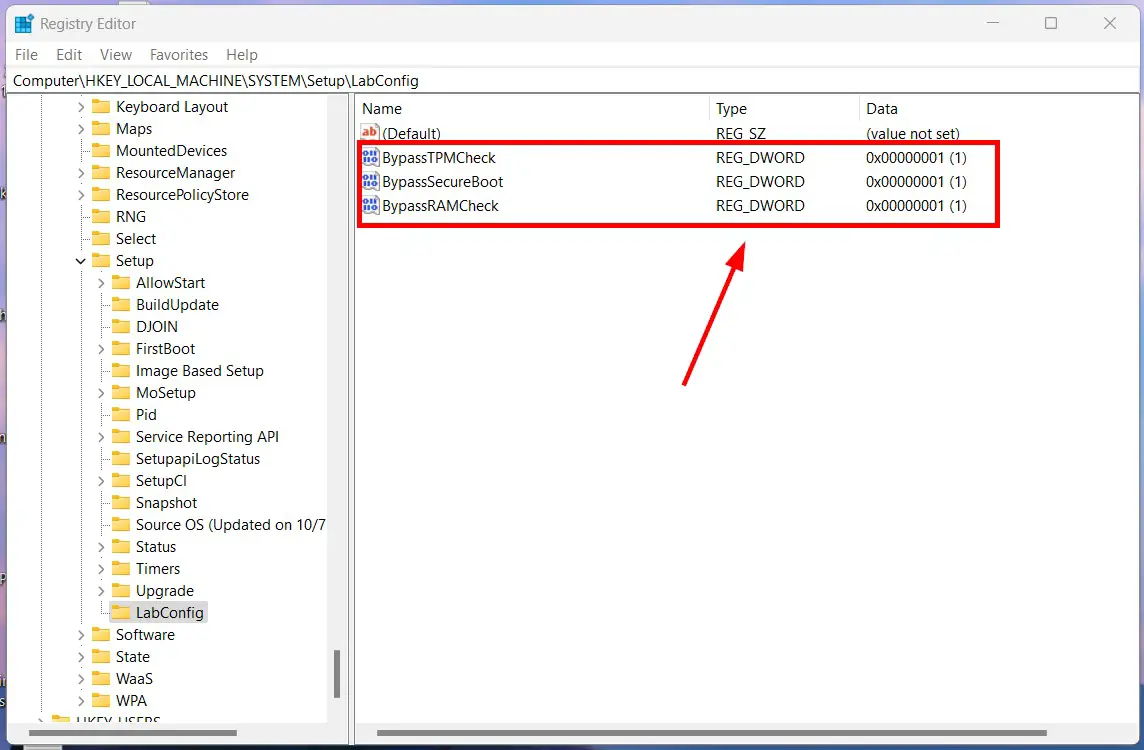
Step 3: Now You Need to Create a New Key and Name the Key as LabConfig.
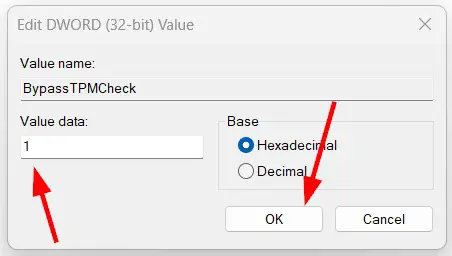
Step 4: To Bypass the TPM Requirements, Just Click on the LabConfig Key & Now You Need to Create a DWORD (32-bit) Value and Name the Value as BypassTPMCheck & Double Click on it & Enter “1″ in Value Data Field, and Press OK.
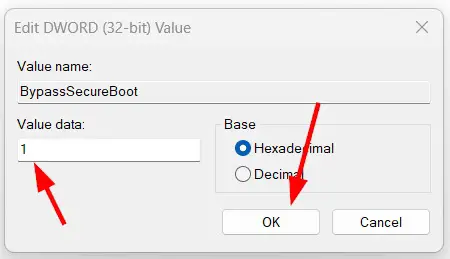
Step 5: To Bypass the SecureBoot Requirements, You Need to Create a DWORD (32-bit) Value & Name the Value as BypassSecureBoot & Double Click on it & Enter “1″ in Value Data Field, and Press OK.
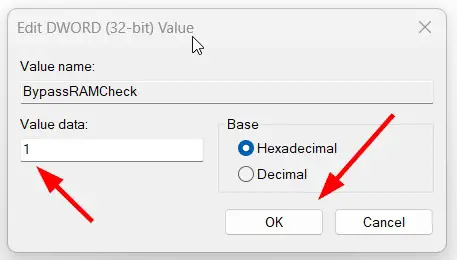
Step 6: To Bypass the RAM Requirements, You Need to Create a DWORD (32-bit) Value & Name the Value as BypassRAMCheck & Double Click on it & Enter “1” in Value Data Field, and Press OK.
Step 6: Now You Need to Check all three Values are set to “1”. Close the Registry Editor and Restart your PC.
Solution 3: Bypass Windows 11 System Requirements Using AveYo’s Media Creation Tool Github
Step 1: First of all, Goto AveYo’s Media Creation Tool Github Page Using the Link Given Below.
Link – AveYo’s Media Creation Tool
Step 2: On AveYo’s GitHub Page, You see the Source Code of Skip_TPM_Check_on_Dynamic_Update.cmd Which Will Bypass the System Requirements Automatically.
Step 3: Now Open Notepad and Copy Paste the Full Source Code and Save the file as Windows 11 Skip TPM Check.cmd
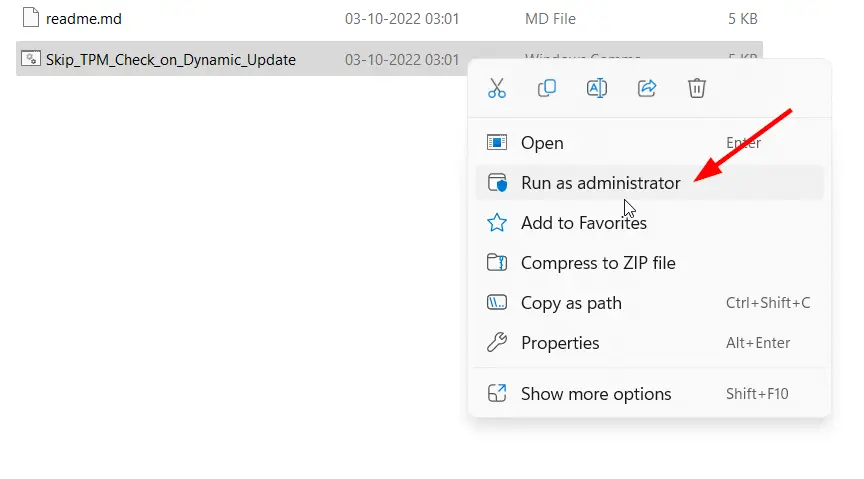
Step 4: Now Run the Windows 11 Skip TPM Check.cmd File and Press Yes If User Account Control Windows Prompts.
So, Now You Can see the message “Skip TPM on Dynamic Update is installed”.
If You Want to Remove this Script, then Run the Windows 11 Skip TPM Check.cmd file again to Remove it.
That’s All About this Post. Give Your Reviews / Reactions about this Post and Leave Comments, Ask Your Doubts, We are here to Help You!