Hi Guys, Today I am Going to Show You How to Enable Trusted Platform Module (TPM) v2.0 in Bios in Gigabyte Motherboard?
Are you Looking for the Commonly Searched Term “How do I enable TPM in the BIOS?” (or) “How to Enable TPM 2.0 in Gigabyte Motherboards?”.
Let’s See about it.
A Trusted Platform Module (TPM) is a security chip that is embedded in most systems to provide a hardware-based tamper-resistant environment to generate, store, and protect encryption keys. On Windows 10 & 11, you Need TPM Module for using the Bitlocker Feature. BitLocker is used to encrypt and decrypt the hard disk. Microsoft announced that Every PC Must Definitely have a Trusted Platform Module 2.0 as minimum Requirements for Installing Their New Windows 11 Operating System. Microsoft Explains Why TPM is So Important for Every PC.Microsoft States that Having a TPM will increase security against firmware and ransomware attacks. Trusted Platform Module is mainly used for Windows Defender, Protecting Software Licenses Protections, and Online Game Cheating Prevention.
Usually, the Trusted Platform Module is a separate chip located on the motherboard. There is no requirement for a separate chip for Manufacturers like INTEL or AMD Because the TPM 20 Standard allows Manufacturers to Build the TPM which is capable into their chipsets. TPM has been around for over 20 years and has been part of PCs since around 2005. In 2016, TPM has got its newer version TPM 2.0 which is the standard for new PCs. If Your PC Meets the Windows 11 System Requirements then there will be a huge chance that it supports TPM 2.0. If your PC is Too much Older,then there will No TPM or It has an Older 1.2 Version.Manufacturers Ships Motherboards with TPM Options Disabled by default. So, You Need to Enable it manually via Bios. Trusted Platform Module can be Enabled or Disabled From BIOS.
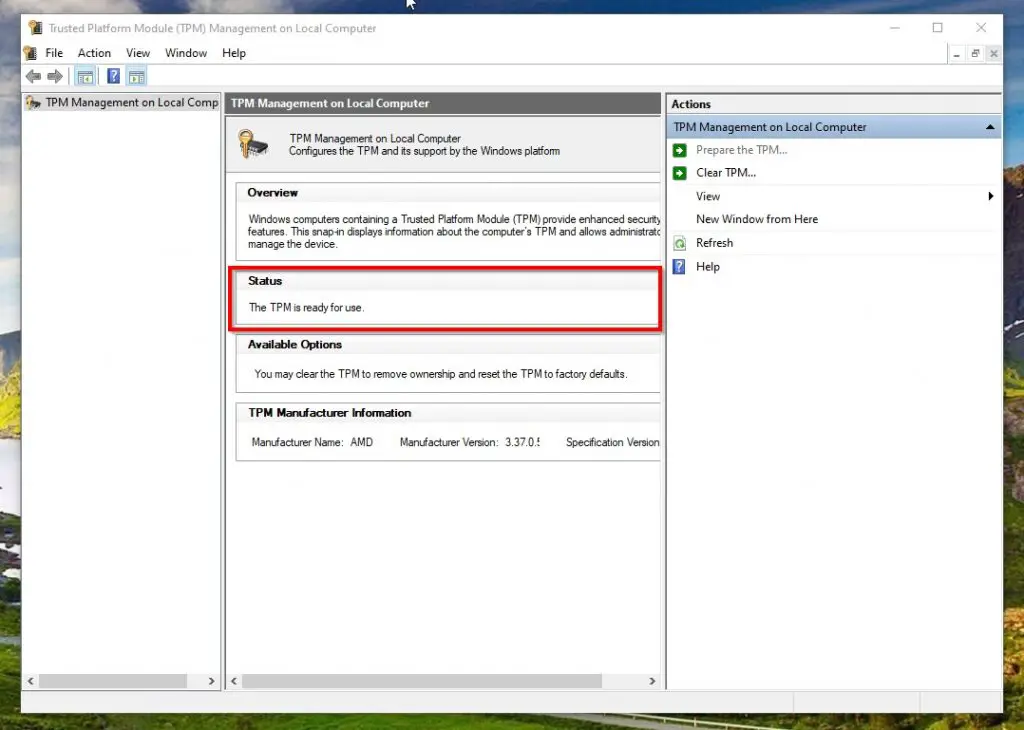
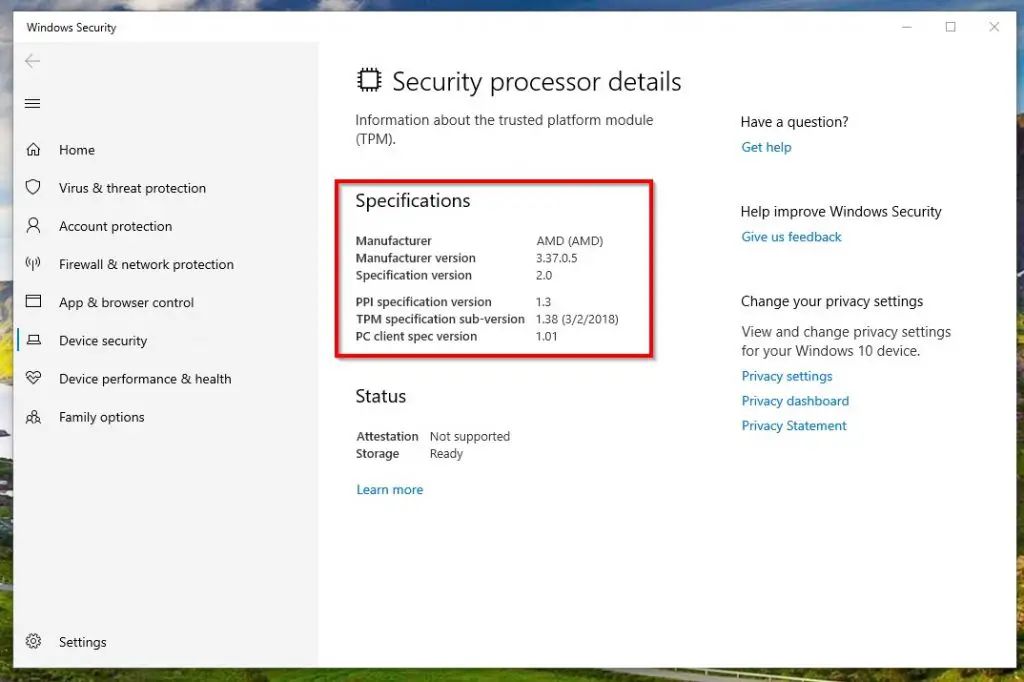
Before Enabling the Trusted Platform Module You Need to Check Whether TPM 2.0 is enabled or not. To Check the TPM 2.0 , You Need to Open the Trusted Platform Module Management either via Search or Run Program. Open Run Program and Type TPM.MSC and press Enter. This will open a TPM Management window. Just Look for Status Options and If you see ‘The TPM is ready for use’ under the Status section, This confirms that TPM 2.0 is already enabled on your system (or) Just Open Settings and Navigate to Privacy & Security and Click on the Windows Security and Under Protection Area, Click on the Device Security and Now You can See this Message stating ‘Your security processor, called the trusted platform module (TPM), is providing additional encryption for your device’. This Ensures that TPM 2.0 is already enabled on your system. After Checking TPM Status, You Can Enable or Disable TPM on Your PC Via Bios.We are here to guide you to explain How to Enable or Disable Trusted Platform Module v2.0 in Bios in Gigabyte Motherboard?
Check Out This: How to Transfer a Domain Easily from One Registrar to Another (In 3 Steps)? | Step-By-Step Domain Transfer Tutorial
Hi Guys, I am Going to tell you How to Enable Trusted Platform Module (TPM) v2.0 in Bios in Gigabyte Motherboard?
For Enabling Trusted Platform Module (TPM) v2.0,
*Important Note – You Cannot Find Exact TPM Word in BIOS.Since AMD and Intel Uses Different Term for TPM.
For AMD Users – AMD fTPM
For Intel Users – Intel Platform Trust Technology (PTT)
Step 1: Restart your Pc and Enter Boot Menu By Pressing the Boot Key.
* Some of the Boot Keys are Esc, Del, F9, F10, F12.
Some of the Gigabyte Motherboards were listed Below,
1.Gigabyte A320M HD2- You Can Find TPM Option (Intel Platform Trust Technology (IPTT) or AMD CPU fTPM) Under the Peripherals Option In BIOS.
Just Enable the TPM.
2.Gigabyte B550 Aorus PRO – Choose Advanced Mode and Navigate to Settings Under Settings You’ll See the Miscellaneous Option. You Can Find
TPM Option (Intel Platform Trust Technology (IPTT) or AMD CPU fTPM).
Just Enable the TPM.
3.Gigabyte Z590 AORUS Pro – Choose Advanced Mode and Navigate to Settings Under Settings You’ll See the Miscellaneous Option. You Can Find
TPM Option (Intel Platform Trust Technology (IPTT) or AMD CPU fTPM.
Just Enable the TPM.
For Enabling Secure Boot,
Step 5: Navigate to the Boot Options in BIOS Settings.
Step 6: Under Boot Options, You’ll See the Secure boot Option.
Step 7: Almost in Many PC the Secure boot is Disabled, Just Enable the Secure boot Option.
Step 8: Log in to Your PC and Check if it is Working Properly or not.
Step 9: Just Type tpm in Windows Search Bar and Check your Security Processor Details.
That’s It! You’re Done Man!
Note – If it Meets the Basic Requirements then you can get a free upgrade when it rolls out.
For More Information on Windows 11 System Requirements & feature-specific Requirements & Feature Deprecation and Removal.
Visit – Microsoft Windows 11 Official Page
That’s All About this Post. Give Your Reviews / Reactions about this Post and Leave Comments, Ask Your Doubts, We are here to Help You!


