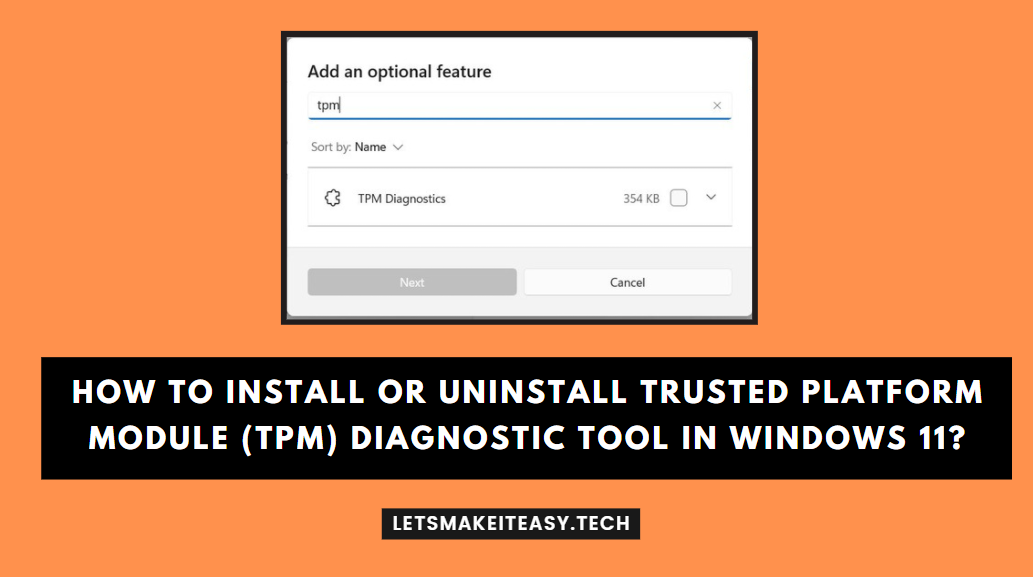
Hi Guys, Today I am Going to Show You How to Install or Uninstall Trusted Platform Module (TPM) Diagnostic Tool in Windows 11?
Are you Looking for the Commonly Searched Term “How to Install Trusted Platform Module (TPM) Diagnostic Tool in Windows 11?” (or) “How to Uninstall Trusted Platform Module (TPM) Diagnostic Tool in Windows 11?”. You are at the Right Place to Get Your Answers & Solve the Issue/Error.
A Trusted Platform Module (TPM) is a security chip that is embedded in most systems to provide a hardware-based tamper-resistant environment to generate, store, and protect encryption keys. On Windows 10 & 11, you Need TPM Module for using the Bitlocker Feature. BitLocker is used to encrypt and decrypt the hard disk. Microsoft announced that Every PC Must Definitely have a Trusted Platform Module 2.0 as minimum Requirements for Installing Their New Windows 11 Operating System. Microsoft Explains Why TPM is So Important for Every PC.Microsoft States that Having a TPM will increase security against firmware and ransomware attacks. Trusted Platform Module is mainly used for Windows Defender, Protecting Software Licenses Protections, and Online Game Cheating Prevention.

Usually, the Trusted Platform Module is a separate chip located on the motherboard. There is no requirement for a separate chip for Manufacturers like INTEL or AMD Because the TPM 20 Standard allows Manufacturers to Build the TPM which is capable into their chipsets. TPM has been around for over 20 years and has been part of PCs since around 2005. In 2016, TPM has got its newer version TPM 2.0 which is the standard for new PCs. If Your PC Meets the Windows 11 System Requirements then there will be a huge chance that it supports TPM 2.0. If your PC is Too much Older,then there will No TPM or It has an Older 1.2 Version.
Some of the Most Important Features and Uses of Trusted Platform Modules are
1. Trusted Platform Module (TPM) is Used to Generate, store, and limit the use of cryptographic keys.
2. Trusted Platform Module (TPM) is also for protecting digital media rights using DRM technology, Preventing software licenses.
3. Trusted Platform Module (TPM) is used for Preventing firmware, ransomware, dictionary, and phishing attacks.
Manufacturers Ships Motherboards with TPM Options Disabled by default. So, You Need to Enable it manually via Bios. In Windows 11, There is a new app called TPM Diagnostic Tool for getting information about TPM. You can Install Trusted Platform Module Diagnostic Tool Using Optional Features (or) You Can Also Use DISM to Install or Uninstall TPM Diagnostic Tool. You can easily Enable or Disable Trusted Platform Module Diagnostic Tool in Windows 11. You should Follow the Guide Given Below.
Let’s See About it.
Check Out This: How to Transfer a Domain Easily from One Registrar to Another (In 3 Steps)? | Step-By-Step Domain Transfer Tutorial
Steps For How to Install or Uninstall Trusted Platform Module (TPM) Diagnostic Tool in Windows 11?
Method 1: Using Optional Features
For Installing Trusted Platform Module Diagnostic Tool
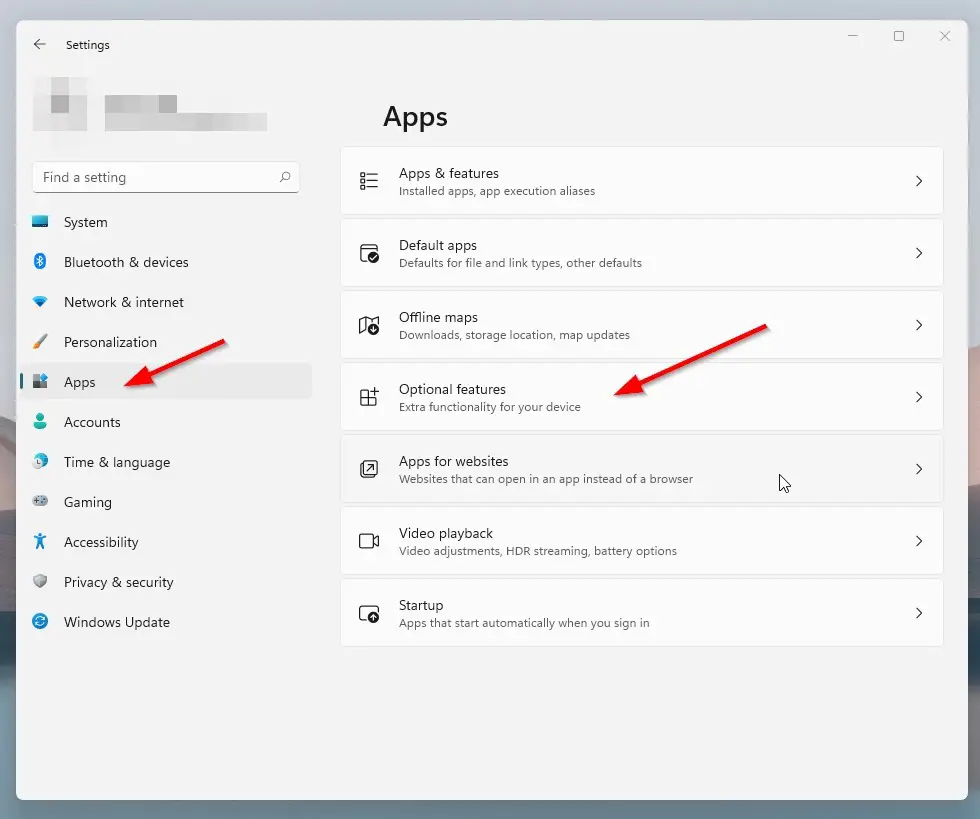
Step 1:First of all Goto the Settings and Click on the Apps and Select the Optional Features.
Step 2: Now Click on the View Features Button to View & Install the Available Feature.
Step 3: Navigate to TPM Diagnostics and Press the Next Button.
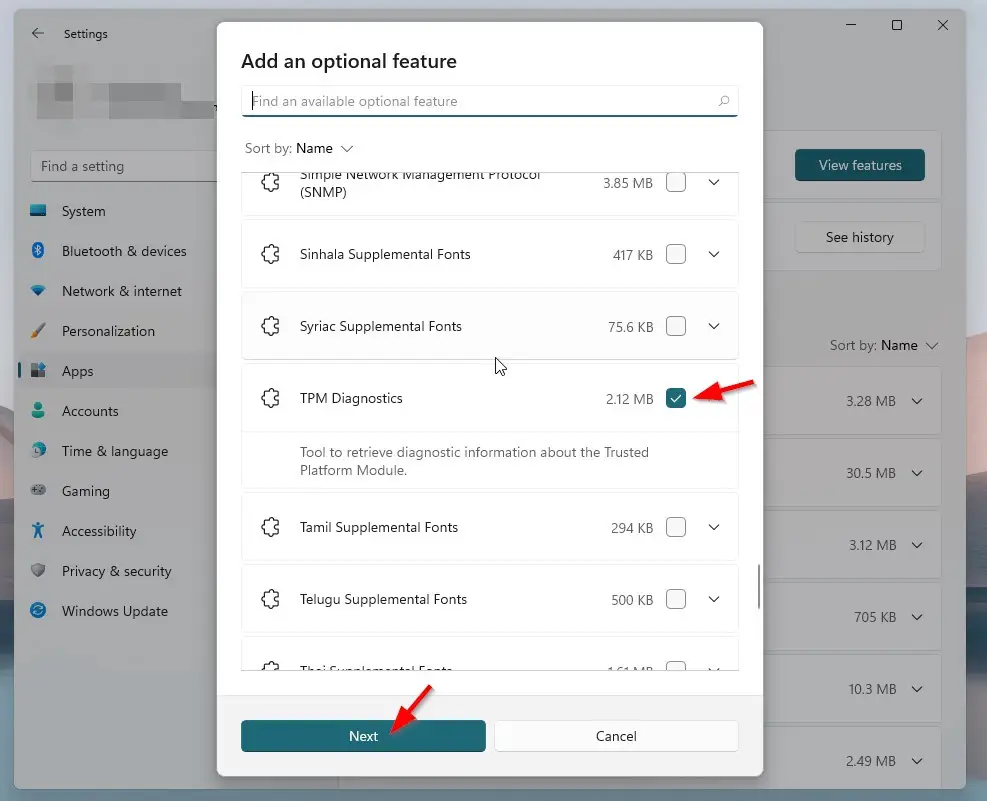
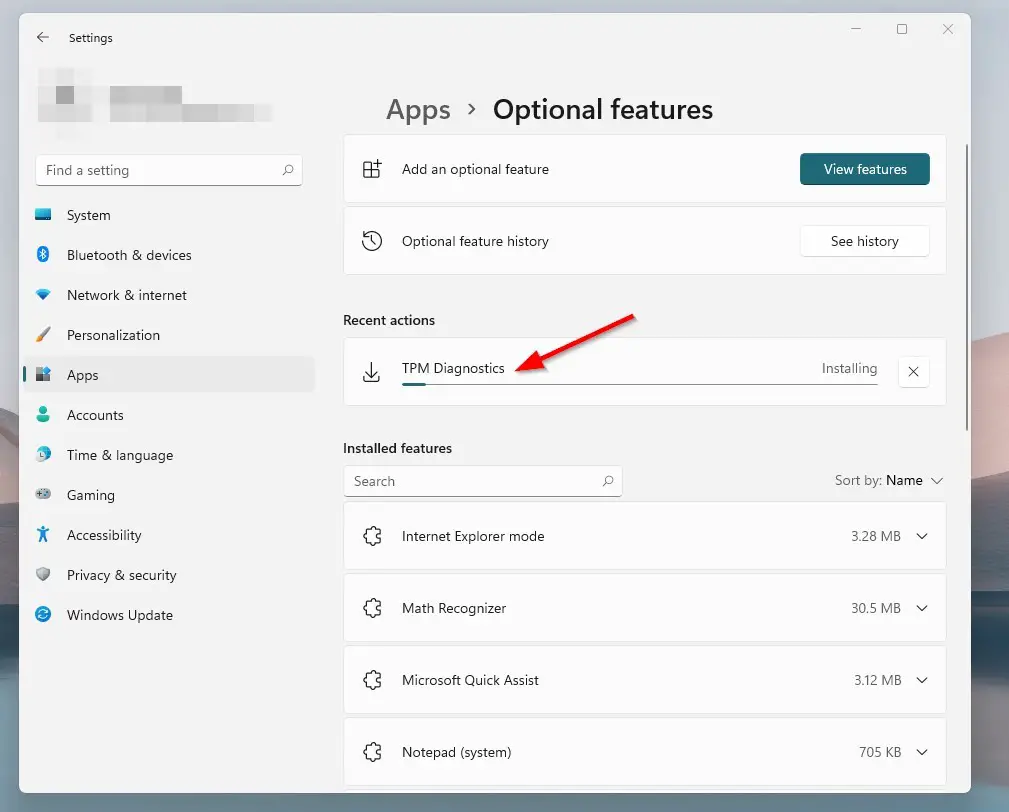
Step 4: Now Just Click on the Install Button and Wait for the Installation Process to Complete.
Step 5: Now You Can Use the TPM Diagnostics Tool Through
C:\Windows\system32\tpmdiagnostics.exe
(or)
Use Command Prompt (Admin) and Type the Following Command
tpmdiagnostics.exe /?
For Uninstalling Trusted Platform Module Diagnostic Tool
Step 1:First of all Goto the Settings and Click on the Apps and Select the Optional Features.
Step 2: Under Optional Features, Navigate to Installed Features Tab and Look for TPM Diagnostics and Click on it and Press the Uninstall button. 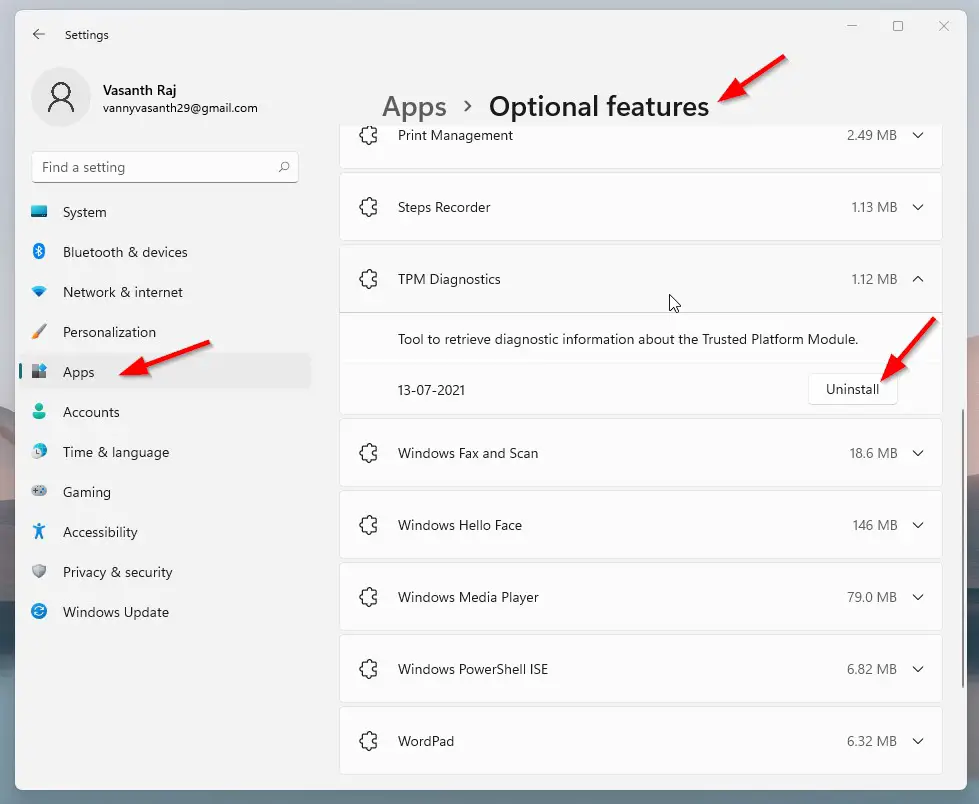
Method 2: Using DISM Commands
Step 1: Right-click on the Start and Select Command Prompt ( Admin ) Or Windows Terminal (Admin) in Your Windows 11.
Step 2: Enter the Following Commands to Install and Uninstall TPM Diagnostics Tool.
For Installing Trusted Platform Module Diagnostic Tool with DISM
DISM /Online /Add-Capability /CapabilityName:Tpm.TpmDiagnostics~~~~0.0.1.0
DISM /Online /Add-Capability /CapabilityName:Tpm.TpmDiagnostics~~~~0.0.1.0
For Uninstalling Trusted Platform Module Diagnostic Tool with DISM
DISM /Online /Remove-Capability /CapabilityName:Tpm.TpmDiagnostics~~~~0.0.1.0.
DISM /Online /Remove-Capability /CapabilityName:Tpm.TpmDiagnostics~~~~0.0.1.0.
That’s It. You’re Done. Have a Nice Day.
That’s All About this Post. Give Your Reviews / Reactions about this Post and Leave Comments, Ask Your Doubts, We are