Lets Make It EasyLets Make It Easy
    Lets Make It EasyLets Make It Easy
    • Home
    • Related To PC
      • Computer Tips & Tricks
      • General Tips
      • Game Tricks And Fixes
      • Windows Tricks
    • Build a PC

      Best Gaming PC Build Under ₹80000 in India with an Amazing Performance (60 FPS)(4K,2K,1080p FHD)

      December 9, 2022

      Best Gaming PC Build Under ₹90000 in India with Stunning Performance (60 FPS)(4K,2K,1080p FHD)

      December 9, 2022

      Best Gaming PC Build Under ₹100000 (1 Lakh) in India with an Outstanding Performance (60 FPS)(4K,2K,1080p FHD)

      December 9, 2022

      Best Gaming Laptops Under 50000 in India with Super Cool Performance (60 FPS)(2K,1080p FHD)

      December 9, 2022

      Best AMD Threadripper Processors That You Need to Buy (2021) | Top Performing AMD Ryzen Threadripper Processors List (2021)

      December 9, 2022
    • Blogger Tips

      How To Create a Perfect Custom Robots.txt File in Blogger?

      January 11, 2023

      How to Disavow Backlinks in Google Search Console?

      December 9, 2022

      How to Find and Remove the Bad/Toxic/Spammy Backlinks that affects your SEO Badly from Google?

      December 9, 2022

      How to Verify Google Search Console for WordPress Using DNS Verification? | Google Search Console DNS Verification ( Domain )

      December 9, 2022

      Google Search Console : 4 Simple Methods To Verify your Site Ownership For WordPress and Blogger

      December 9, 2022
    • WordPress Tips

      How to Hide/Remove Theme Name in WordPress?

      March 7, 2023

      How to Repair a Corrupted MySQL Database Table?

      March 2, 2023

      How to Get Quick Adsense Approval for WordPress Blog/Website?

      February 27, 2023

      How to Update/Clear Google Amp Cache?

      January 28, 2023

      How to Get a Free Domain and Hosting for Educational/Testing Purposes?

      January 25, 2023
    • Youtube Tips And Tricks
    • More Topics
      • Andriod Tricks
      • Mobile Tricks
      • Publisher’s Spot
      • Internet Tricks
    Lets Make It EasyLets Make It Easy
    Home » How to Redirect HTTP to HTTPS in WordPress?
    Uncategorized

    How to Redirect HTTP to HTTPS in WordPress?

    Vasantharaj R NBy Vasantharaj R NDecember 9, 2022Updated:December 9, 2022No Comments3 Mins Read
    How to Redirect HTTP to HTTPS in Wordpress?

    Hi Guys, Today I am Going to Show You How to Redirect HTTP to HTTPS in WordPress?

    Are you Looking for the Commonly Searched WordPress Error “How to Redirect HTTP to HTTPS in WordPress?” (or) “How to Fix Cloudflare SSL Handshake Failed Error?”.Here is the Solution to Fix this Common Issue That has been faced by most of the WordPress Users including myself.

    Let’s See about How to fix this issue?

    Check Out This: How to Transfer a Domain Easily from One Registrar to Another (In 3 Steps)? | Step-By-Step Domain Transfer Tutorial

    Trending
    How to Fix Command Prompt Opens And Closes Immediately in Windows 10? | Why CMD.exe Closes Immediately Whenever I Tried to Open it?

    Steps For How to Redirect HTTP to HTTPS in WordPress?

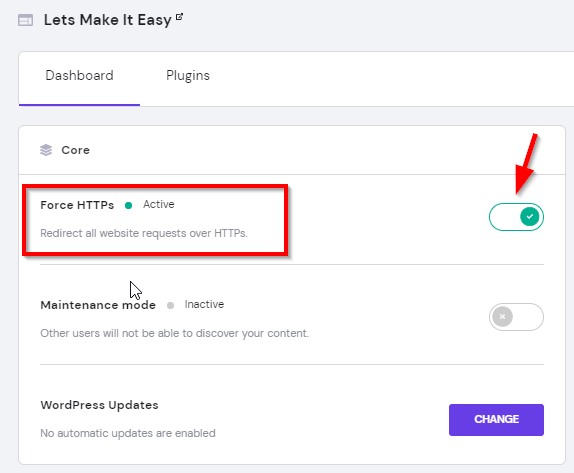
    Method 1: Using Force HTTPS Redirect Option on Your Hosting Server

    Step 1: Go to Hosting Website and Login to Your Account.

    Step 2: Click on your Domain and Navigate To SSL (Secure Socket Layer).

    Step 3: On SSL Page, Turn on the Force HTTPS Redirect.

    Step 4: Now Refresh the Website.

    Method 2: Using Worpdress Admin Area

    *Try this Method after Successfully Installing the SSL Otherwise this will not work.
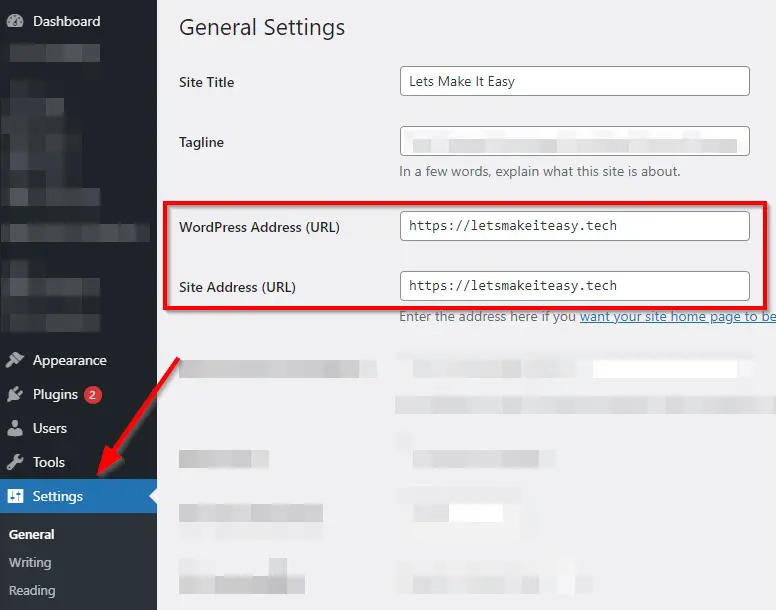
    Step 1: Go to WordPress Admin and Navigate to Settings Option.

    Step 2: Under Settings Option, Select the General Settings Option.

    Step 3: Now Change the WordPress Address, Site Address from HTTP to HTTPS.

    Step 4: Now Refresh the Website.

    If You’re Using Cloudflare Free SSL, Then Try this Below Method.

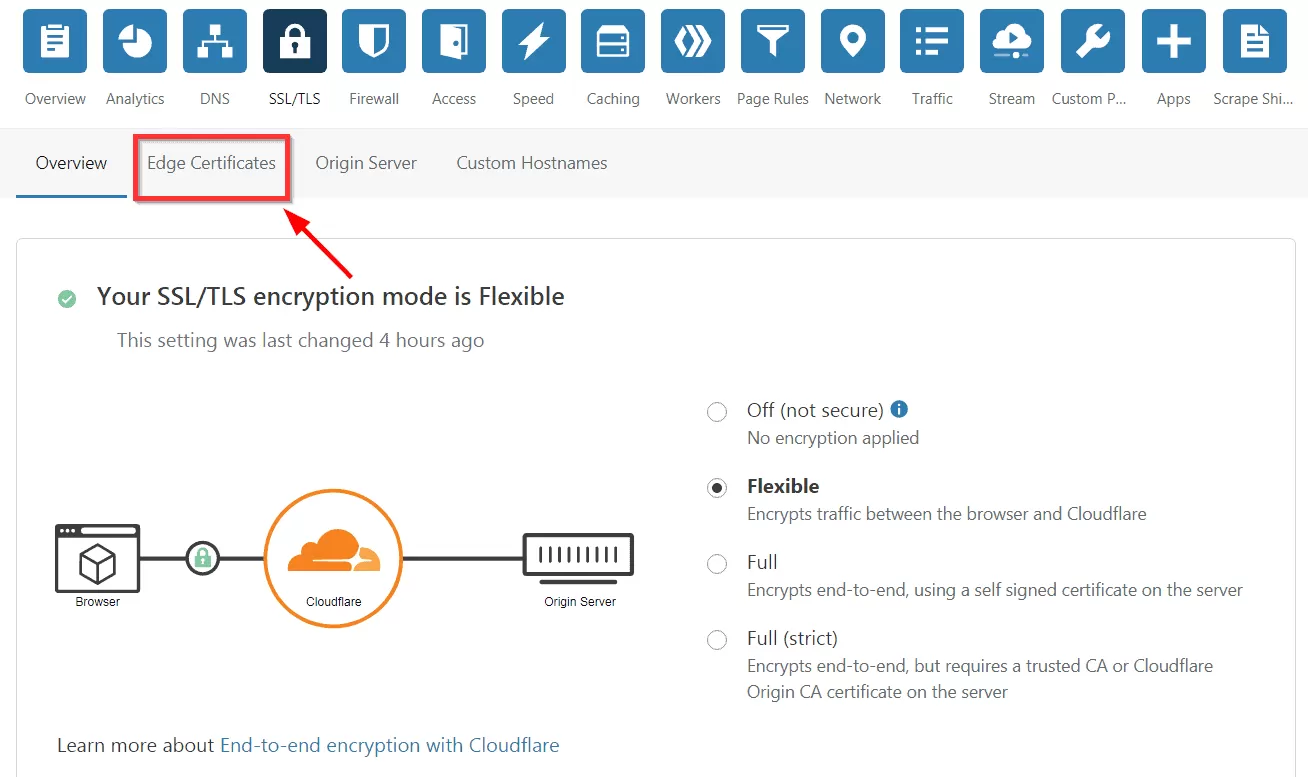
    Method 3: Using Cloudflare SSL Options

    Step 1: Now Open the Cloudflare Official Website and Navigate to SSL/TLS Option and Select Edge Certificates Tab.

    How to Fix Mixed Content Issue in WordPress

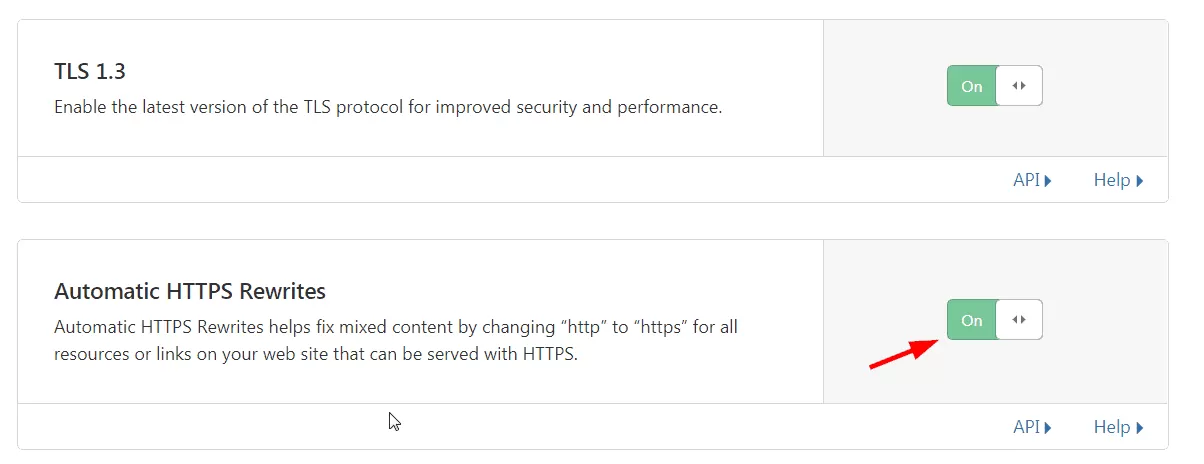
    Step 2: Now Turn On The Automatic HTTPS Rewrite Option.

    Step 3: Now Turn On The Always Use HTTPS Option.

    How to Fix Mixed Content Issue in WordPress

    Step 4: Now Refresh your Website And Wait For Changes.

    Method 4: Using Custom Code in .htaccess File and Wp-Config.php File

    Step 1: First of all Go to Your Web Hosting Site and Log into Your CPanel (HPanel).

    Step 2: Navigate to File Manager and Open Public_Html Folder.

    Step 3: Now Right Click on the .htaccess File and Click Edit Option to Edit the .htaccess File.

    Step 4: Add this Piece of Lines into the .htaccess File.

    For APACHE Server Users,

    <IfModule mod_rewrite.c>
    RewriteEngine On
    RewriteCond %{HTTPS} off
    RewriteRule ^(.*)$ https://%{HTTP_HOST}%{REQUEST_URI} [L,R=301]
    </IfModule>

    <IfModule mod_rewrite.c>
    RewriteEngine On
    RewriteCond %{HTTPS} off
    RewriteRule ^(.*)$ https://%{HTTP_HOST}%{REQUEST_URI} [L,R=301]
    </IfModule>
    

    Try this Alternate Code if the Above One Not Works,

    RewriteEngine On
    RewriteCond %{SERVER_PORT} 80
    RewriteRule ^(.*)$ https://www.yourdomain.com/$1 [R,L]

    RewriteEngine On
    RewriteCond %{SERVER_PORT} 80
    RewriteRule ^(.*)$ https://www.yourdomain.com/$1 [R,L]

    For NGINX Server Users,

    server {
    listen 80;
    server_name example.com www.example.com;
    return 301 https://example.com$request_uri;
    }

    server {
    listen 80;
    server_name example.com www.example.com;
    return 301 https://example.com$request_uri;
    }
    

    Step 5: Now Save the .htaccess File.

    Step 6: Now Right Click on the Wp-Config.php File and Click Edit Option to Edit the Wp-Config.php File.

    Step 7: Add this Piece of Lines into the Wp-Config.php

    define(‘FORCE_SSL_ADMIN’, true);

    define('FORCE_SSL_ADMIN', true);

    Step 8: Now Save the Wp-Config.php File.

    If the Above Method Doesn’t Work for you, then Try The Below Method.
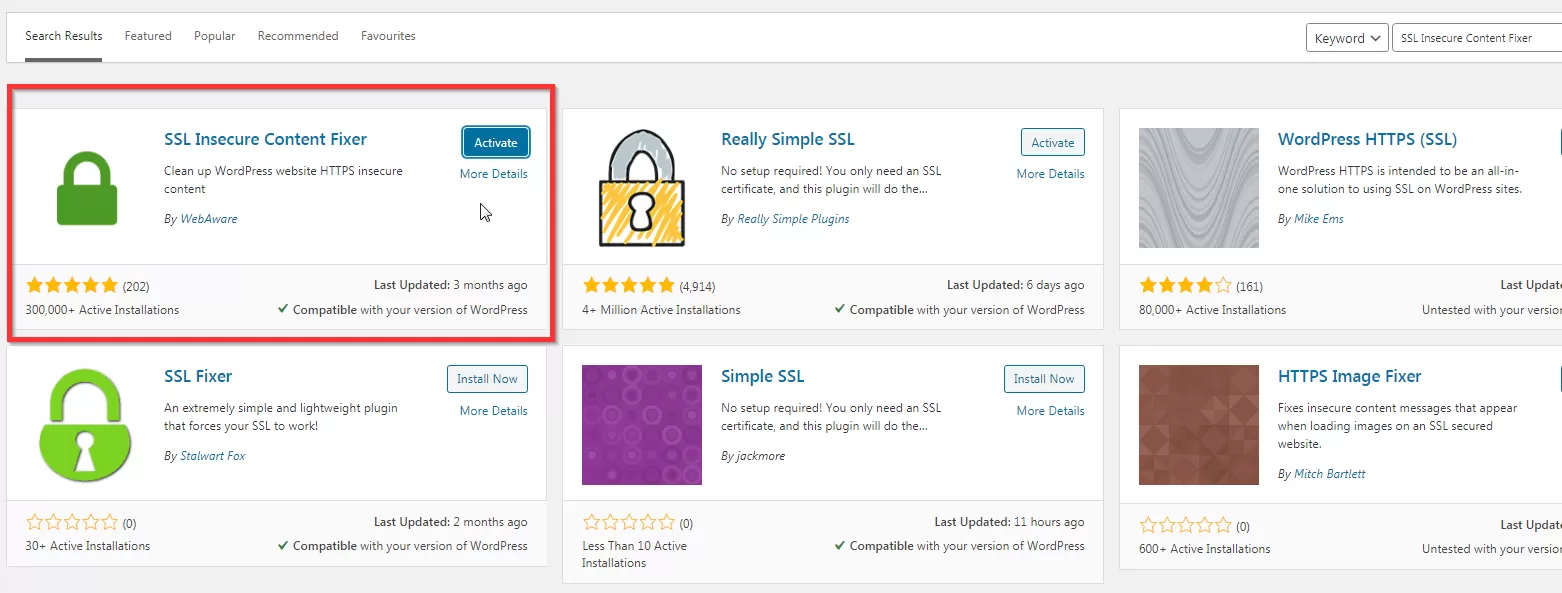
    Step 1: Goto to Your WordPress Plugin Section and Search For Really Simple SSL Plugin and Download it.

    https://wordpress.org/plugins/really-simple-ssl/

    How to Fix Mixed Content Issue in WordPress

    Step 7: Now After Downloading the Plugin Activate it.

    Step 8: Now Click the Go Ahead, Activate SSL Button to Fix the Error SSL “your connection to this site is not fully secure ”.

    How to Fix Mixed Content Issue in WordPress

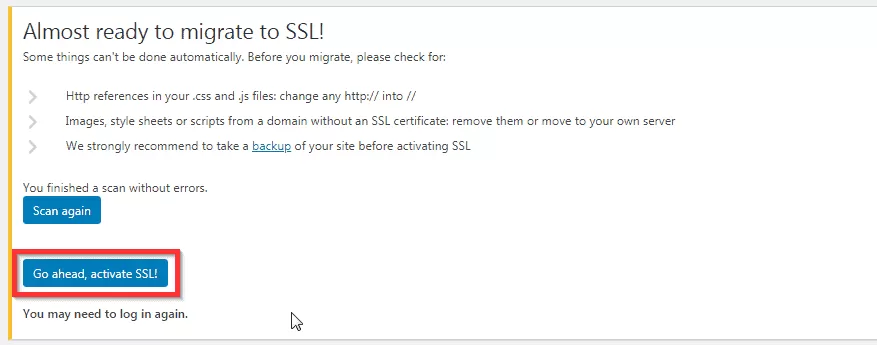
    Step 9: Goto Your Website and Check it. You’ll See the Message “Connection is Secure” in Green Colour.

    That’s It! You’re Done Man! 

    That’s All About this Post. Give Your Reviews / Reactions about this Post and Leave Comments, Ask Your Doubts, We are here to Help You!

    Vasantharaj R N

    Basically an Instrumentation Engineer But Very much Interested in Blogging. I'm a Passionate Blogger and an Expert in Search Engine Optimization And Always Looking Forward to Learn New Things. I Would Fix & Provide Solution to the Most Common Issues Related to PC,Laptops,Mobiles,OS, Hardwares and Softwares.

    Related Posts

    How to Fix “An error occurred While attempting to create the directory” When Trying to Install VMware Workstation Pro?

    December 9, 2022

    How to Fix “File importer detected an inconsistency in the file structure.Reading and writing this files metadata (XMP) has been disabled.” Error in Adobe Media Encoder?

    December 9, 2022

    How to Take Screenshot in Laptop & PC Without Using Print Screen Button?

    December 9, 2022

    How to Fix FIFA 23 EA Anticheat Service Error on Windows 10,11?

    December 9, 2022
    Add A Comment

    Leave A Reply Cancel Reply

    Lets Make It Easy
    Copyright © 2021 Letsmakeiteasy LLC. All Rights Reserved. Letsmakeiteasy® is a registered trademark.WordPress hosting by Hostinger | Crafted With Love | Designed By Vasanth

    Type above and press Enter to search. Press Esc to cancel.