
Hi Guys, Today I am Going to Show You How to Delete (or) Clear the Media Cache Files in Adobe Premiere Pro & Adobe Media Encoder?
If You are Looking for the Commonly Searched Term “How to Delete (or) Clear the Media Cache Files in Adobe Premiere Pro & Adobe Media Encoder?” (or) “How to Clear the Media Cache Files in Adobe Premiere Pro & Adobe Media Encoder?”.
You are at the Right Place to Get Your Answers & Solve the Issue/Error.


Nowadays, Every gamer and Video Editing Expert uses Adobe Premiere Pro and Adobe Media Encoders for Video Editing & exporting purposes. Adobe Premiere Pro and Media Encoders became the most widely used Video Editing Programs in the market. Whenever we import video and audio files into a project in Premiere Pro, it creates temporary versions of the files so that can improve performance. This process is called as media cache files. This kind of file is They are located in the Media Cache folder. Media Cache files like Adobe Premiere Peak Waveform files (.pek) and Adobe Conformed Audio File (.cfa) files were created in the media cache folder.
If you’re working on a video project then you will definitely be running out of disk space at some time. This happens whenever you finish projects and forgot to delete the media cache files which was created while editing videos. If you keep on editing videos and doing a lot of editing projects without clearing the media cache, then it can occupy a large storage space. So, When you clear this kind of old or unused media cache files can help boost performance and also it can Free up Storage space. After deleting the Media cache files, You can see that some hard disk space becomes available. If you completed the projects, then right away delete these files to save storage space which keeps your computer’s hard drive Good.
Steps For How to Delete (or) Clear the Media Cache Files in Adobe Premiere Pro & Adobe Media Encoder?
Method 1: Using Premiere Pro Preferences Option
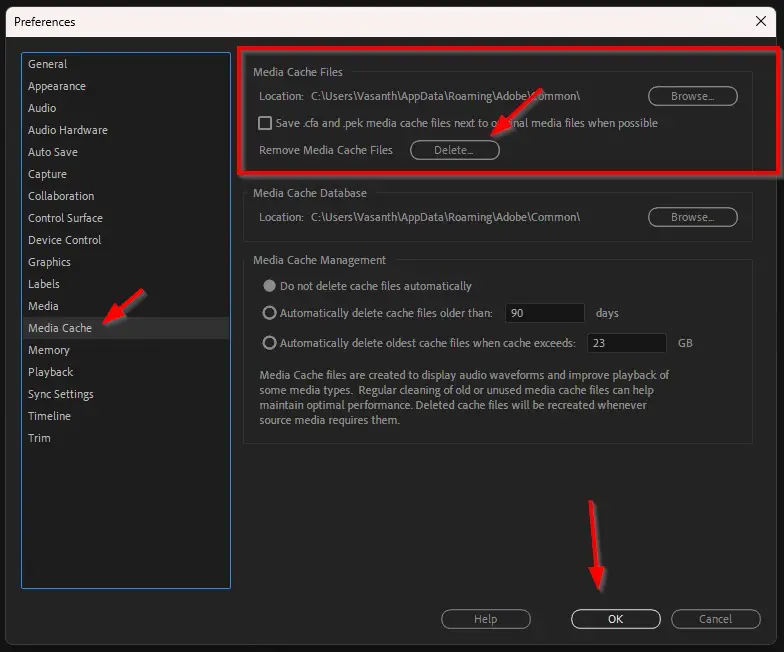
Step 1: Open the Adobe Premiere Pro Software. Navigate to Edit Tab, Select Preferences, and click the Media Cache Option.
Step 2: Under Media Cache Files Option, You’ll see Remove Media Cache Files Option and Press the Delete Button.
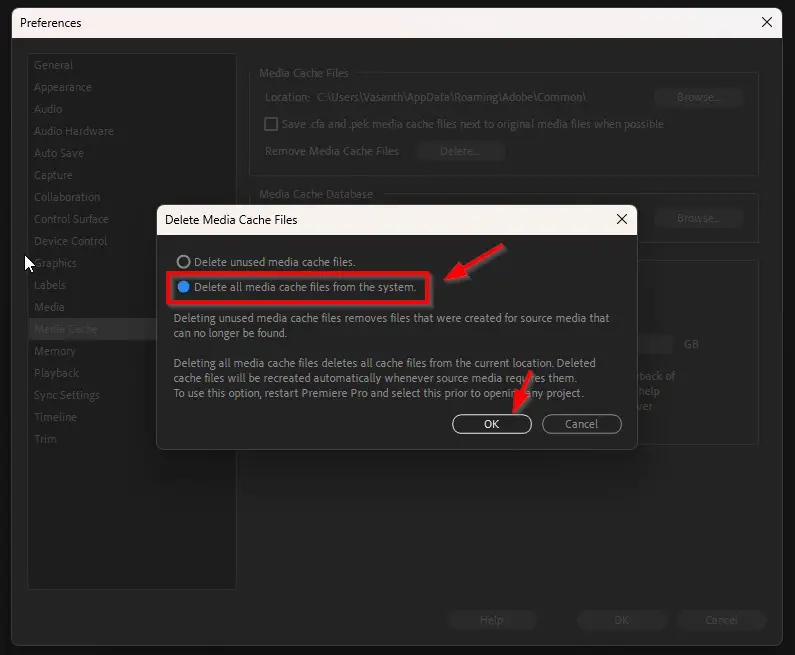
Step 3: Now Select the “Delete all media cache files from the system” Option to Delete all media cache files from the current location.
*Note – Deleted cache files will be recreated automatically whenever source media requires them. So, You need to Delete it every time after successfully Completing & exporting the Project.
Step 4: Press Ok to Start the Clear the Media Cache Files.
Adobe Premiere Pro also provides a few options for deleting the media cache.
1. Do not delete cache files automatically – This is the default option provided by the Media Cache Preferences. If this is enabled then the cache files will not be deleted automatically. You need to Delete the Cache Files Manually.
2. Automatically delete cache files older than – This is the 2nd option provided by the Media Cache Preferences. With this option, you can Delete the Media cache files after a certain number of days. So you can select a number of days of your preference. The Default Option is 90 Days.
3. Automatically delete oldest cache files when cache exceeds – This is the 3rd option provided by the Media Cache Preferences. With this option, You can automatically delete the Old Media Cache Files when it exceeds a certain amount of Storage Space. So you can choose the Cache Storage Size exceed limit as per your needs.
Method 2: Deleting the Media Cache Manually
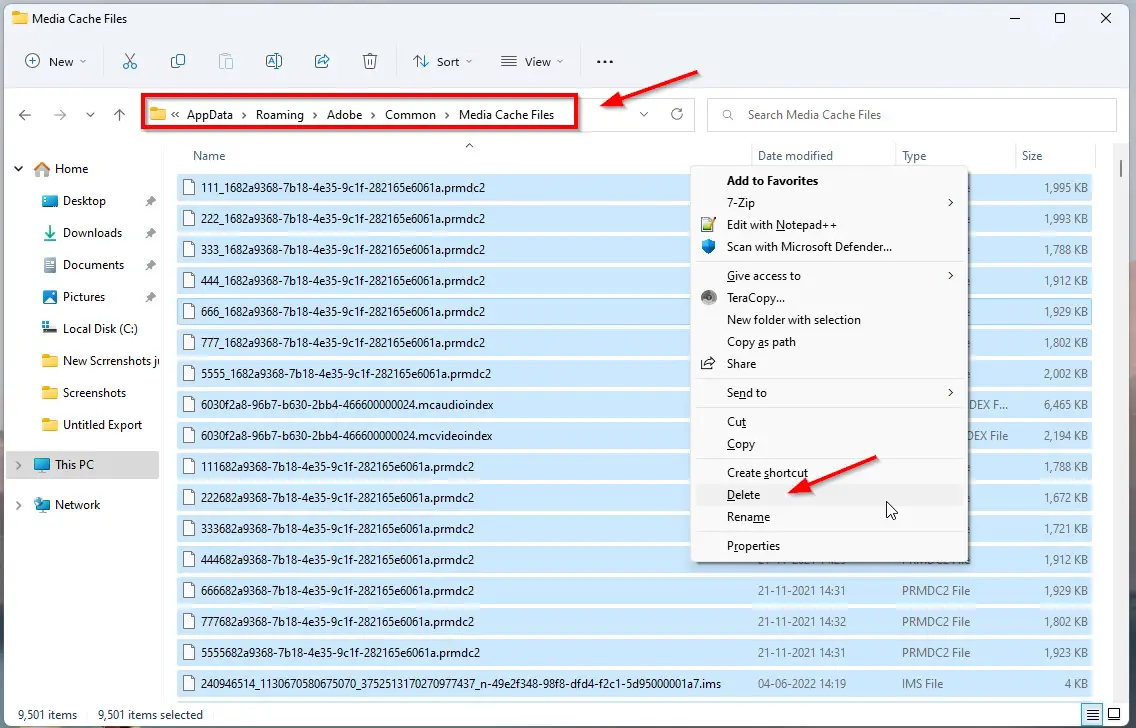
Step 1: Go to the Following Location Given Below and Check the Properties of the Media Cache Files Folder.
C:\Users\Your User Name\AppData\Roaming\Adobe\Common\Media Cache Files
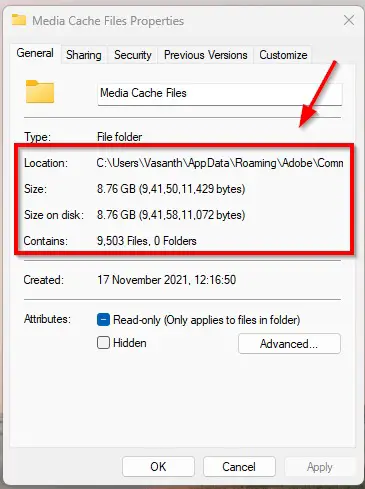
Step 2: Now press Ctrl + A to select all and Press Shift and Delete all the Files (prmdc2,ims, etc..)
That’s It.
That’s It! You’re Done Man!
That’s All About this Post. Give Your Reviews / Reactions about this Post and Leave Comments, Ask Your Doubts, We are here to Help You!