Hi Guys, Today I am Going to Show You How to Fix Loading ImporterQuicktime.prm in Adobe Premiere Pro?
Are you Looking for the Commonly Searched Term “How to Fix Loading importerquicktime.prm in Adobe Premiere Pro?” (or) “How To Solve Adobe Loading ImporterQuicktime.prm Crash In Windows 10?”. You are at the Right Place to Get Your Answers & Solve the Issue/Error.
There are 7 Ways to Fix Loading ImporterQuicktime.prm
1.Removing the QuickTimeHost files


2.Using Run Compatibility Troubleshooter
3.Create a Dummy.dll File
4.Closing the Adobe QT32 Server Background process
5.Deleting the Sharedtags.json file
6.Disable your Antivirus
7.Using Firewall Settings
8.Resetting the Premiere Pro Settings
Check Out This: How to Transfer a Domain Easily from One Registrar to Another (In 3 Steps)? | Step-By-Step Domain Transfer Tutorial
Steps For How to Fix Loading ImporterQuicktime.prm in Adobe Premiere Pro?
Method 1: Removing the QuickTimeHost files
Step 1:First of all Goto the Exact Location Which I’ve Mentioned Below.
C:\Program Files\Adobe\Adobe Premiere Pro 2021\Plug-Ins\Common
C:\Program Files\Adobe\Adobe Premiere Pro 2021\Plug-Ins\Common
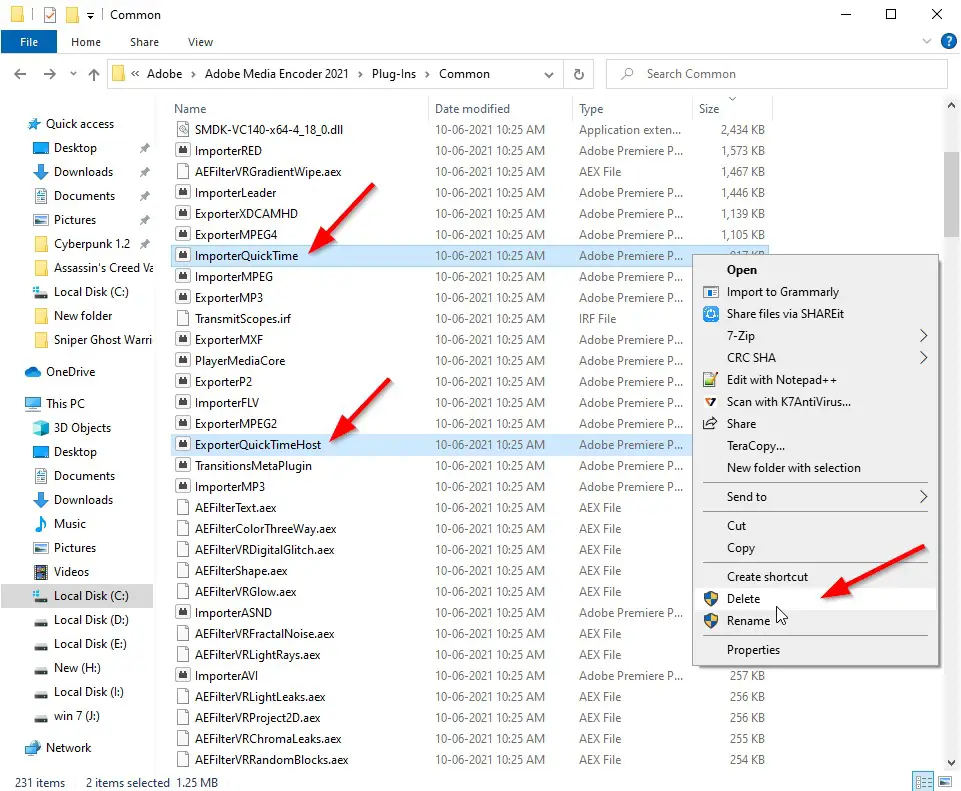
Step 2: Now Delete the ImporterQuickTime.prm & ExporterQuickTimeHost.prm Files.
Step 3: Run the Adobe Premiere Pro.
Method 2: Using Run Compatibility Troubleshooter
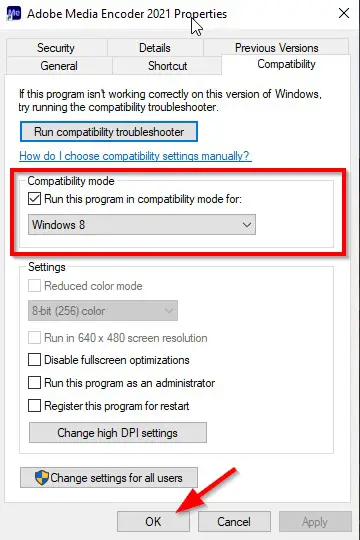
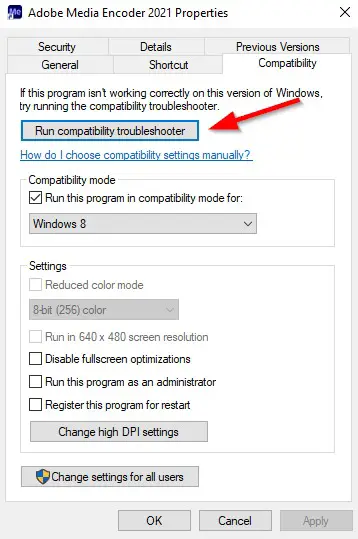
Step 1: First of all Right Click Adobe Premiere Pro and Select the Properties and Navigate to Compatibility Tab.
Step 2: Under Compatibility Tab, You will see the Compatibility Mode and Enable Run this Program in Compatibility Mode and Choose Windows 8.
Step 3: Under Compatibility Tab, You will see the Run Compatibility Troubleshooter. Just Click On it.
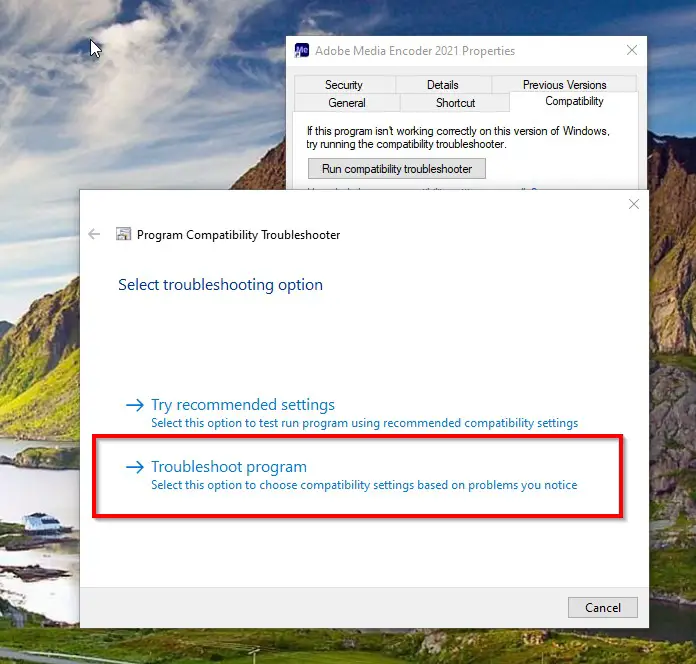
Step 4: Now Program Compatibility Troubleshooter Will Appear and Now Select the Troubleshoot Program.
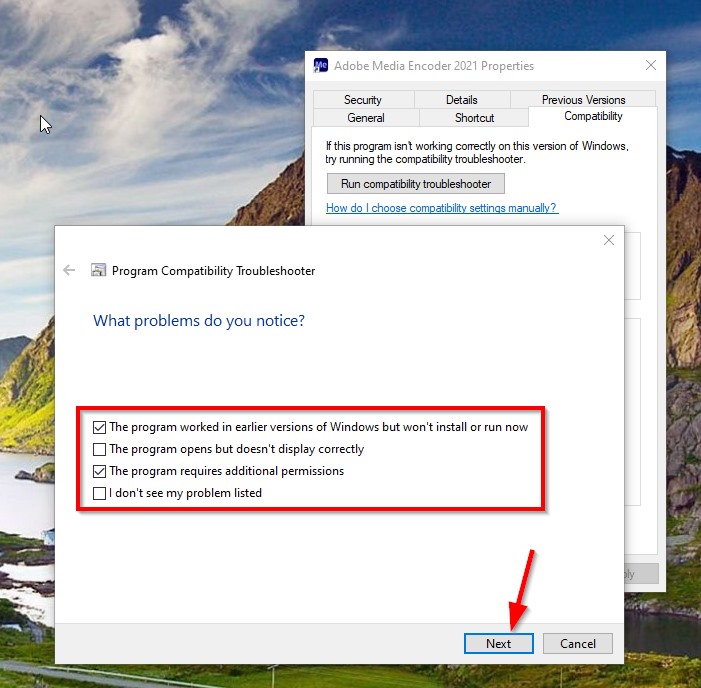
Step 5: Now Choose 1st and 2nd Options and Press Next Button.
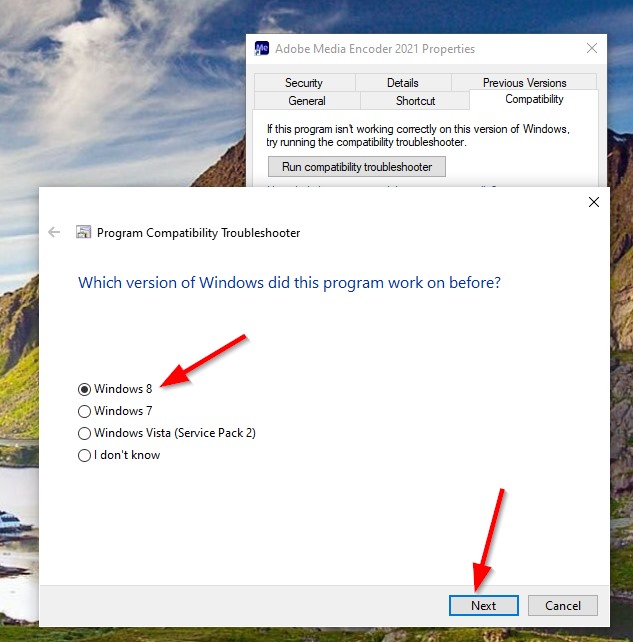
Step 6: Now Select Windows 8 And Press Next Button.
Step 7: Now Click the Test the Program Button and Press Yes When UAC Window Appears.
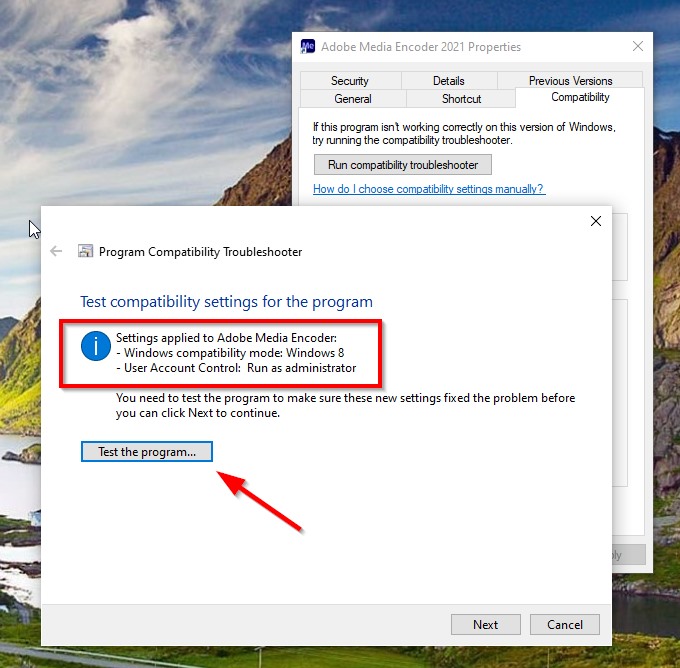
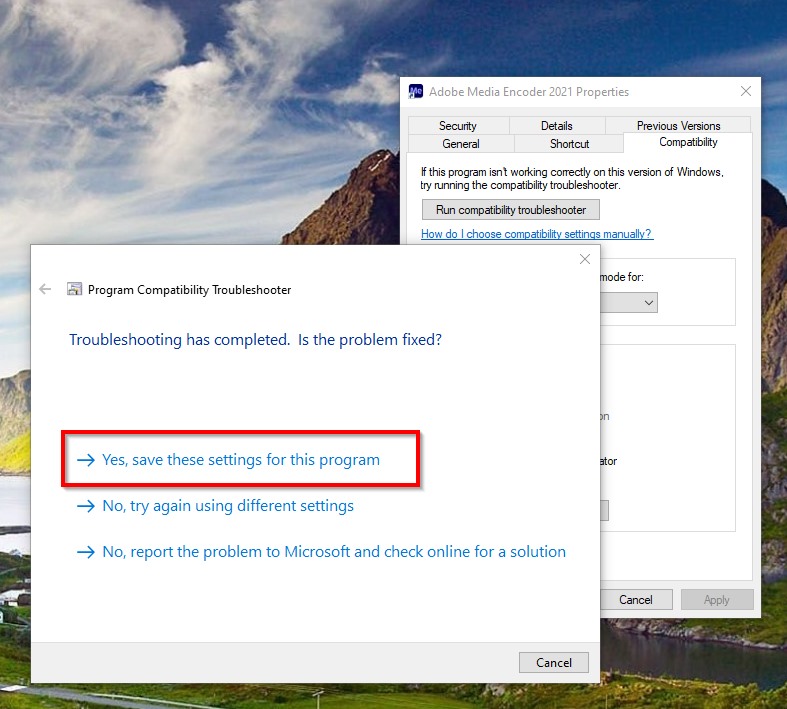
Step 8: Now If it is Worked, then Select the Yes, Save these Settings for this Program Option to Save the Settings For Future Use.
Method 3: Create a Dummy.dll File
Step 1: First of all Goto the Exact Location Which I’ve Mentioned Below.
C:\Program Files\Adobe\Common\Plug-ins\7.0\MediaCore
C:\Program Files\Adobe\Common\Plug-ins\7.0\MediaCore
Step 2: Create a New Text Document With Text Given Below.
“this is a dummy plugin”
this is a dummy plugin
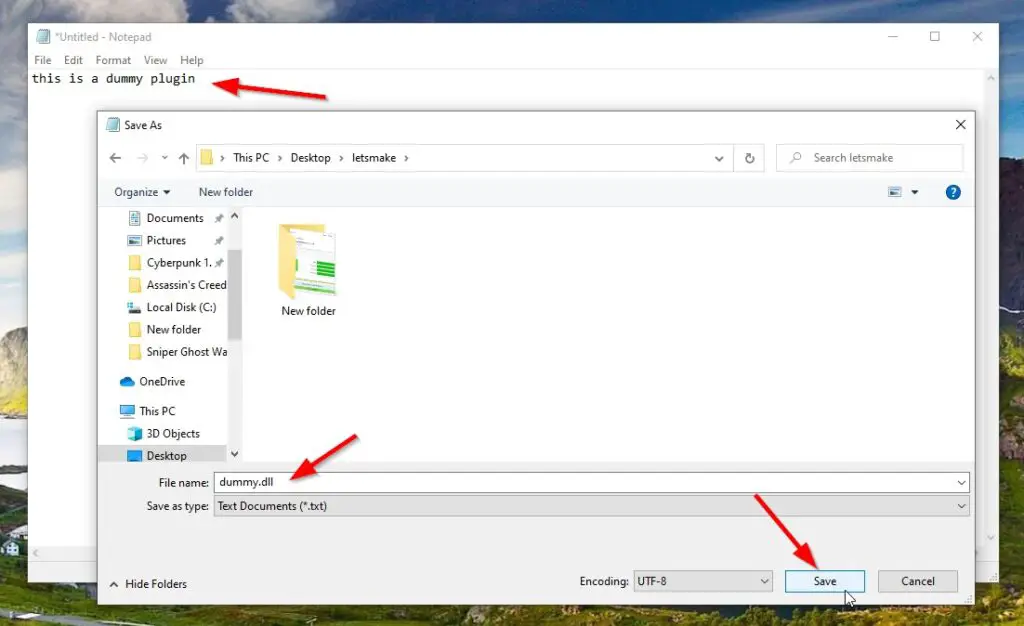
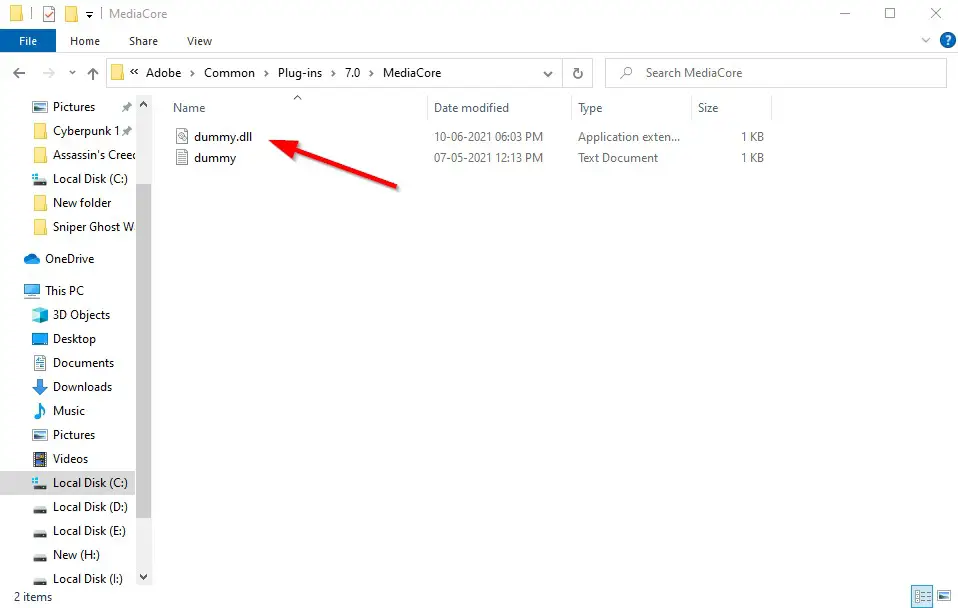
Step 3: Save the Document as a dummy.dll and Copy-Paste it in the Location Given Below.
C:\Program Files\Adobe\Common\Plug-ins\7.0\MediaCore
Step 4: Run the Adobe Premiere Pro.
Method 4: Closing the Adobe QT32 Server Background process
Step 1: First of all Close Adobe Premiere Pro and Run the Task Manager.
Step 2: Under Process Tab, You’ll See the Background Process Section. Look Out for the Adobe QT32 Server process.
Step 3: Close the Adobe QT32 Server process.
Step 4: Run the Adobe Premiere Pro.
Method 5: Deleting the Sharedtags.json file
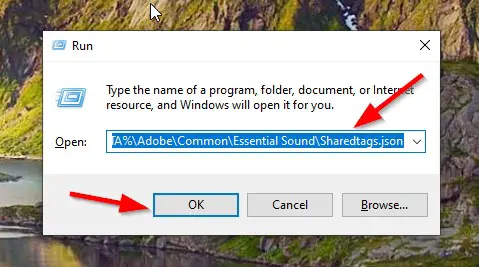
Step 1: First of all Start the Run Program and Copy-Paste the Below Location and Press Enter.
%APPDATA%\Adobe\Common\Essential Sound\Sharedtags.json
%APPDATA%\Adobe\Common\Essential Sound\Sharedtags.json
(or)
Go to the File Location Manually.
Step 2: Delete the Sharedtags.Json File.
Step 3: Run the Adobe Premiere Pro.
Method 6: Disable your Antivirus
Step 1: First of all Goto your Antivirus Program or Windows Defender and Just Disable it.
Step 2: Run the Adobe Premiere Pro.
Method 7: Using Firewall Settings
Step 1: First of all Goto your Windows Firewall or Your Personal Antivirus Firewall Program.
Step 2: Add the Adobe Premiere Pro to Firewall List.
Method 8: Using Firewall Settings
Step 1: First of all Go to your PC and Navigate to this below location.
C:\Users\username\AppData\Roaming\Adobe
C:\Users\username\AppData\Roaming\Adobe
Step 2: Now Just Rename the folders named Premiere Pro & Common to OldPremiere Pro & Oldcommon.
Step 3: Now Navigate to this below location.
C:\Users\username\Documents\Adobe
C:\Users\username\Documents\Adobe
Step 4: Just Rename the folder named Premiere Pro to OldPremiere Pro
*(This will Reset Apps Settings)
Step 5: Now Right Click on Adobe Premiere Pro Icon and Run it as Administrator.
That’s It! You’re Done Man!
That’s All About this Post. Give Your Reviews / Reactions about this Post and Leave Comments, Ask Your Doubts, We are here to Help You!