Hi Guys, Today I am Going to Show You How to Redirect HTTP to HTTPS in WordPress?
Are you Looking for the Commonly Searched WordPress Error “How to Redirect HTTP to HTTPS in WordPress?” (or) “How to Fix Cloudflare SSL Handshake Failed Error?”.Here is the Solution to Fix this Common Issue That has been faced by most of the WordPress Users including myself.
Let’s See about How to fix this issue?
Check Out This: How to Transfer a Domain Easily from One Registrar to Another (In 3 Steps)? | Step-By-Step Domain Transfer Tutorial
Steps For How to Redirect HTTP to HTTPS in WordPress?
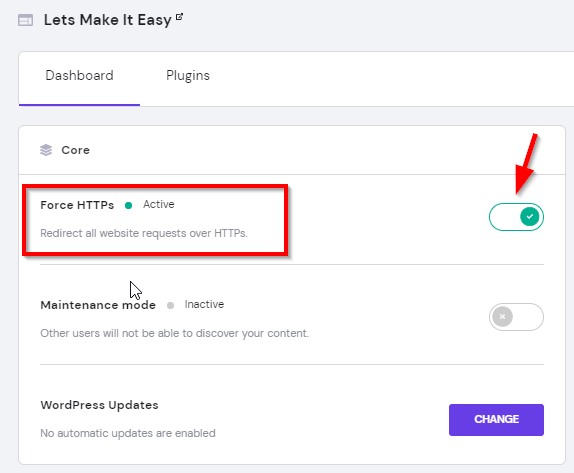
Method 1: Using Force HTTPS Redirect Option on Your Hosting Server
Step 1: Go to Hosting Website and Login to Your Account.
Step 2: Click on your Domain and Navigate To SSL (Secure Socket Layer).
Step 3: On SSL Page, Turn on the Force HTTPS Redirect.
Step 4: Now Refresh the Website.
Method 2: Using Worpdress Admin Area
*Try this Method after Successfully Installing the SSL Otherwise this will not work.
Step 1: Go to WordPress Admin and Navigate to Settings Option.
Step 2: Under Settings Option, Select the General Settings Option.
Step 3: Now Change the WordPress Address, Site Address from HTTP to HTTPS.
Step 4: Now Refresh the Website.
If You’re Using Cloudflare Free SSL, Then Try this Below Method.
Method 3: Using Cloudflare SSL Options
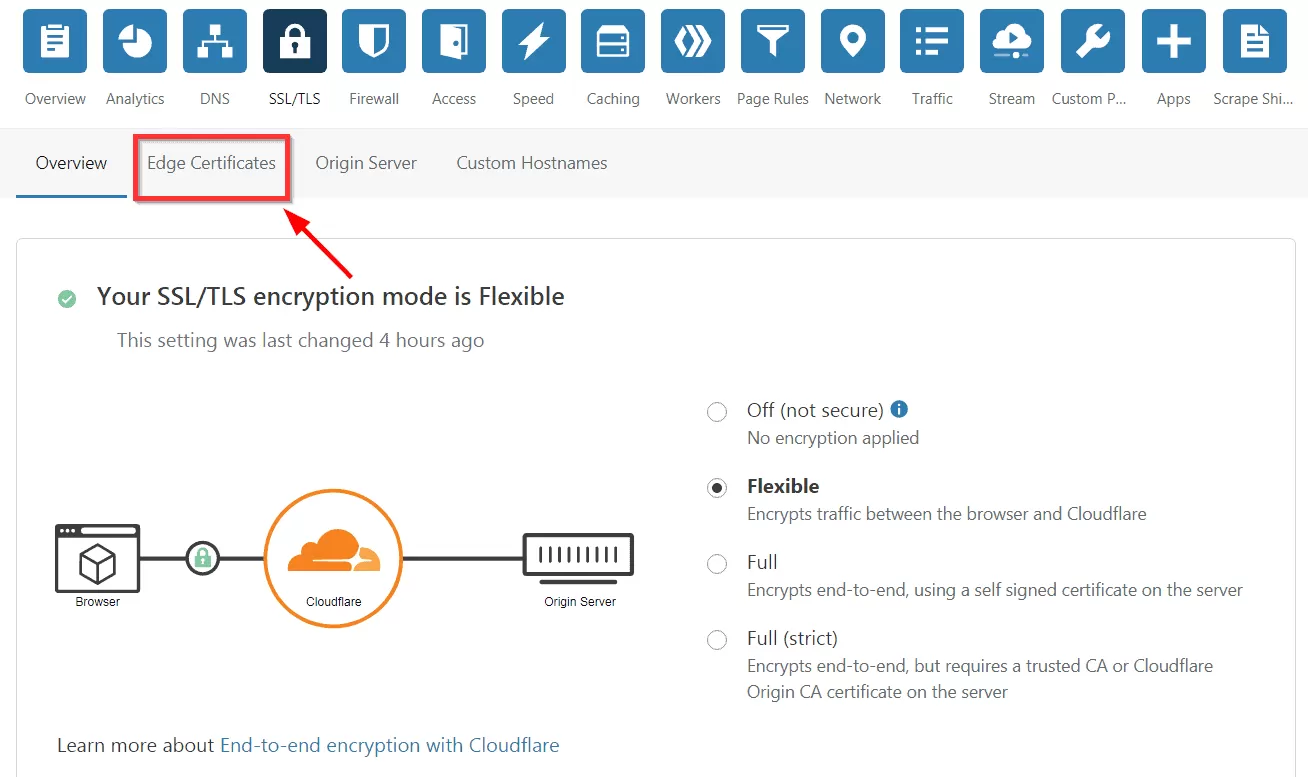
Step 1: Now Open the Cloudflare Official Website and Navigate to SSL/TLS Option and Select Edge Certificates Tab.
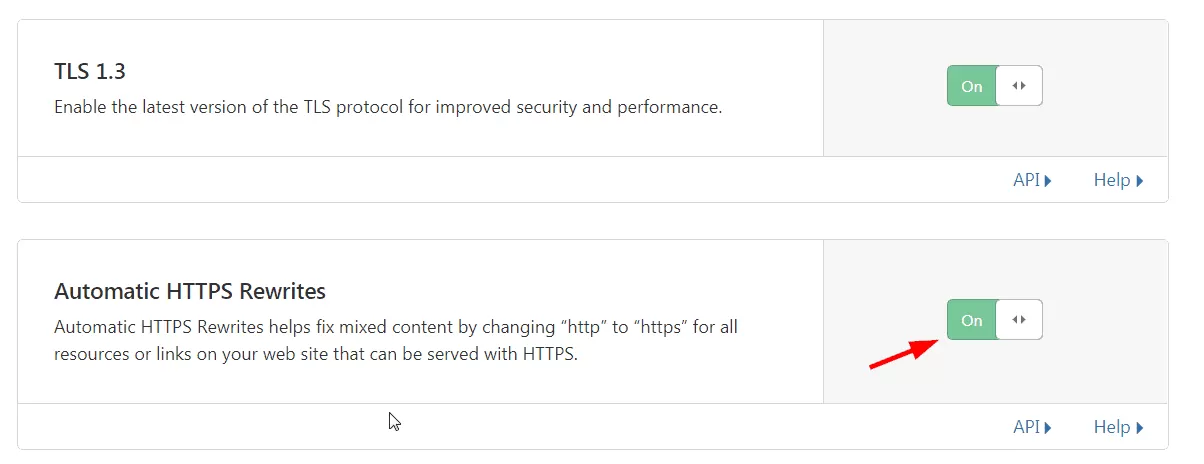
Step 2: Now Turn On The Automatic HTTPS Rewrite Option.
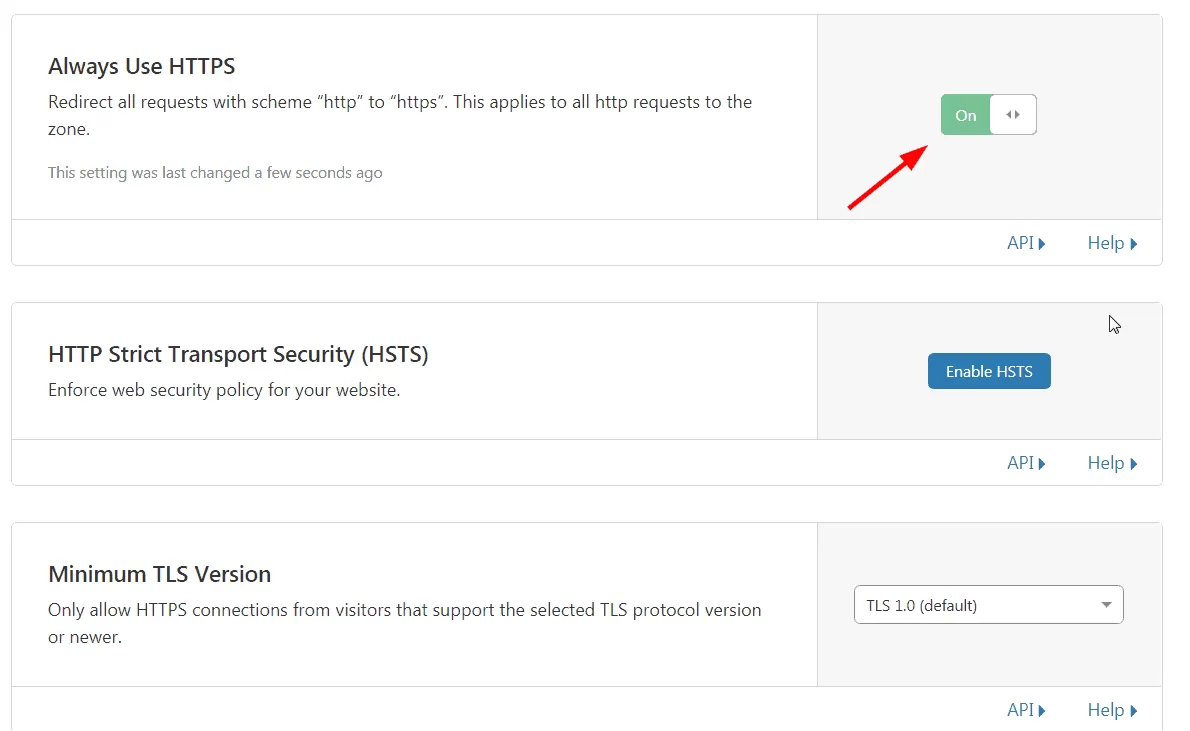
Step 3: Now Turn On The Always Use HTTPS Option.
Step 4: Now Refresh your Website And Wait For Changes.
Method 4: Using Custom Code in .htaccess File and Wp-Config.php File
Step 1: First of all Go to Your Web Hosting Site and Log into Your CPanel (HPanel).
Step 2: Navigate to File Manager and Open Public_Html Folder.
Step 3: Now Right Click on the .htaccess File and Click Edit Option to Edit the .htaccess File.
Step 4: Add this Piece of Lines into the .htaccess File.
For APACHE Server Users,
<IfModule mod_rewrite.c>
RewriteEngine On
RewriteCond %{HTTPS} off
RewriteRule ^(.*)$ https://%{HTTP_HOST}%{REQUEST_URI} [L,R=301]
</IfModule>
<IfModule mod_rewrite.c>
RewriteEngine On
RewriteCond %{HTTPS} off
RewriteRule ^(.*)$ https://%{HTTP_HOST}%{REQUEST_URI} [L,R=301]
</IfModule>
Try this Alternate Code if the Above One Not Works,
RewriteEngine On
RewriteCond %{SERVER_PORT} 80
RewriteRule ^(.*)$ https://www.yourdomain.com/$1 [R,L]
RewriteEngine On
RewriteCond %{SERVER_PORT} 80
RewriteRule ^(.*)$ https://www.yourdomain.com/$1 [R,L]
For NGINX Server Users,
server {
listen 80;
server_name example.com www.example.com;
return 301 https://example.com$request_uri;
}
server {
listen 80;
server_name example.com www.example.com;
return 301 https://example.com$request_uri;
}
Step 5: Now Save the .htaccess File.
Step 6: Now Right Click on the Wp-Config.php File and Click Edit Option to Edit the Wp-Config.php File.
Step 7: Add this Piece of Lines into the Wp-Config.php
define(‘FORCE_SSL_ADMIN’, true);
define('FORCE_SSL_ADMIN', true);
Step 8: Now Save the Wp-Config.php File.
If the Above Method Doesn’t Work for you, then Try The Below Method.
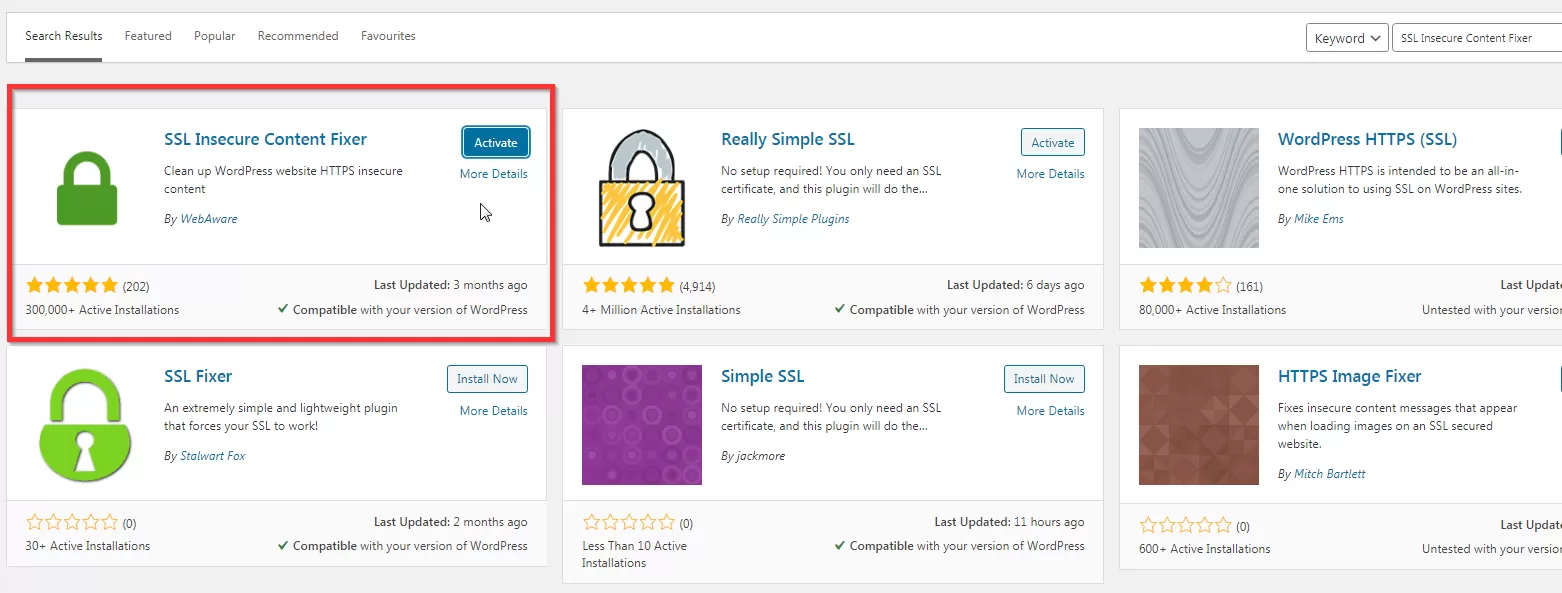
Step 1: Goto to Your WordPress Plugin Section and Search For Really Simple SSL Plugin and Download it.
https://wordpress.org/plugins/really-simple-ssl/
Step 7: Now After Downloading the Plugin Activate it.
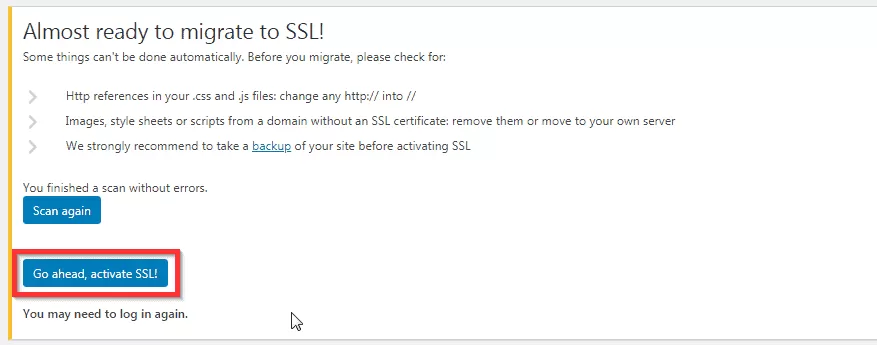
Step 8: Now Click the Go Ahead, Activate SSL Button to Fix the Error SSL “your connection to this site is not fully secure ”.
Step 9: Goto Your Website and Check it. You’ll See the Message “Connection is Secure” in Green Colour.
That’s It! You’re Done Man!
That’s All About this Post. Give Your Reviews / Reactions about this Post and Leave Comments, Ask Your Doubts, We are here to Help You!


